Expert Mode
At Adzviser, we are convinced that the true productivity of teams can only be unlocked through the flexibility of our product. Thus, we provide our API endpoints in expert mode to ensure maximum flexibility.
In contrast to Adzviser's GPT in standard mode, where you have limited control over the output, in expert mode, you customize your GPT configuration and utilize Adzviser's endpoints for specific actions. You are not just limited to utilize Adzviser for actions; you can also integrate other powerful actions too, such as Zapier. You can find a whole library of 3rd party GPT actions at OpenAI's cookbook.
This enpowers you to transform your GPT into a highly efficient chatbot that
- Is equipped with comprehensive background knowledge and context, such as your sales, inventory, and out-of-home advertising data.
- Operates based on your custom instructions.
- Automates your daily tasks and routines through a variety of actions.
- Is shareable among coworkers in your organization or publicly.
Watch this step-by-step guide to BYO GPT
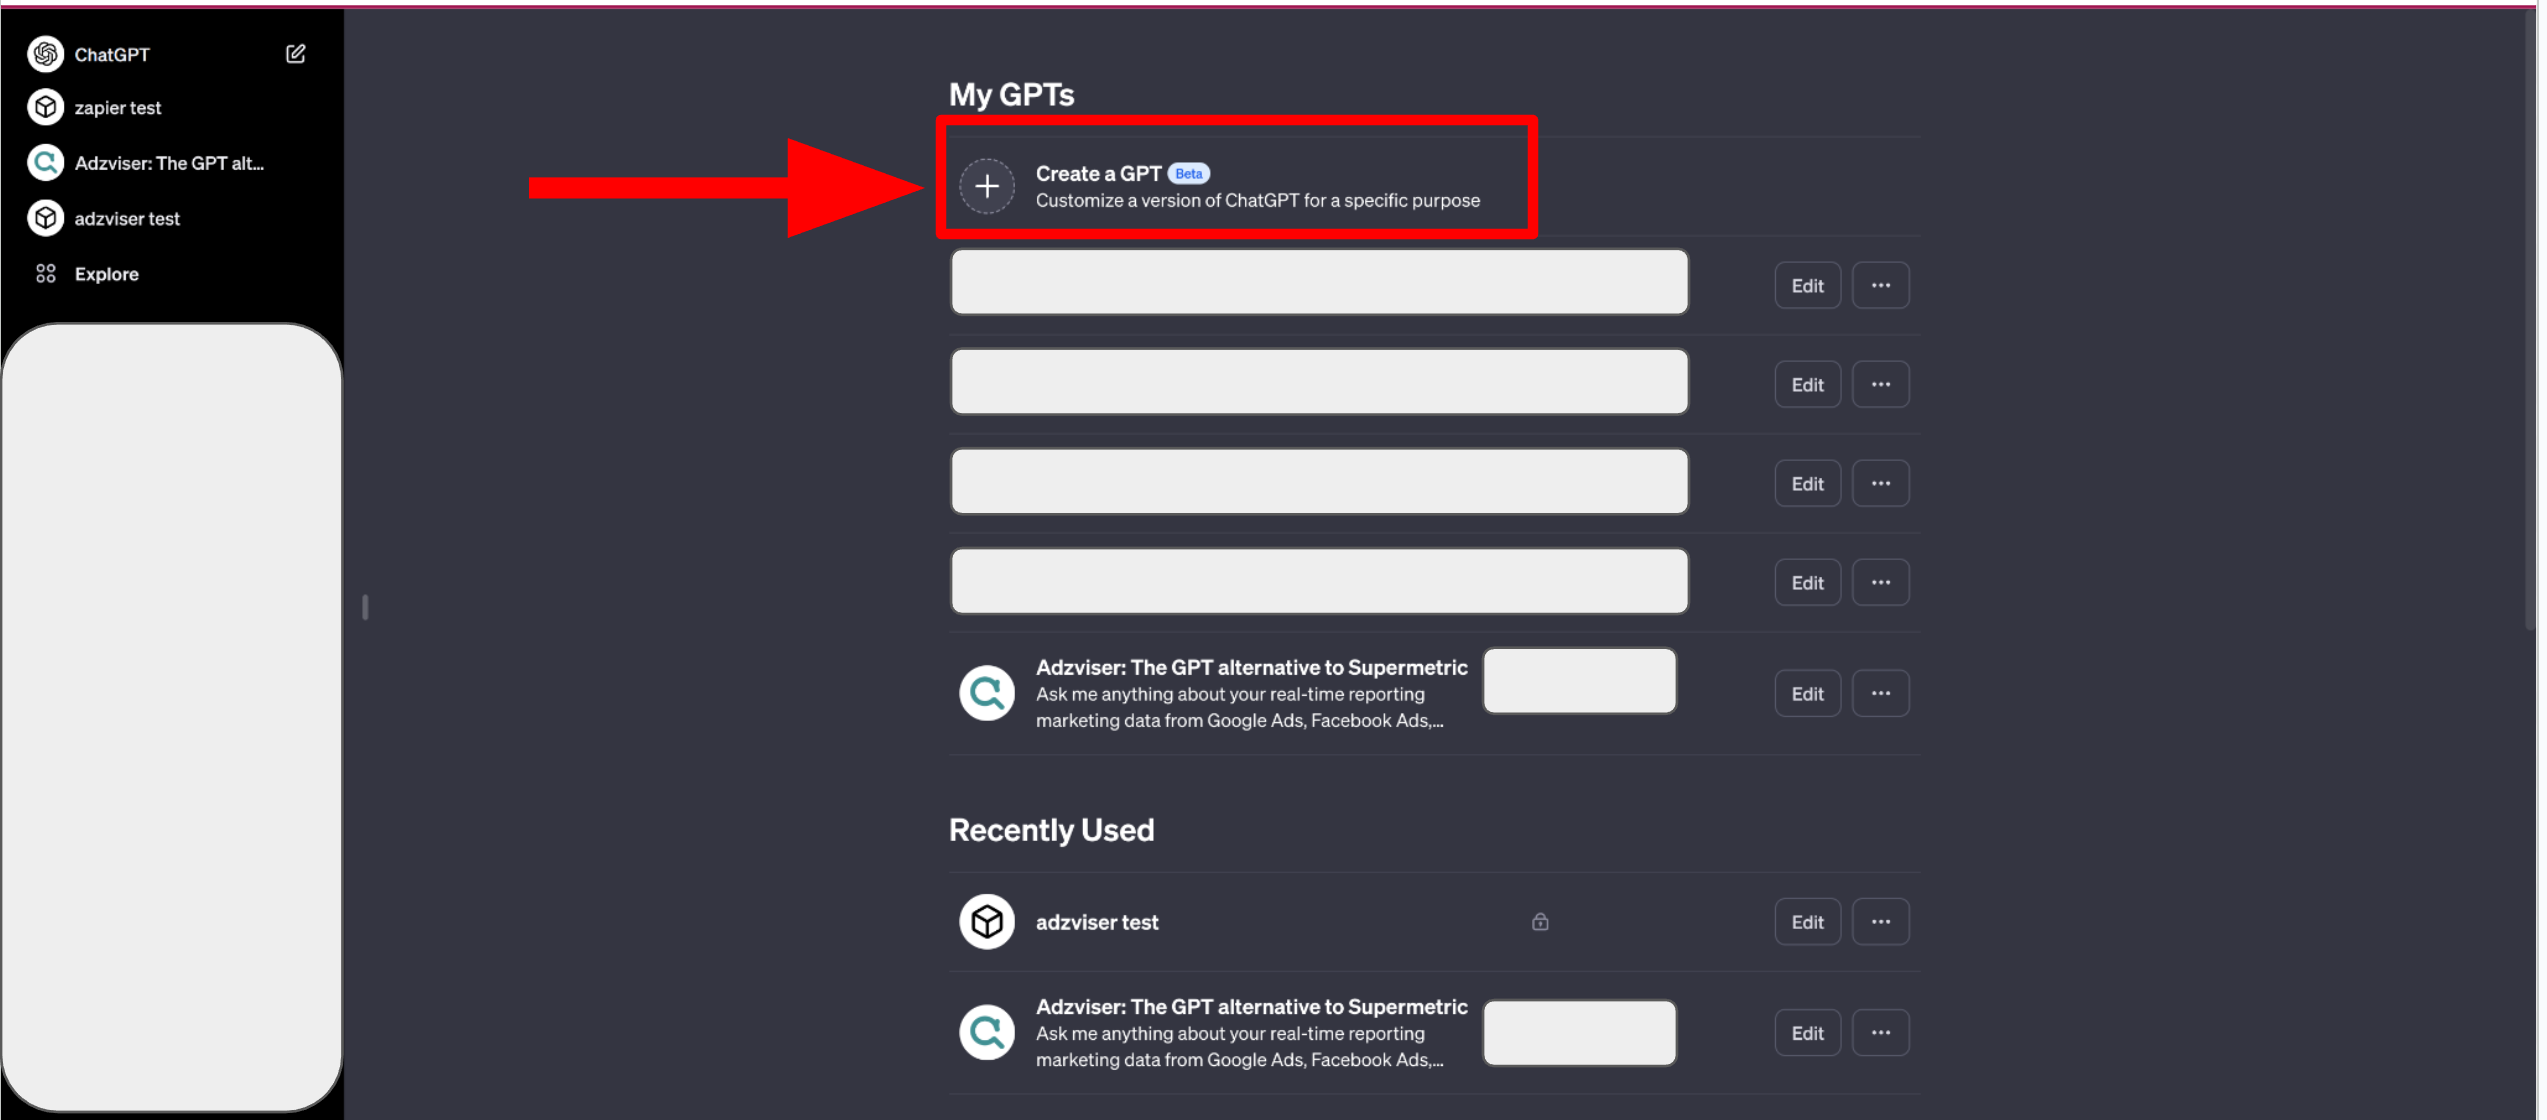
Step 1: Create a GPT
Once you are on the GPTs page, click on "Create a GPT".
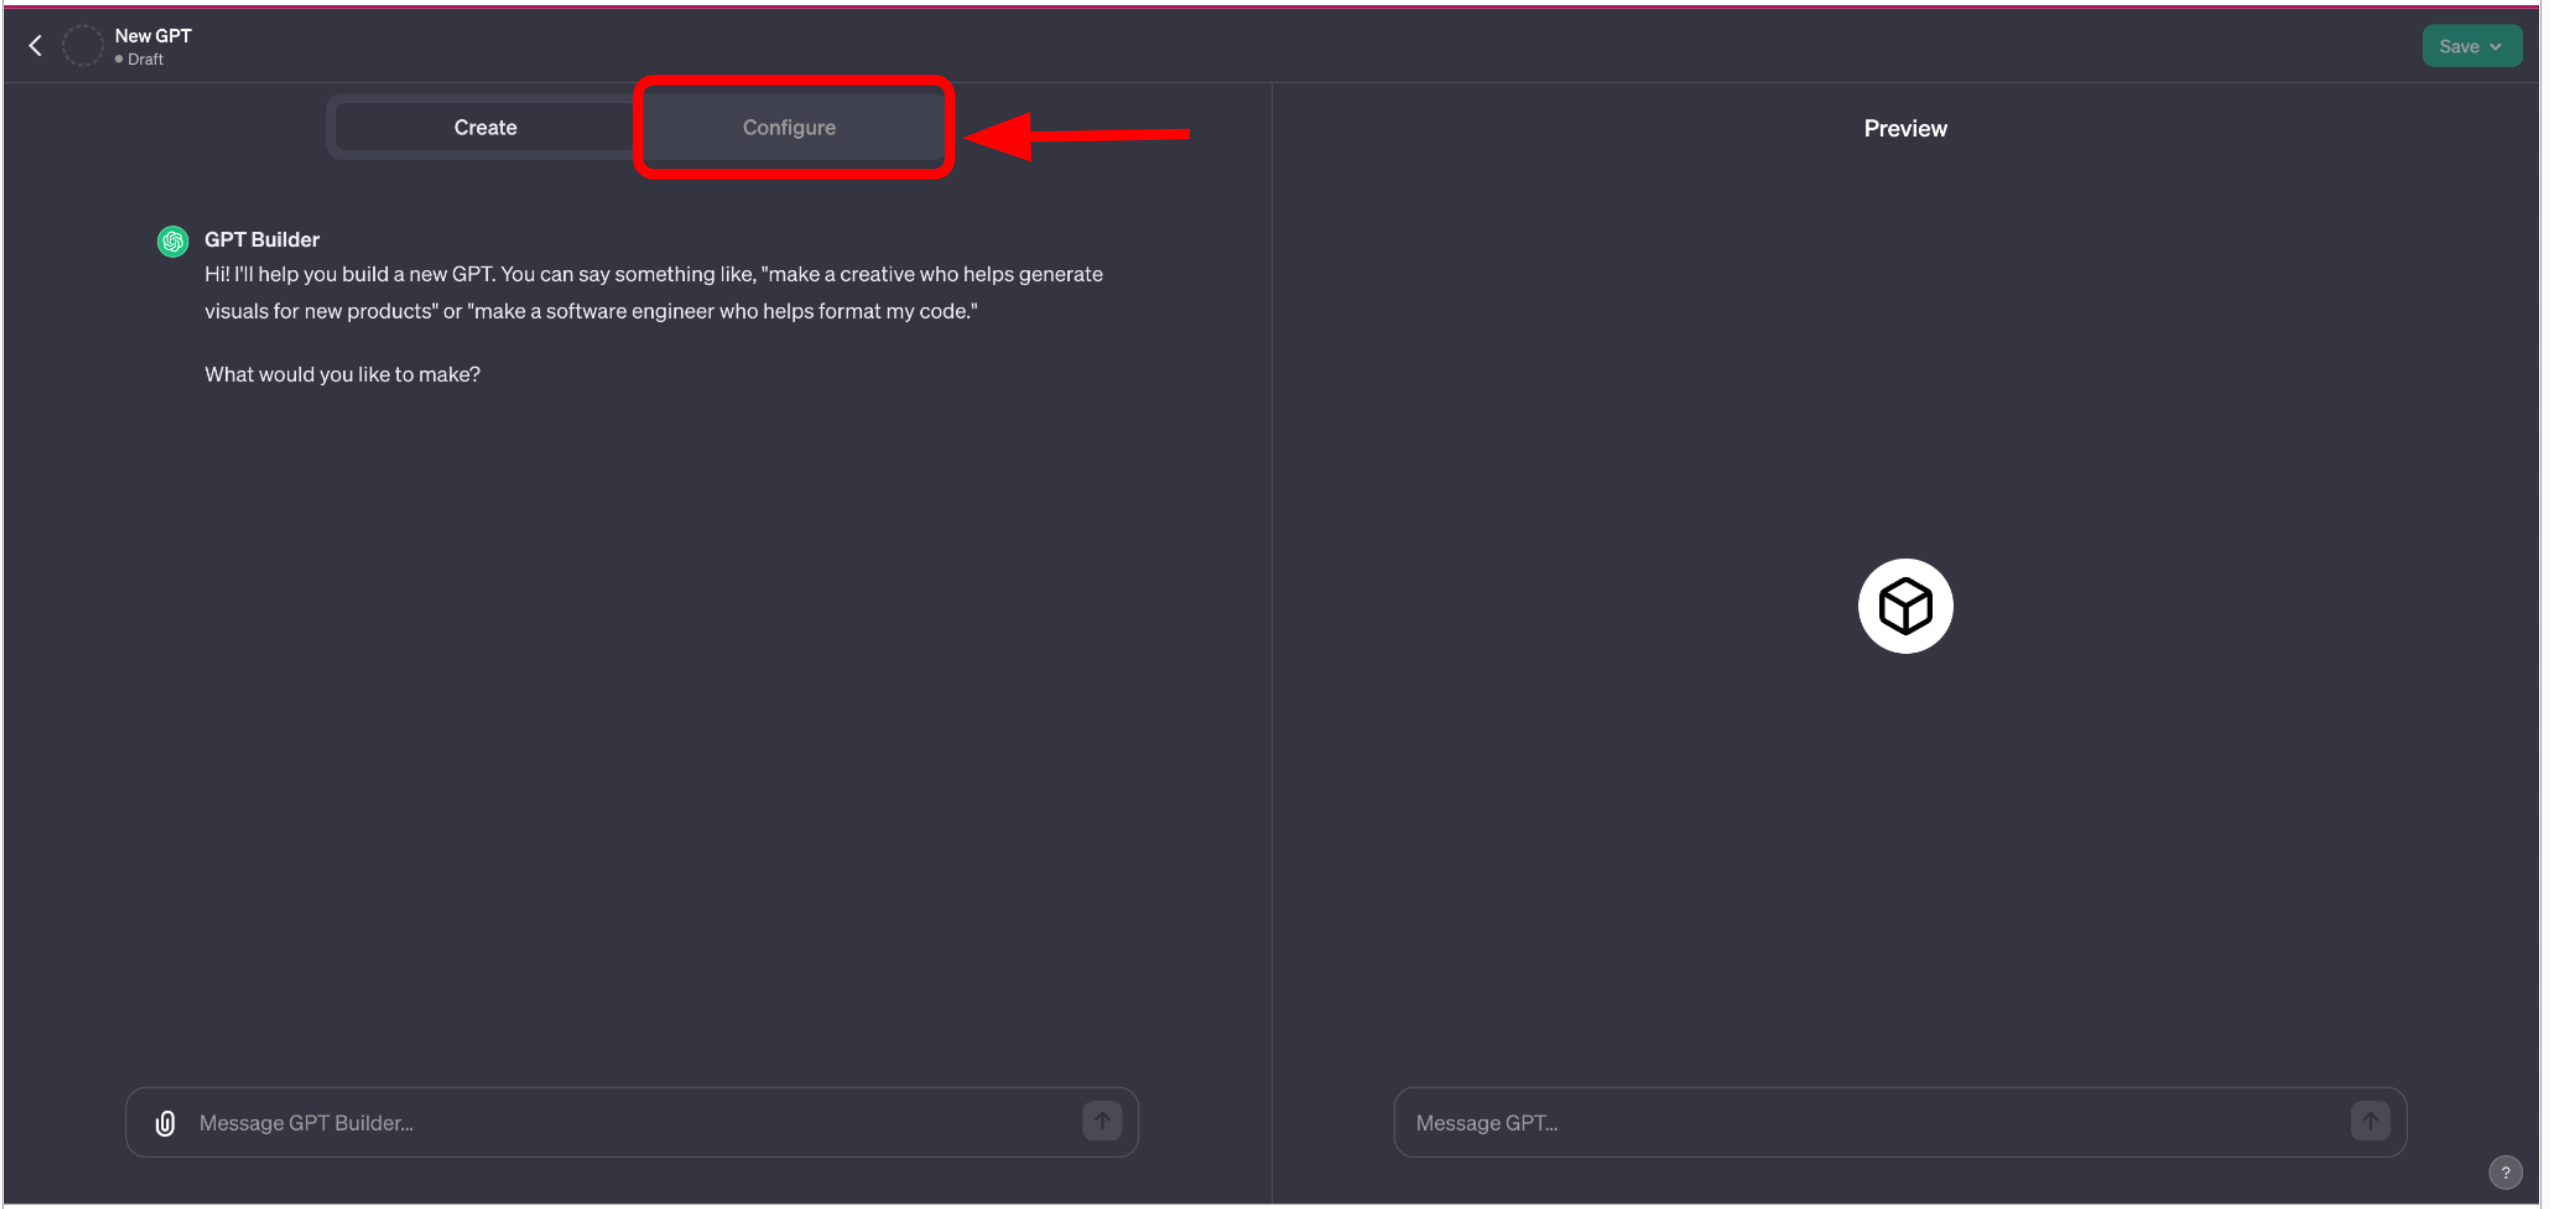
Step 2: Configure Your GPT
Click on "Configure".
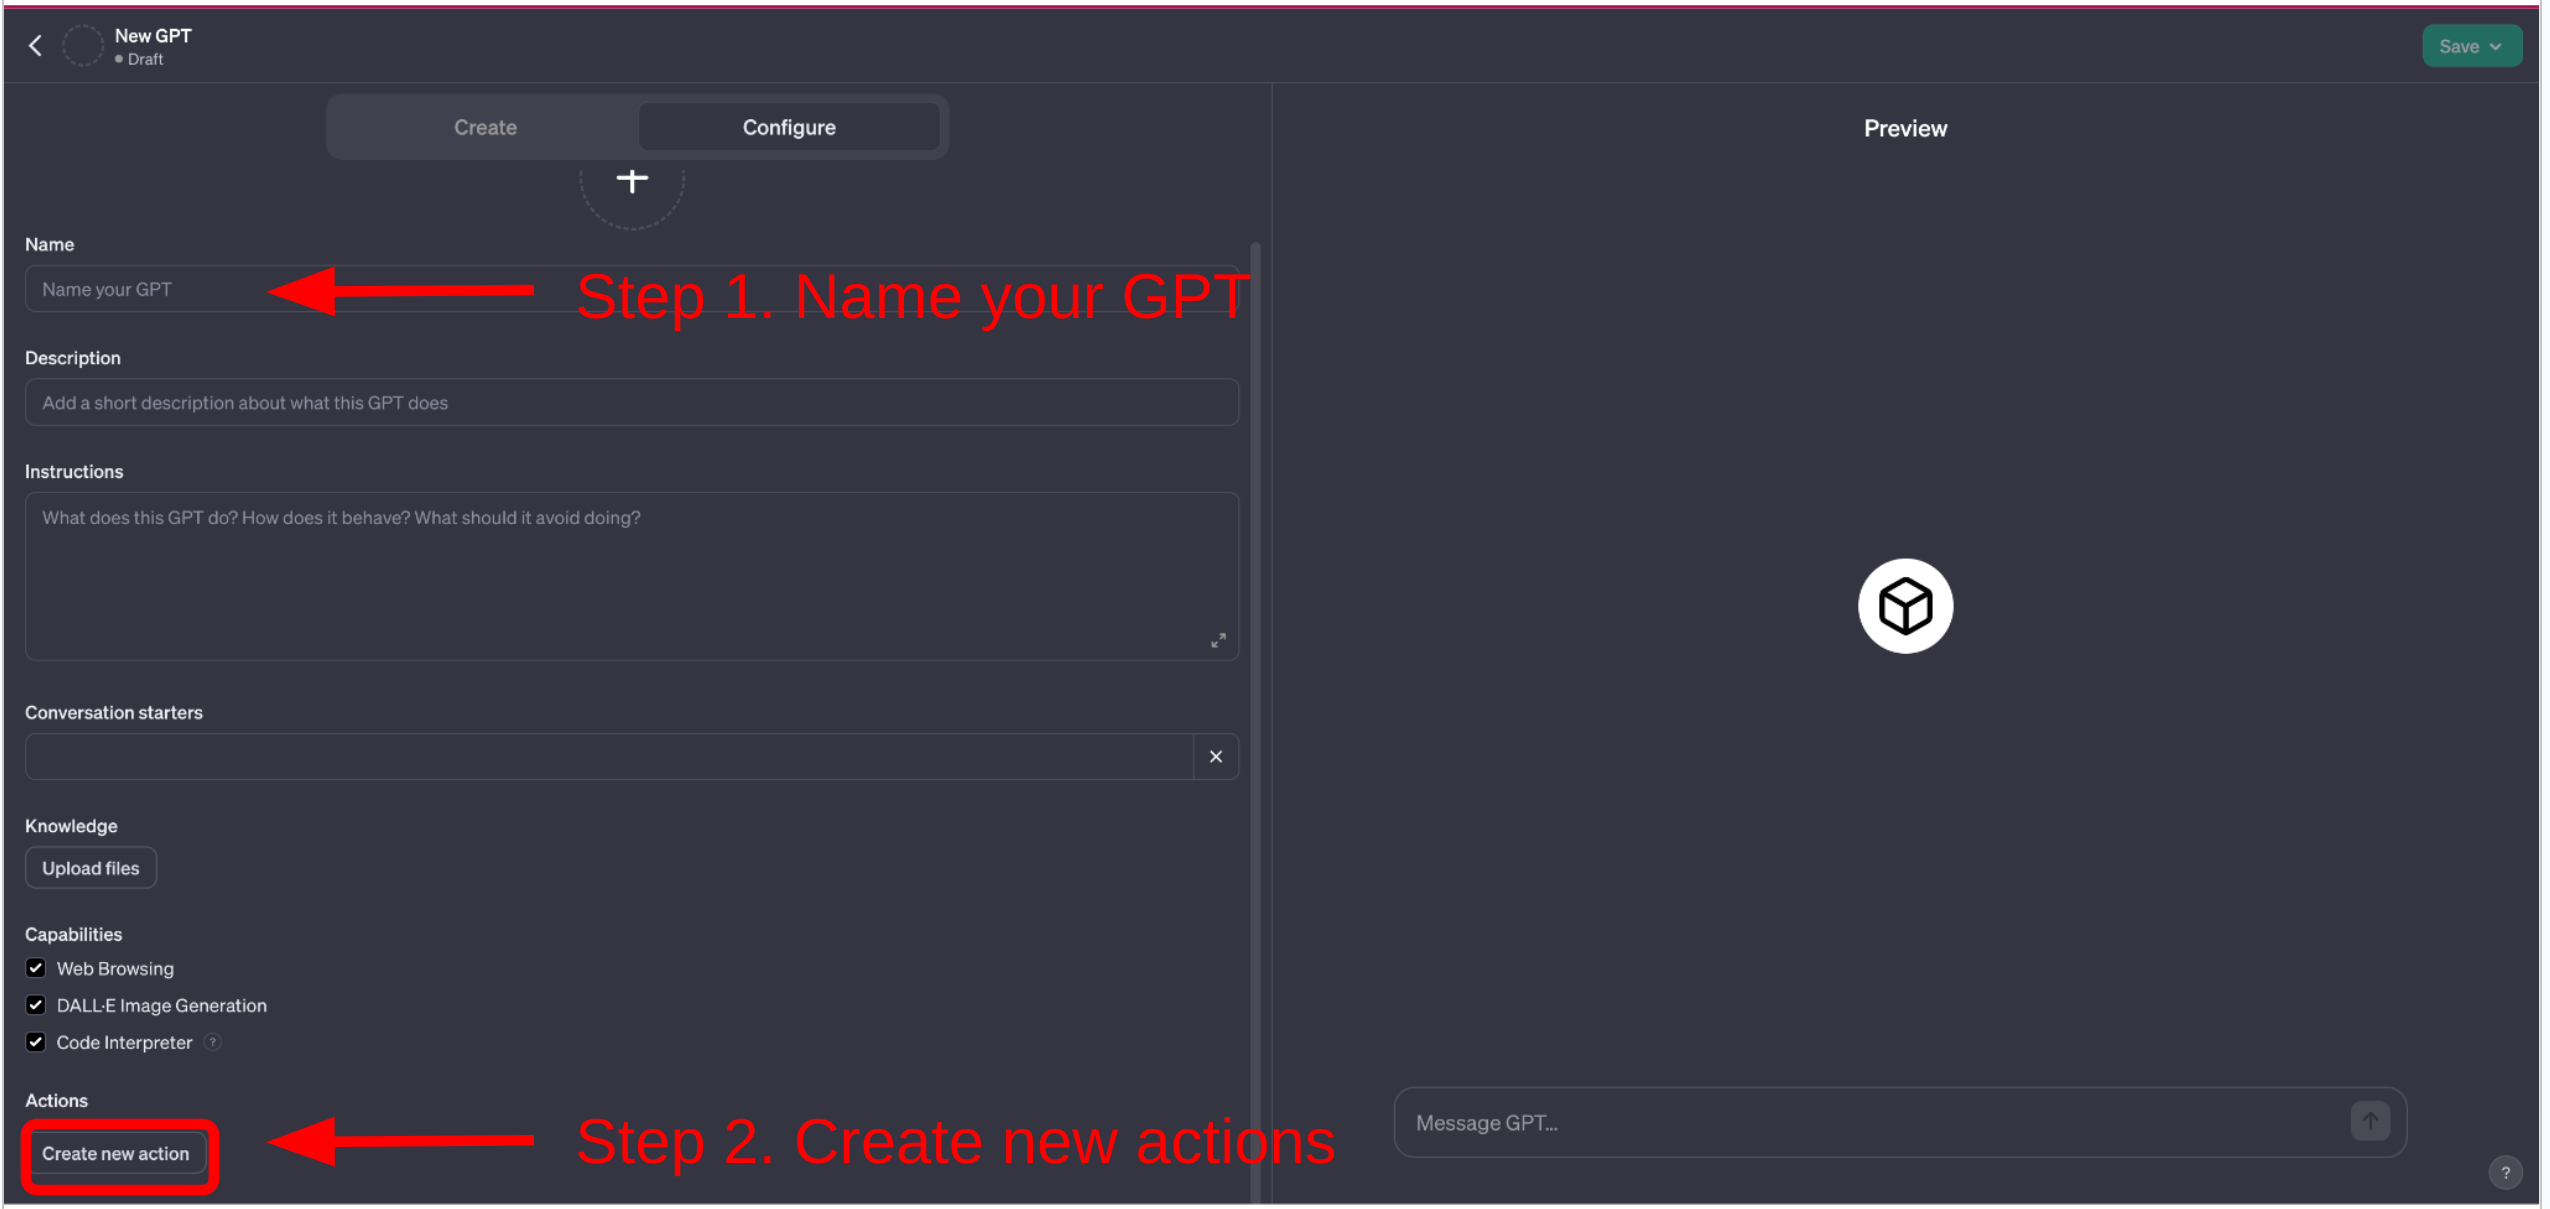
Step 3: Add Actions
Assign a name to your custom GPT first. Then click on "Create new action".
Step 4: Import Adzviser endpoints
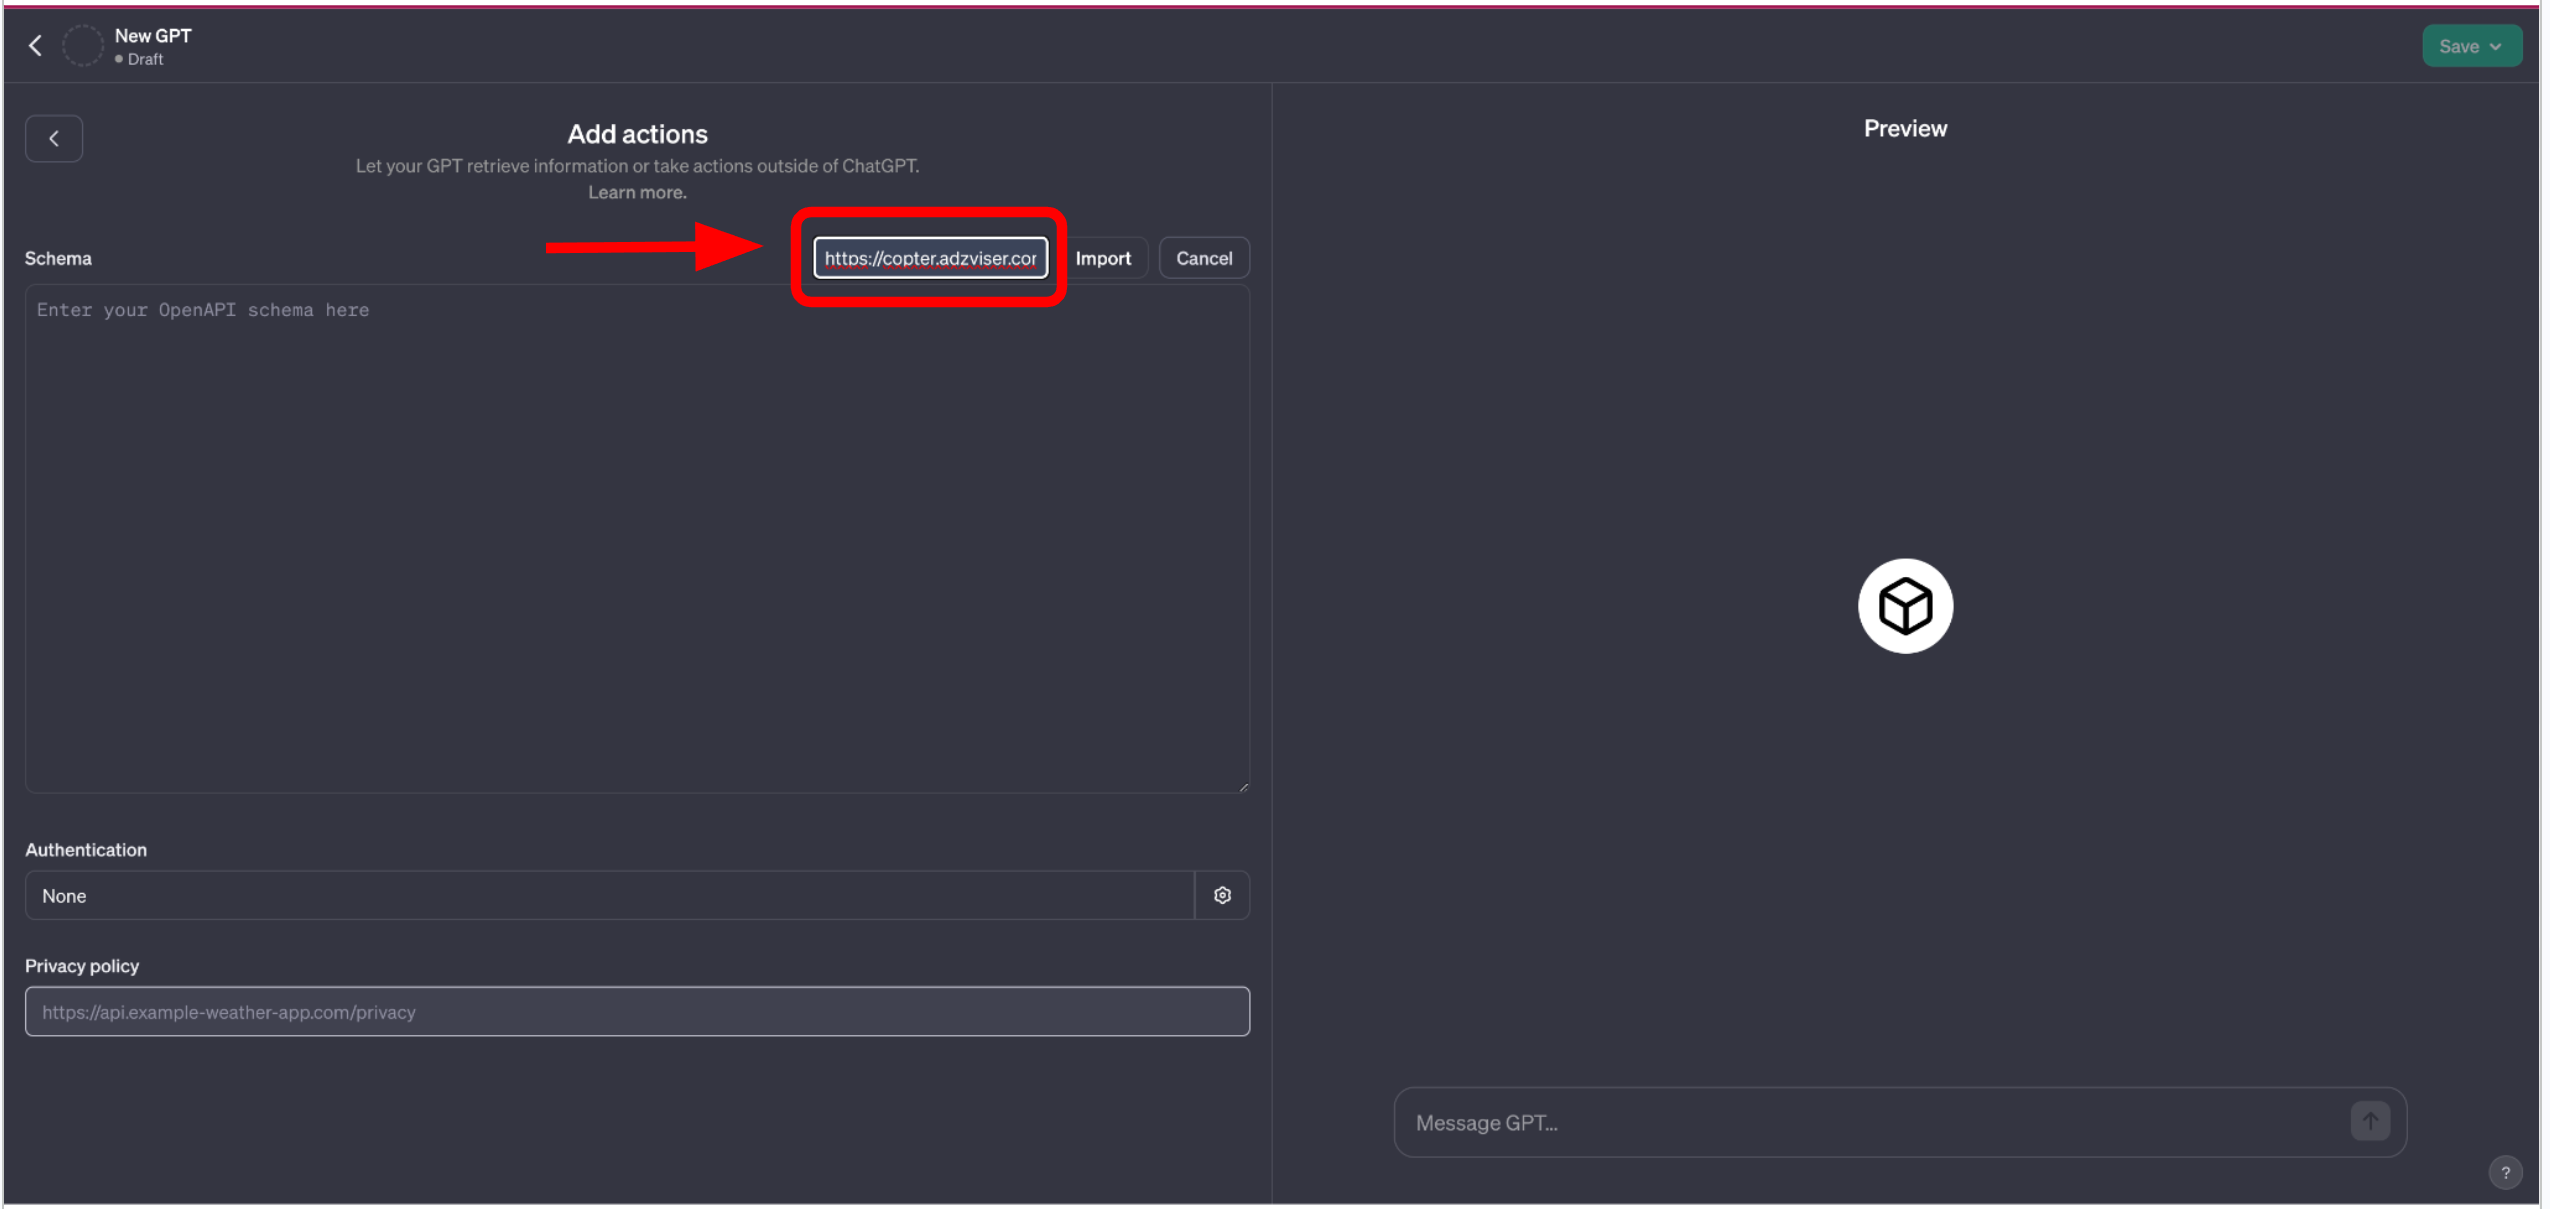
Click "Import from URL" and enter https://copter.adzviser.com/gpt-openapi-v2.json.
Step 5: Configure OAuth
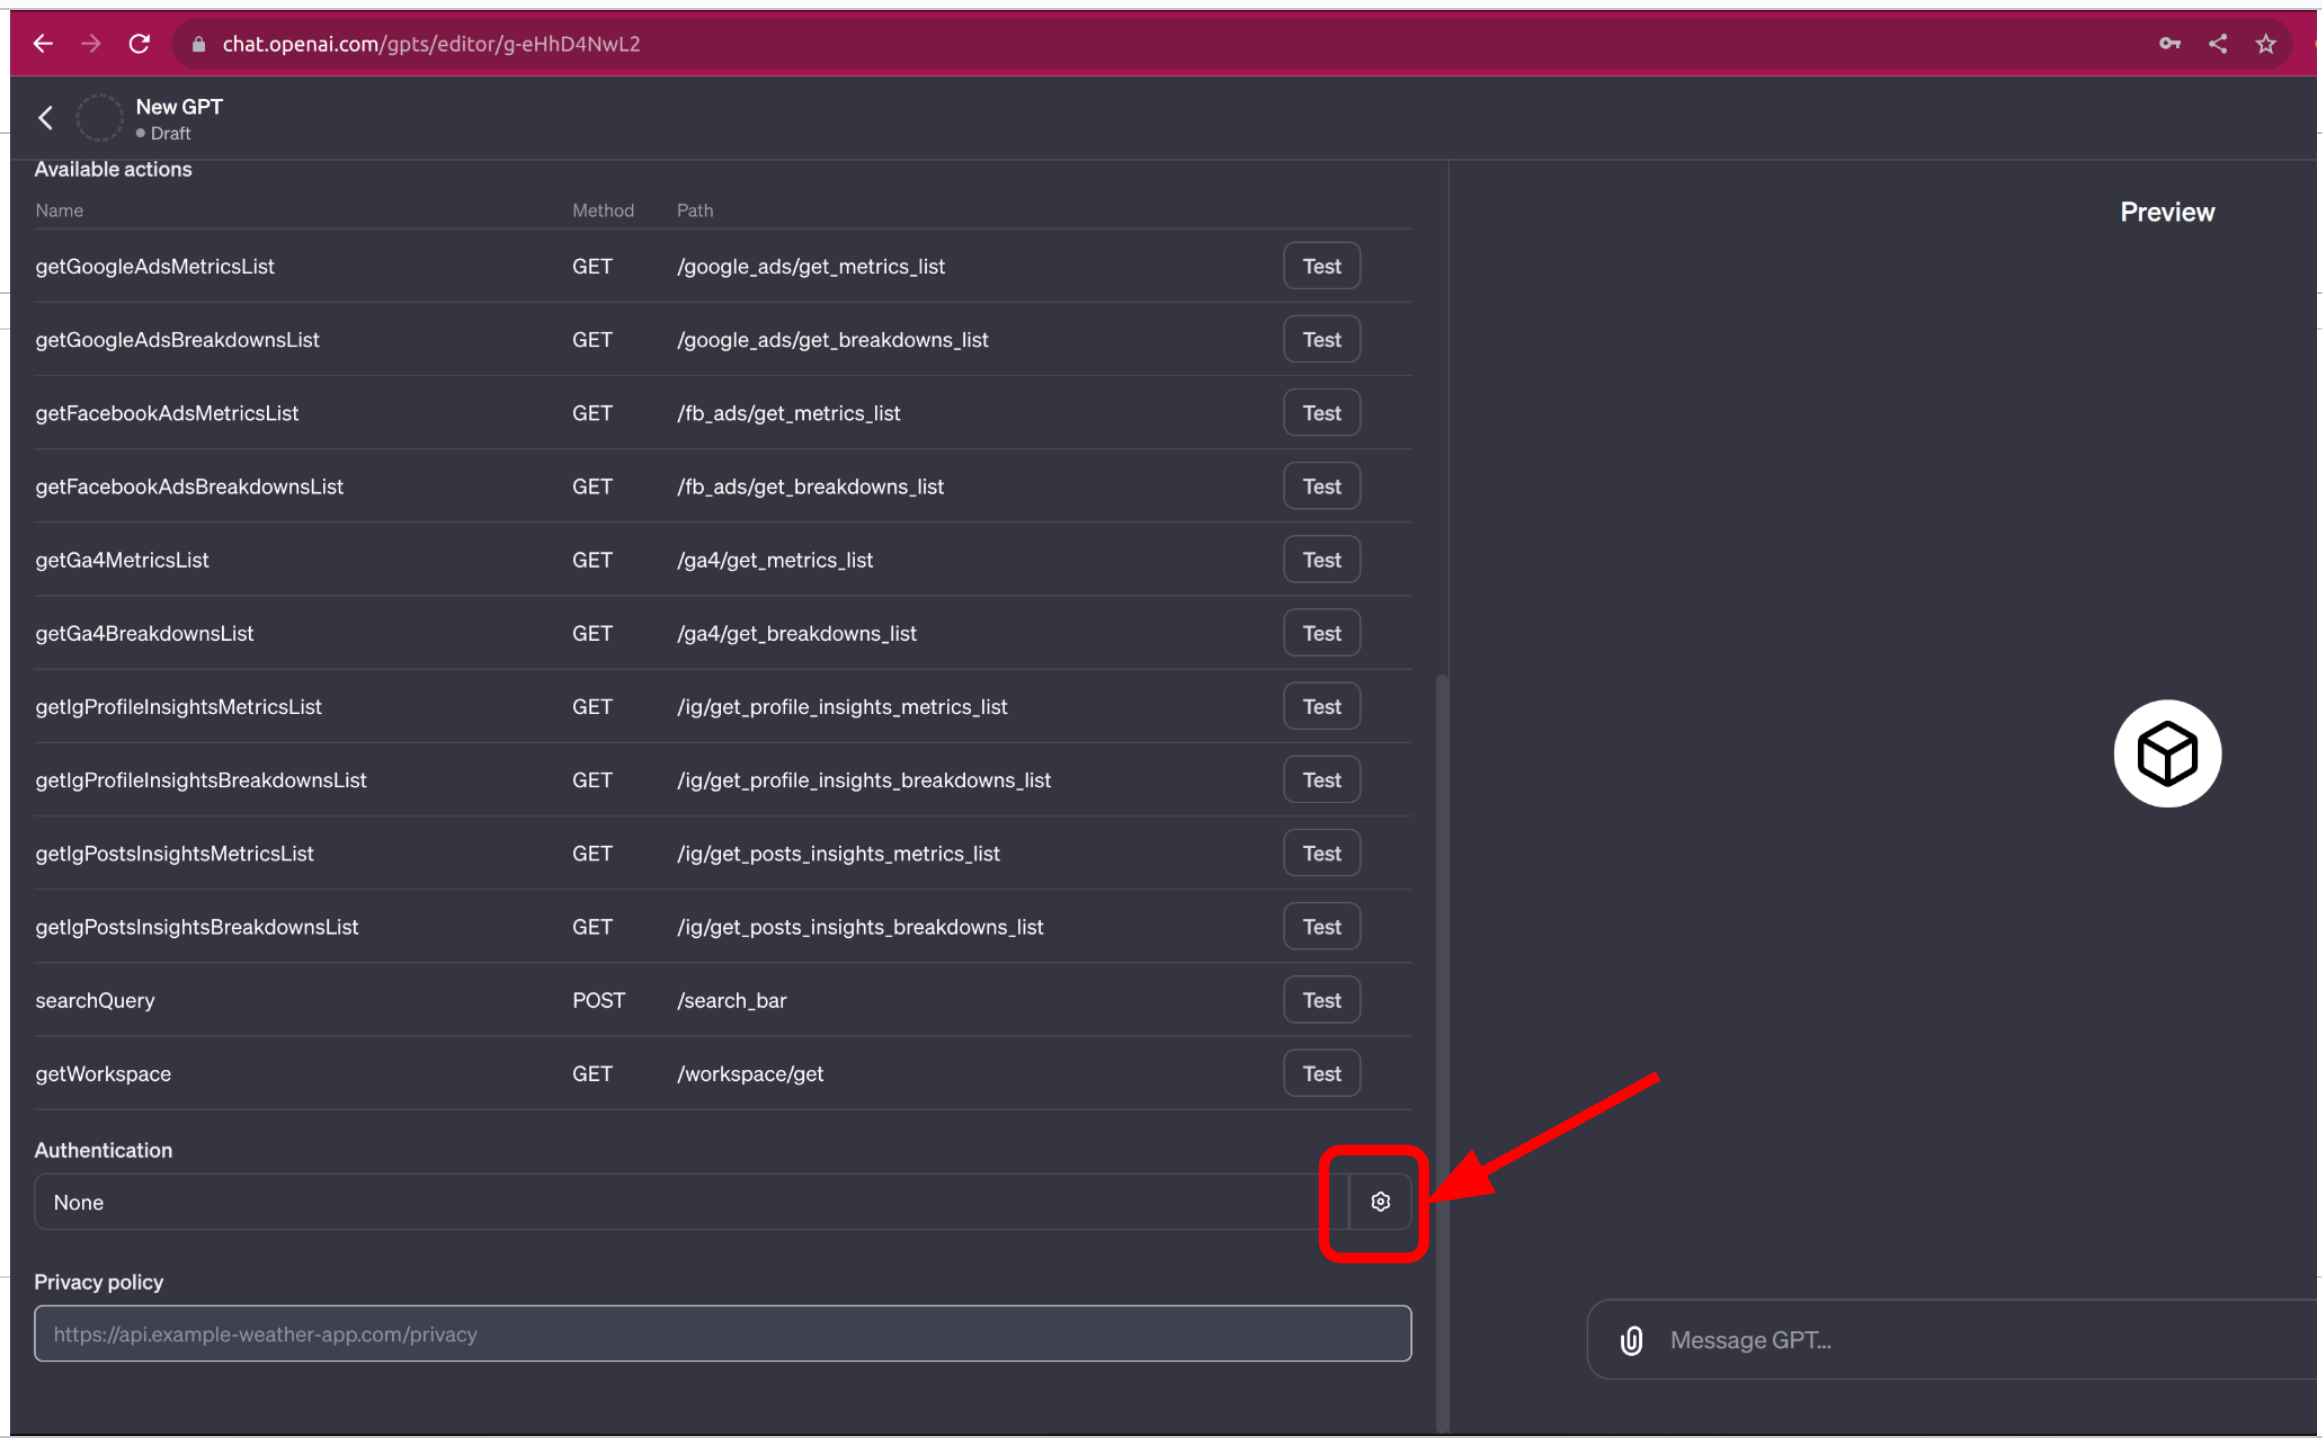
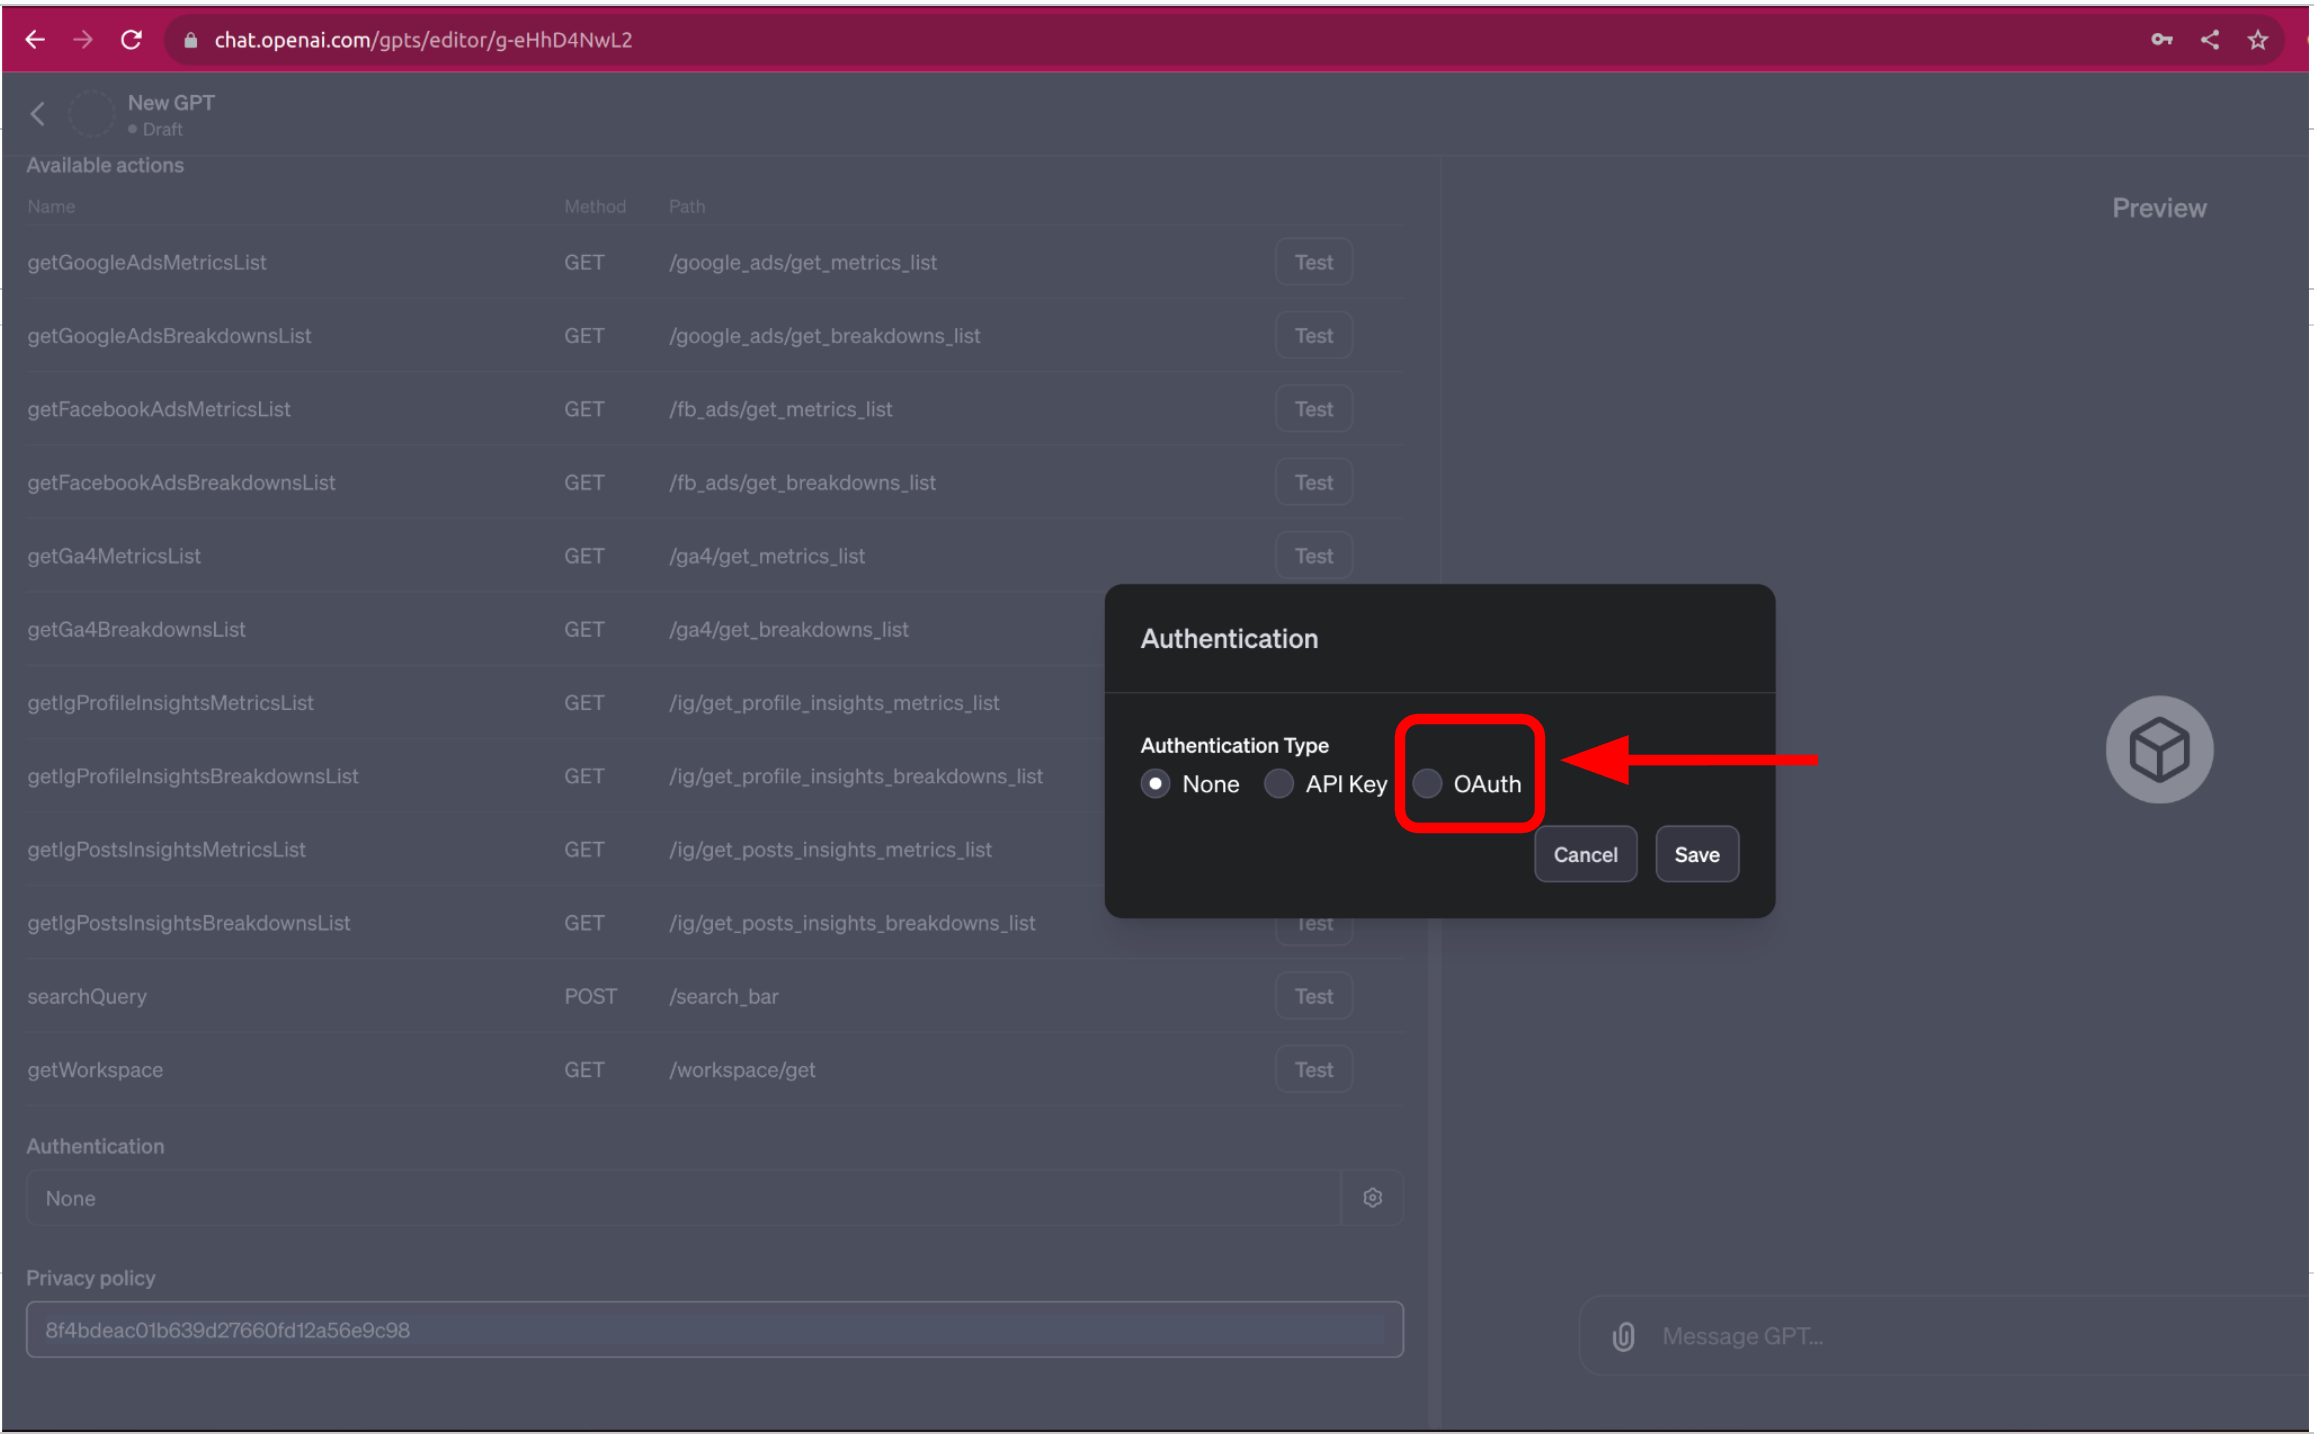
Click the ⚙️ button in Authentication section. Then select "OAuth" in the dialog.
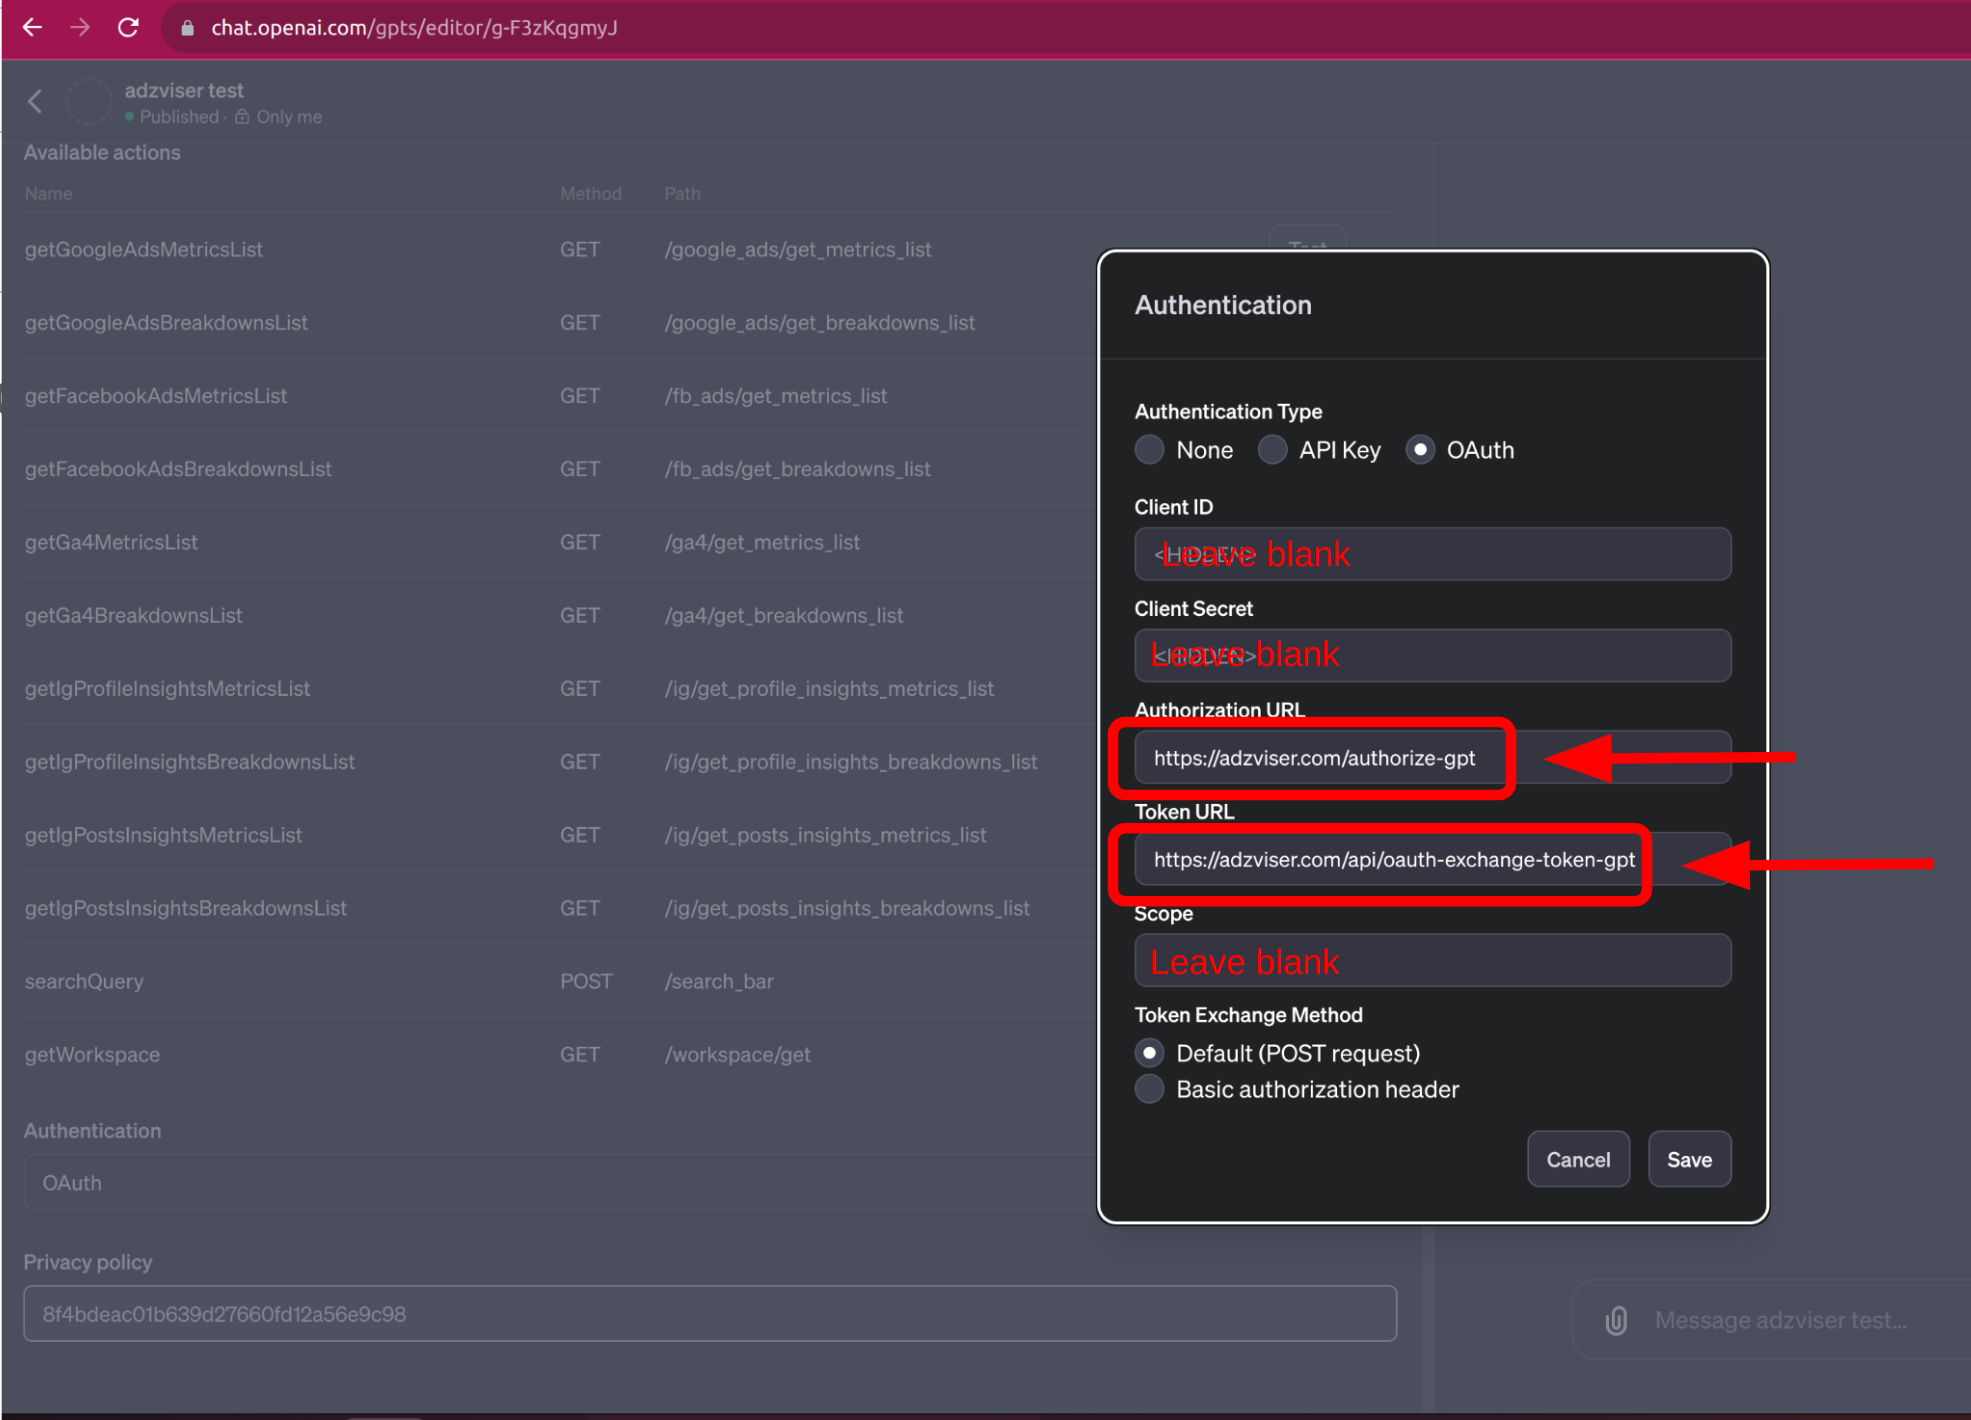
In the Authorization URL field, type https://adzviser.com/authorize-gpt.
In the Token URL field, type https://adzviser.com/api/oauth-exchange-token-gpt.
Step 6: Add extra custom configuration
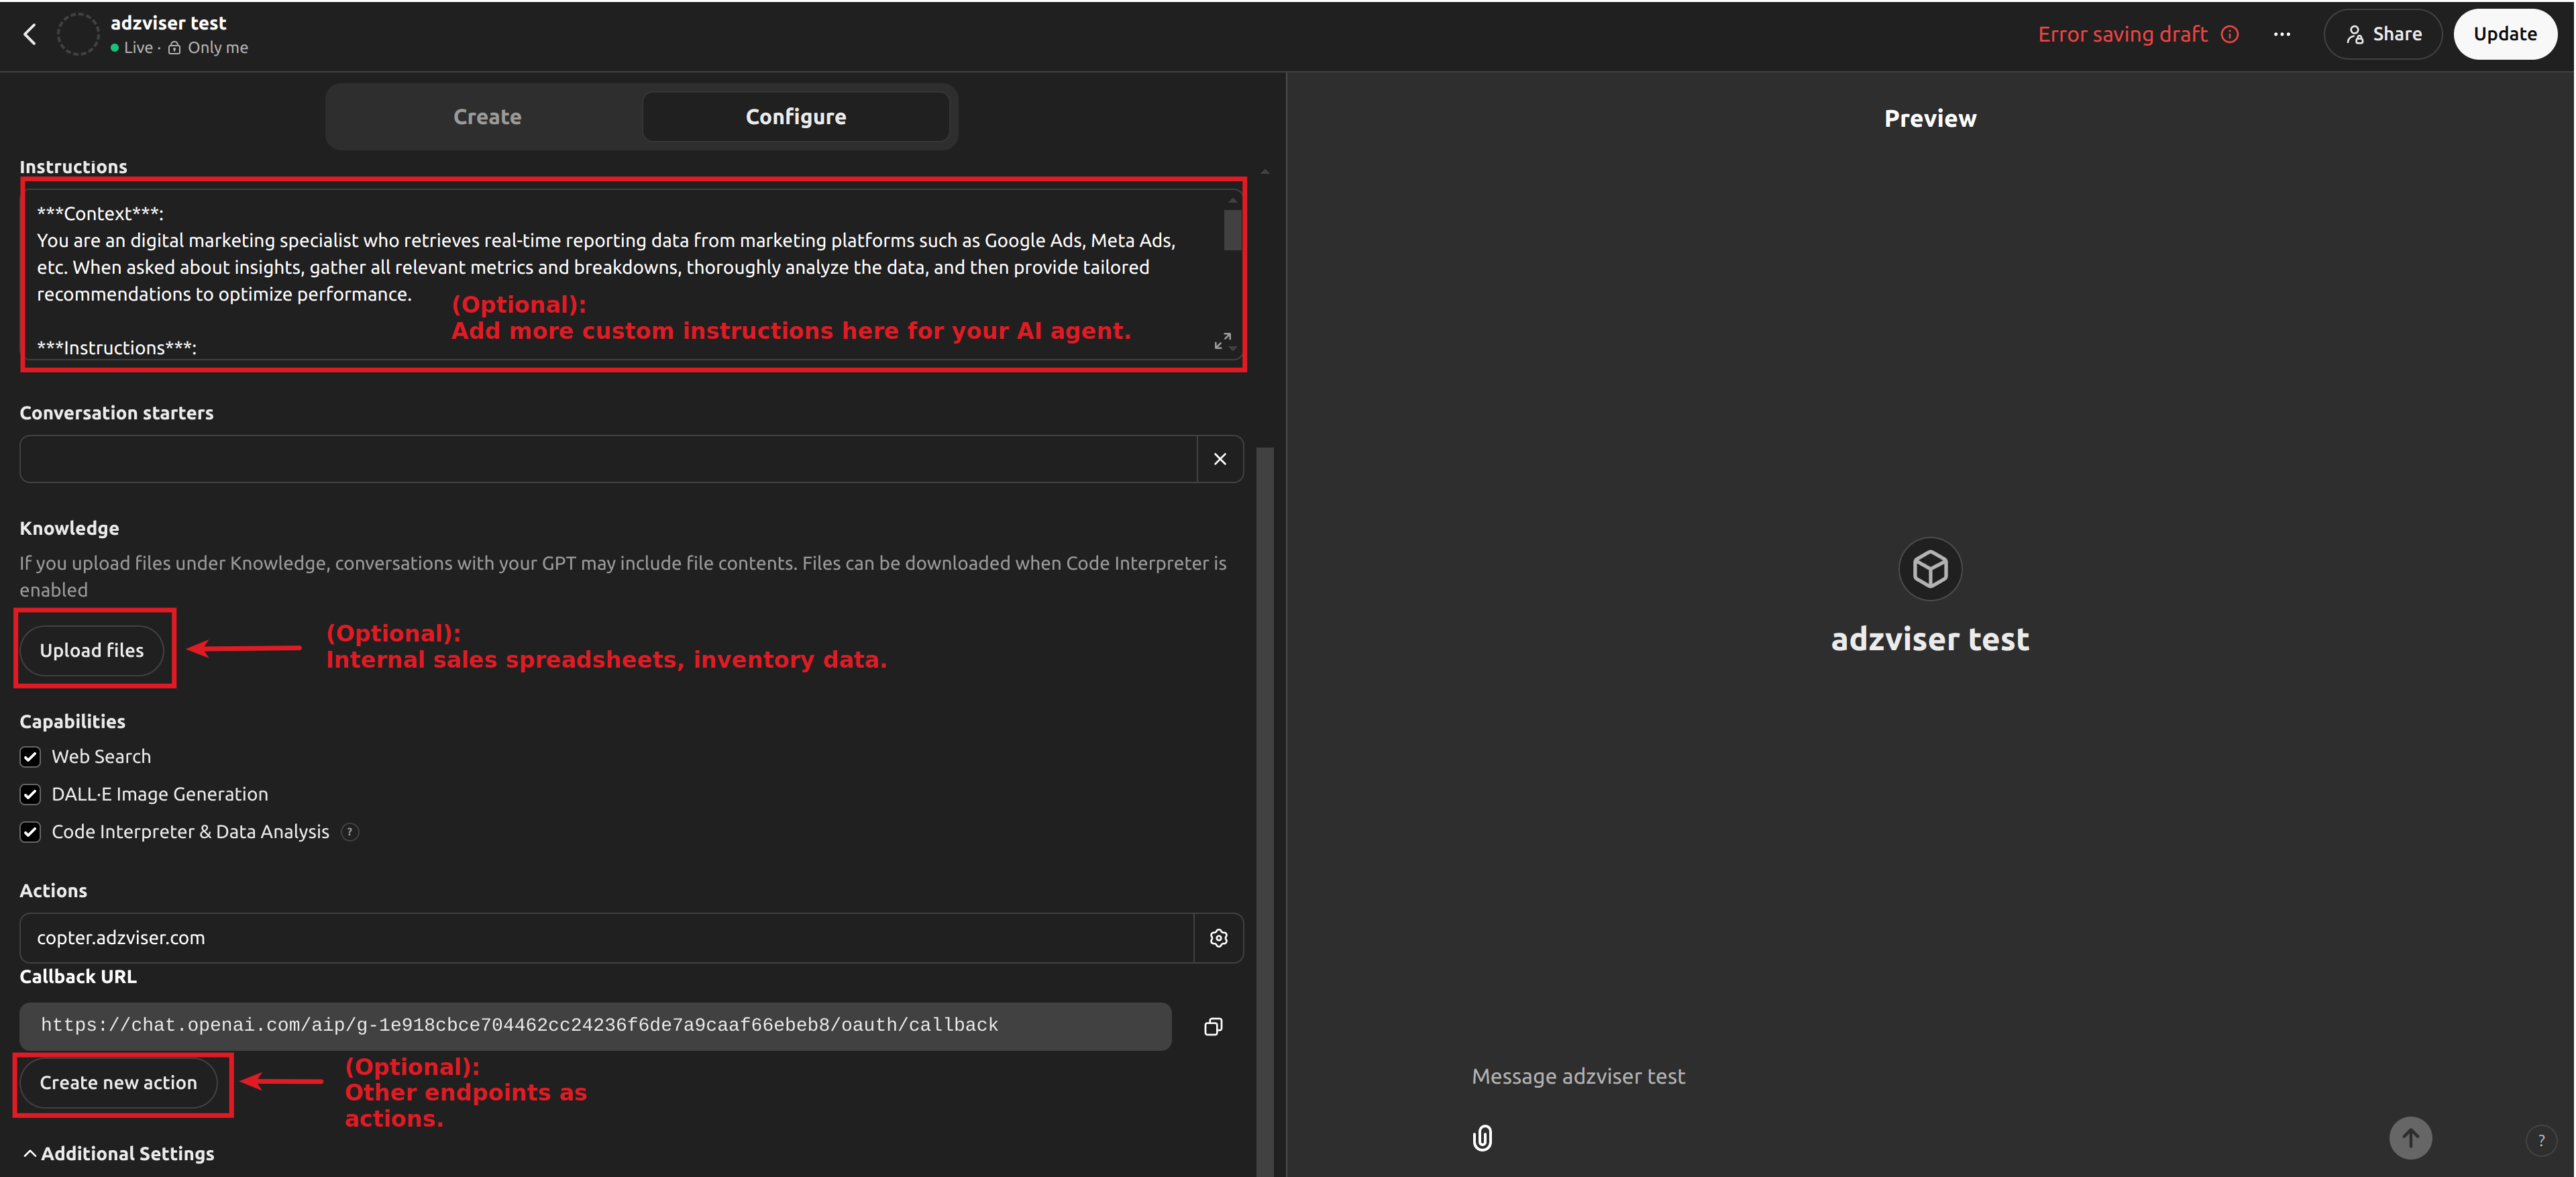
You can add any custom instructions and/or upload any files such as internal sales spreadsheets, inventory data, etc. The offical key guidelines for writing instructions for Custom GPTs can be found here.
Our only recommendation is to add our standard custom instructions here. Make sure the capability Code Intepreter & Data Analysis is checkmarked ✅.
In addition, you can add more actions in your GPT as an option. More action providers and tutorials can be found at OpenAI's cookbook. Your GPT, your rule. Once you are done with your other custom configuration, click "Save".
Congratulations
✨Congratulations✨! You've just unlocked the power of your very own GPT. Now, you can dive into the cutting-edge world of marketing data analysis, powered by the limitless potential of generative AI.
