OAuth from ChatGPT to Adzviser
To integrate ChatGPT with Adzviser, whether using a Standard GPT or a BYO Custom GPT, you'll first need to complete the OAuth authentication process. This involves signing in through ChatGPT.
Watch this guide to use Adzviser on ChatGPT
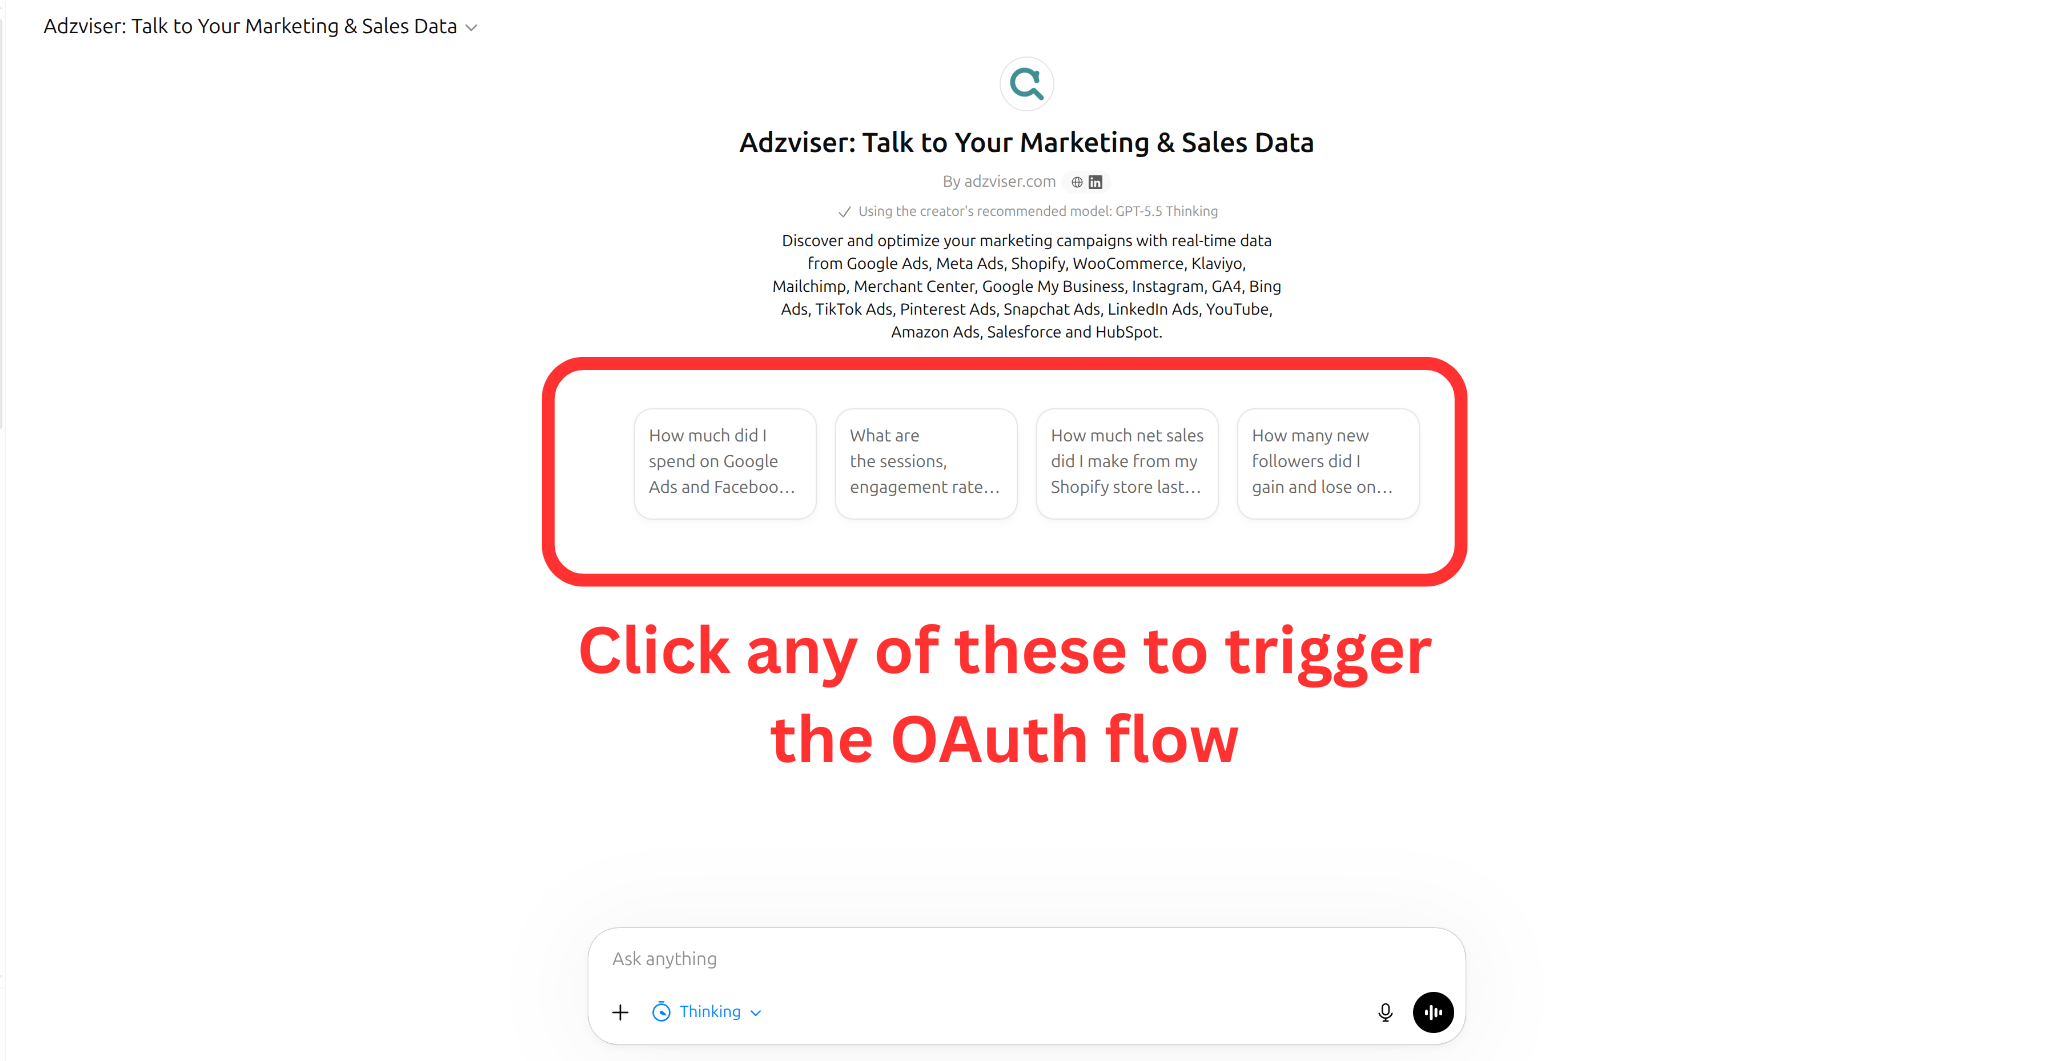
Step 1: Trigger OAuth Flow
- With a Standard GPT, to initiate the OAuth process with Adzviser GPT, simply select one of the conversation starters provided.
- With a BYO Custom GPT, to initiate the OAuth process with your custom GPT, manually type in a question such as "How much did I spend on Facebook Ads this month?".
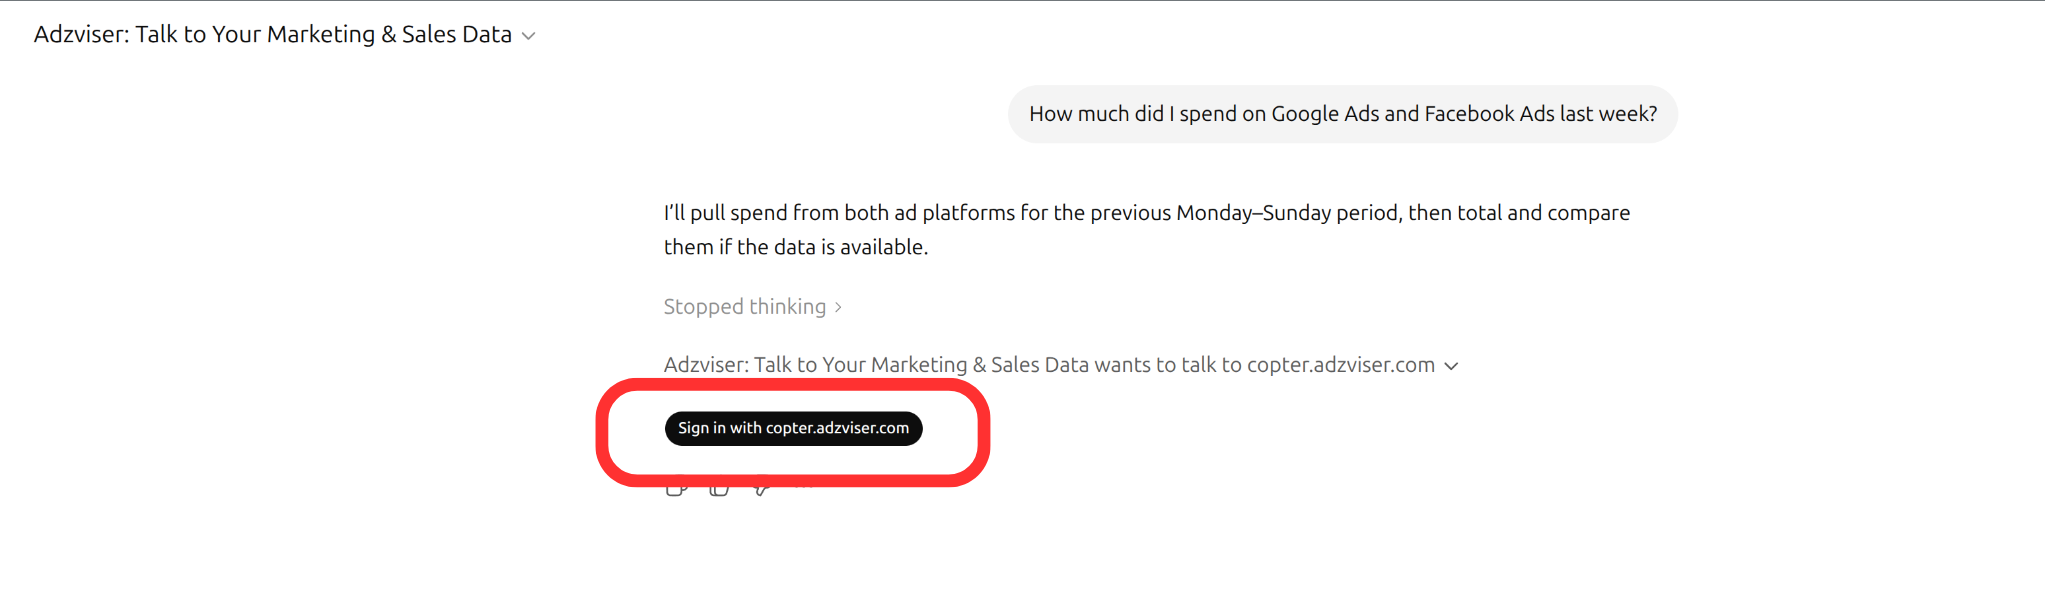
Step 2: Sign in with Adzviser
To proceed, click on “sign in with copter.adzviser.com”.
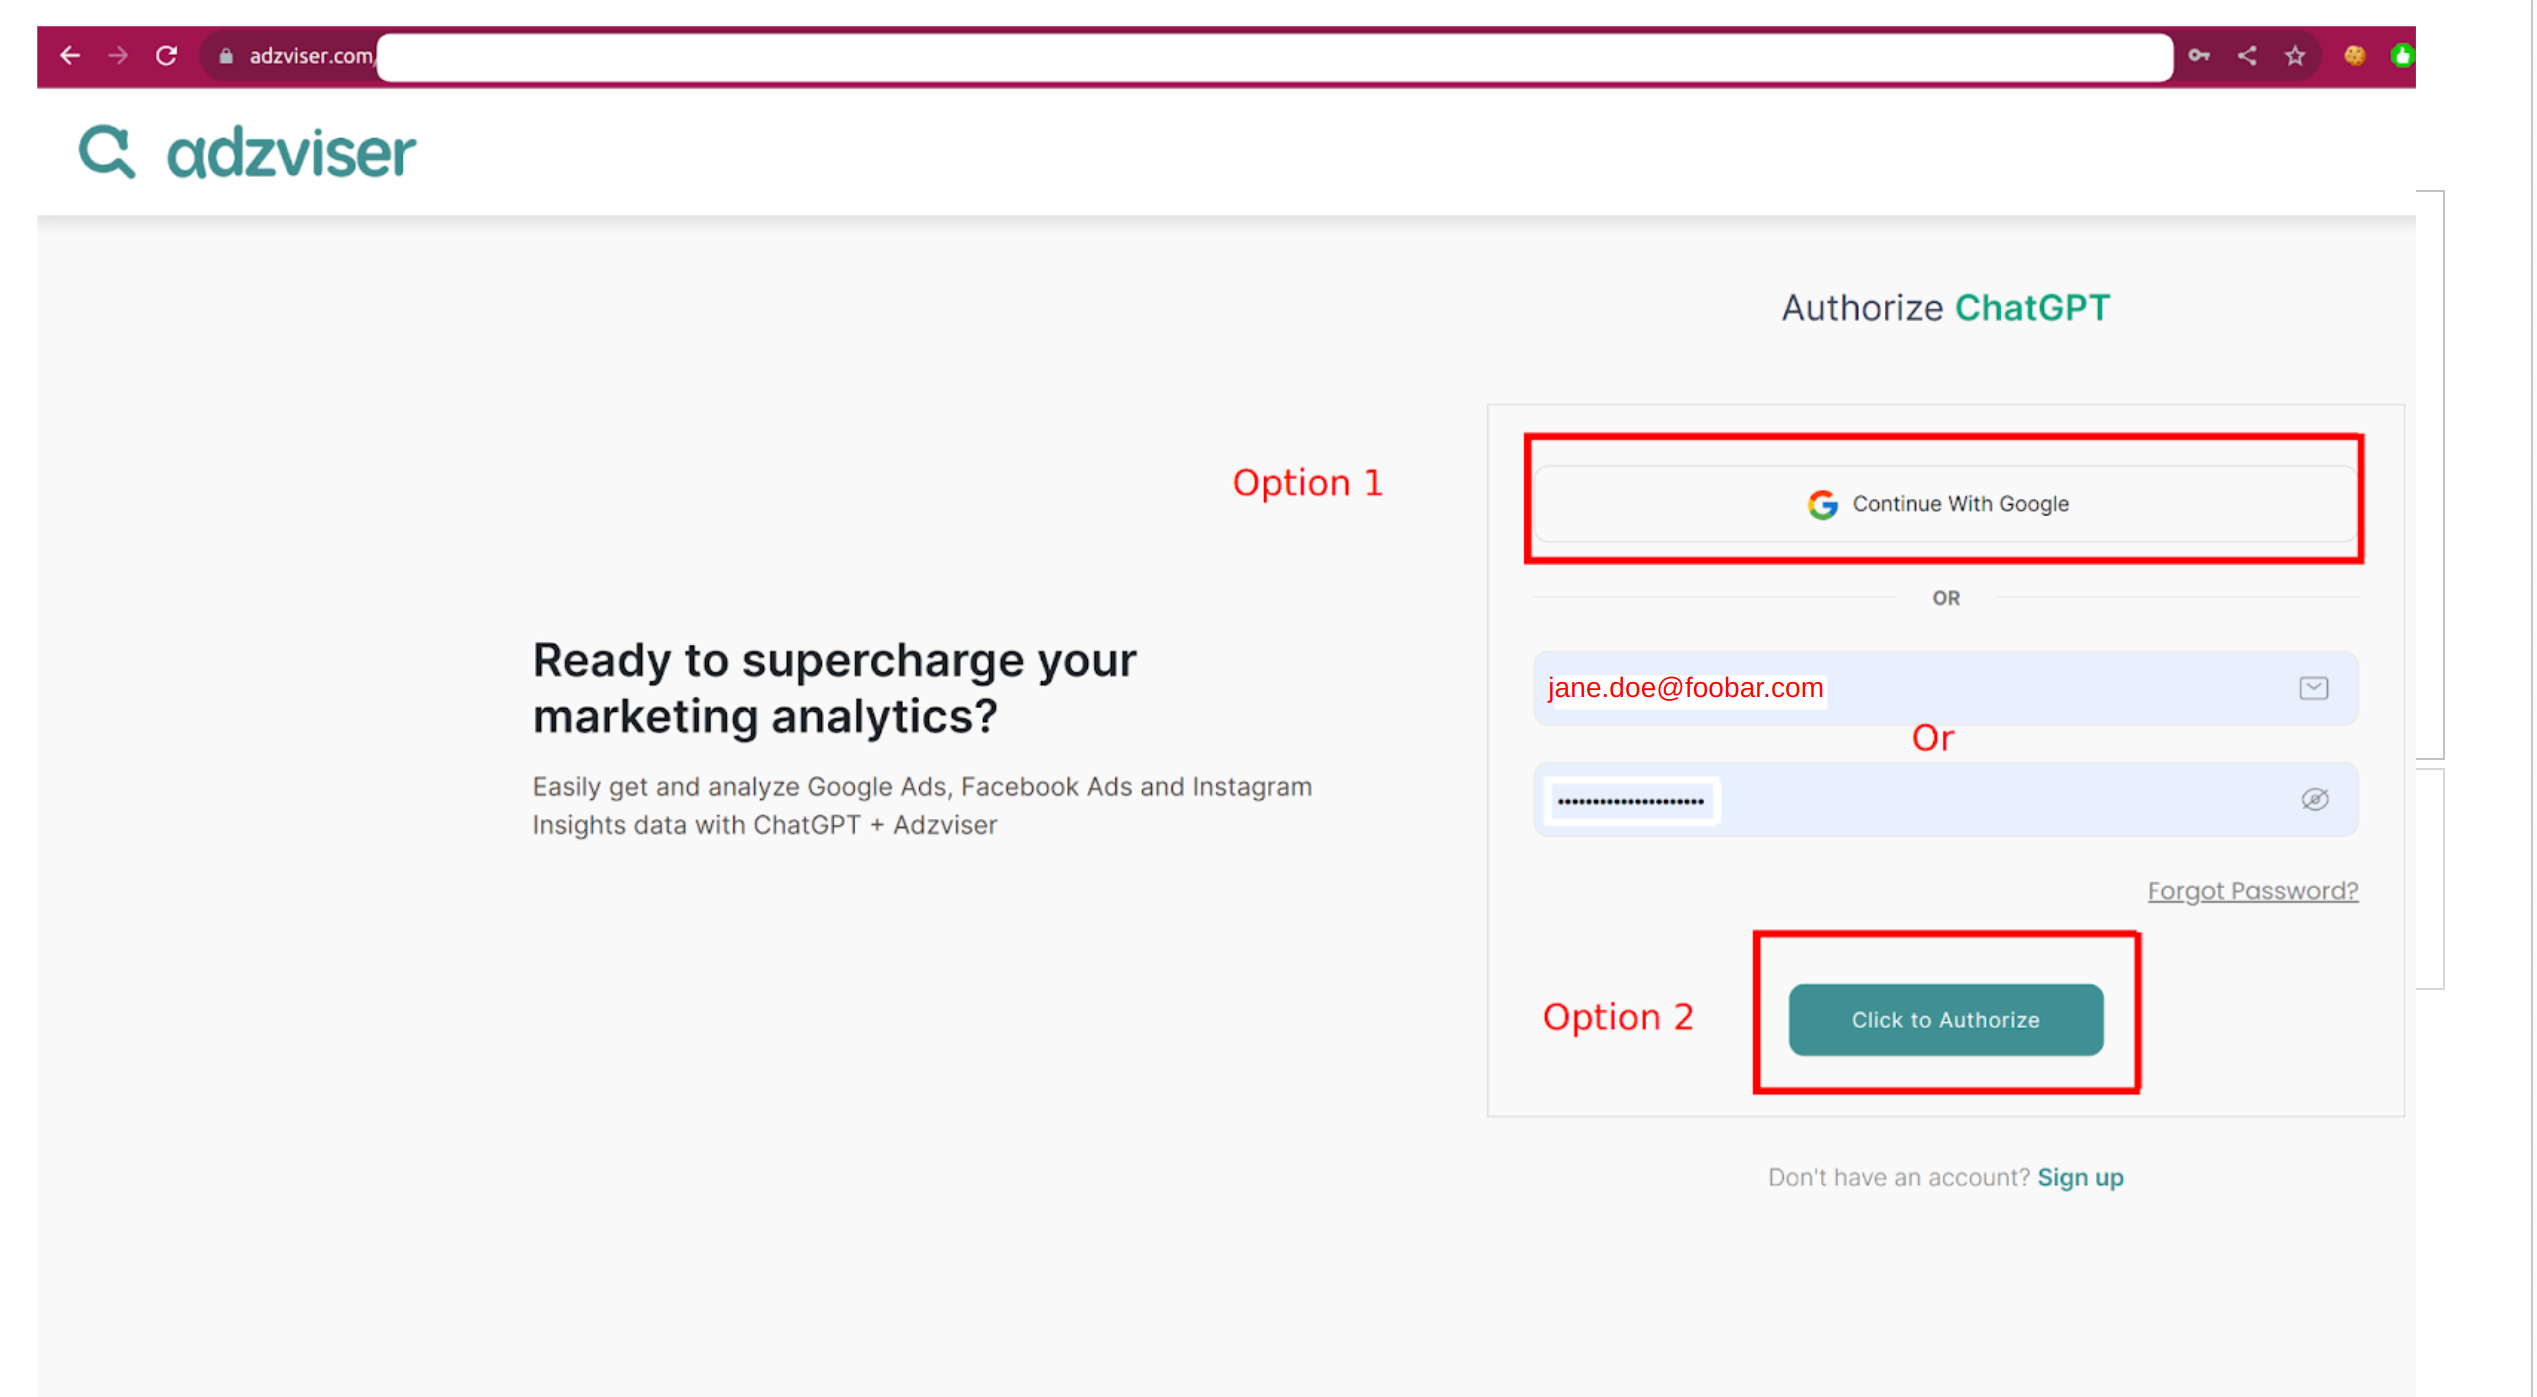
Step 3: Click to Authorize
If you're an existing Adzviser user, simply enter your email and password, then select “Click to Authorize”. For new users, you have the option to sign up for an Adzviser account or use “Continue with Google” for quick access to the Adzviser homepage. More instructions on how to sign up a new account can be found here.
Step 4: Finish OAuth Flow
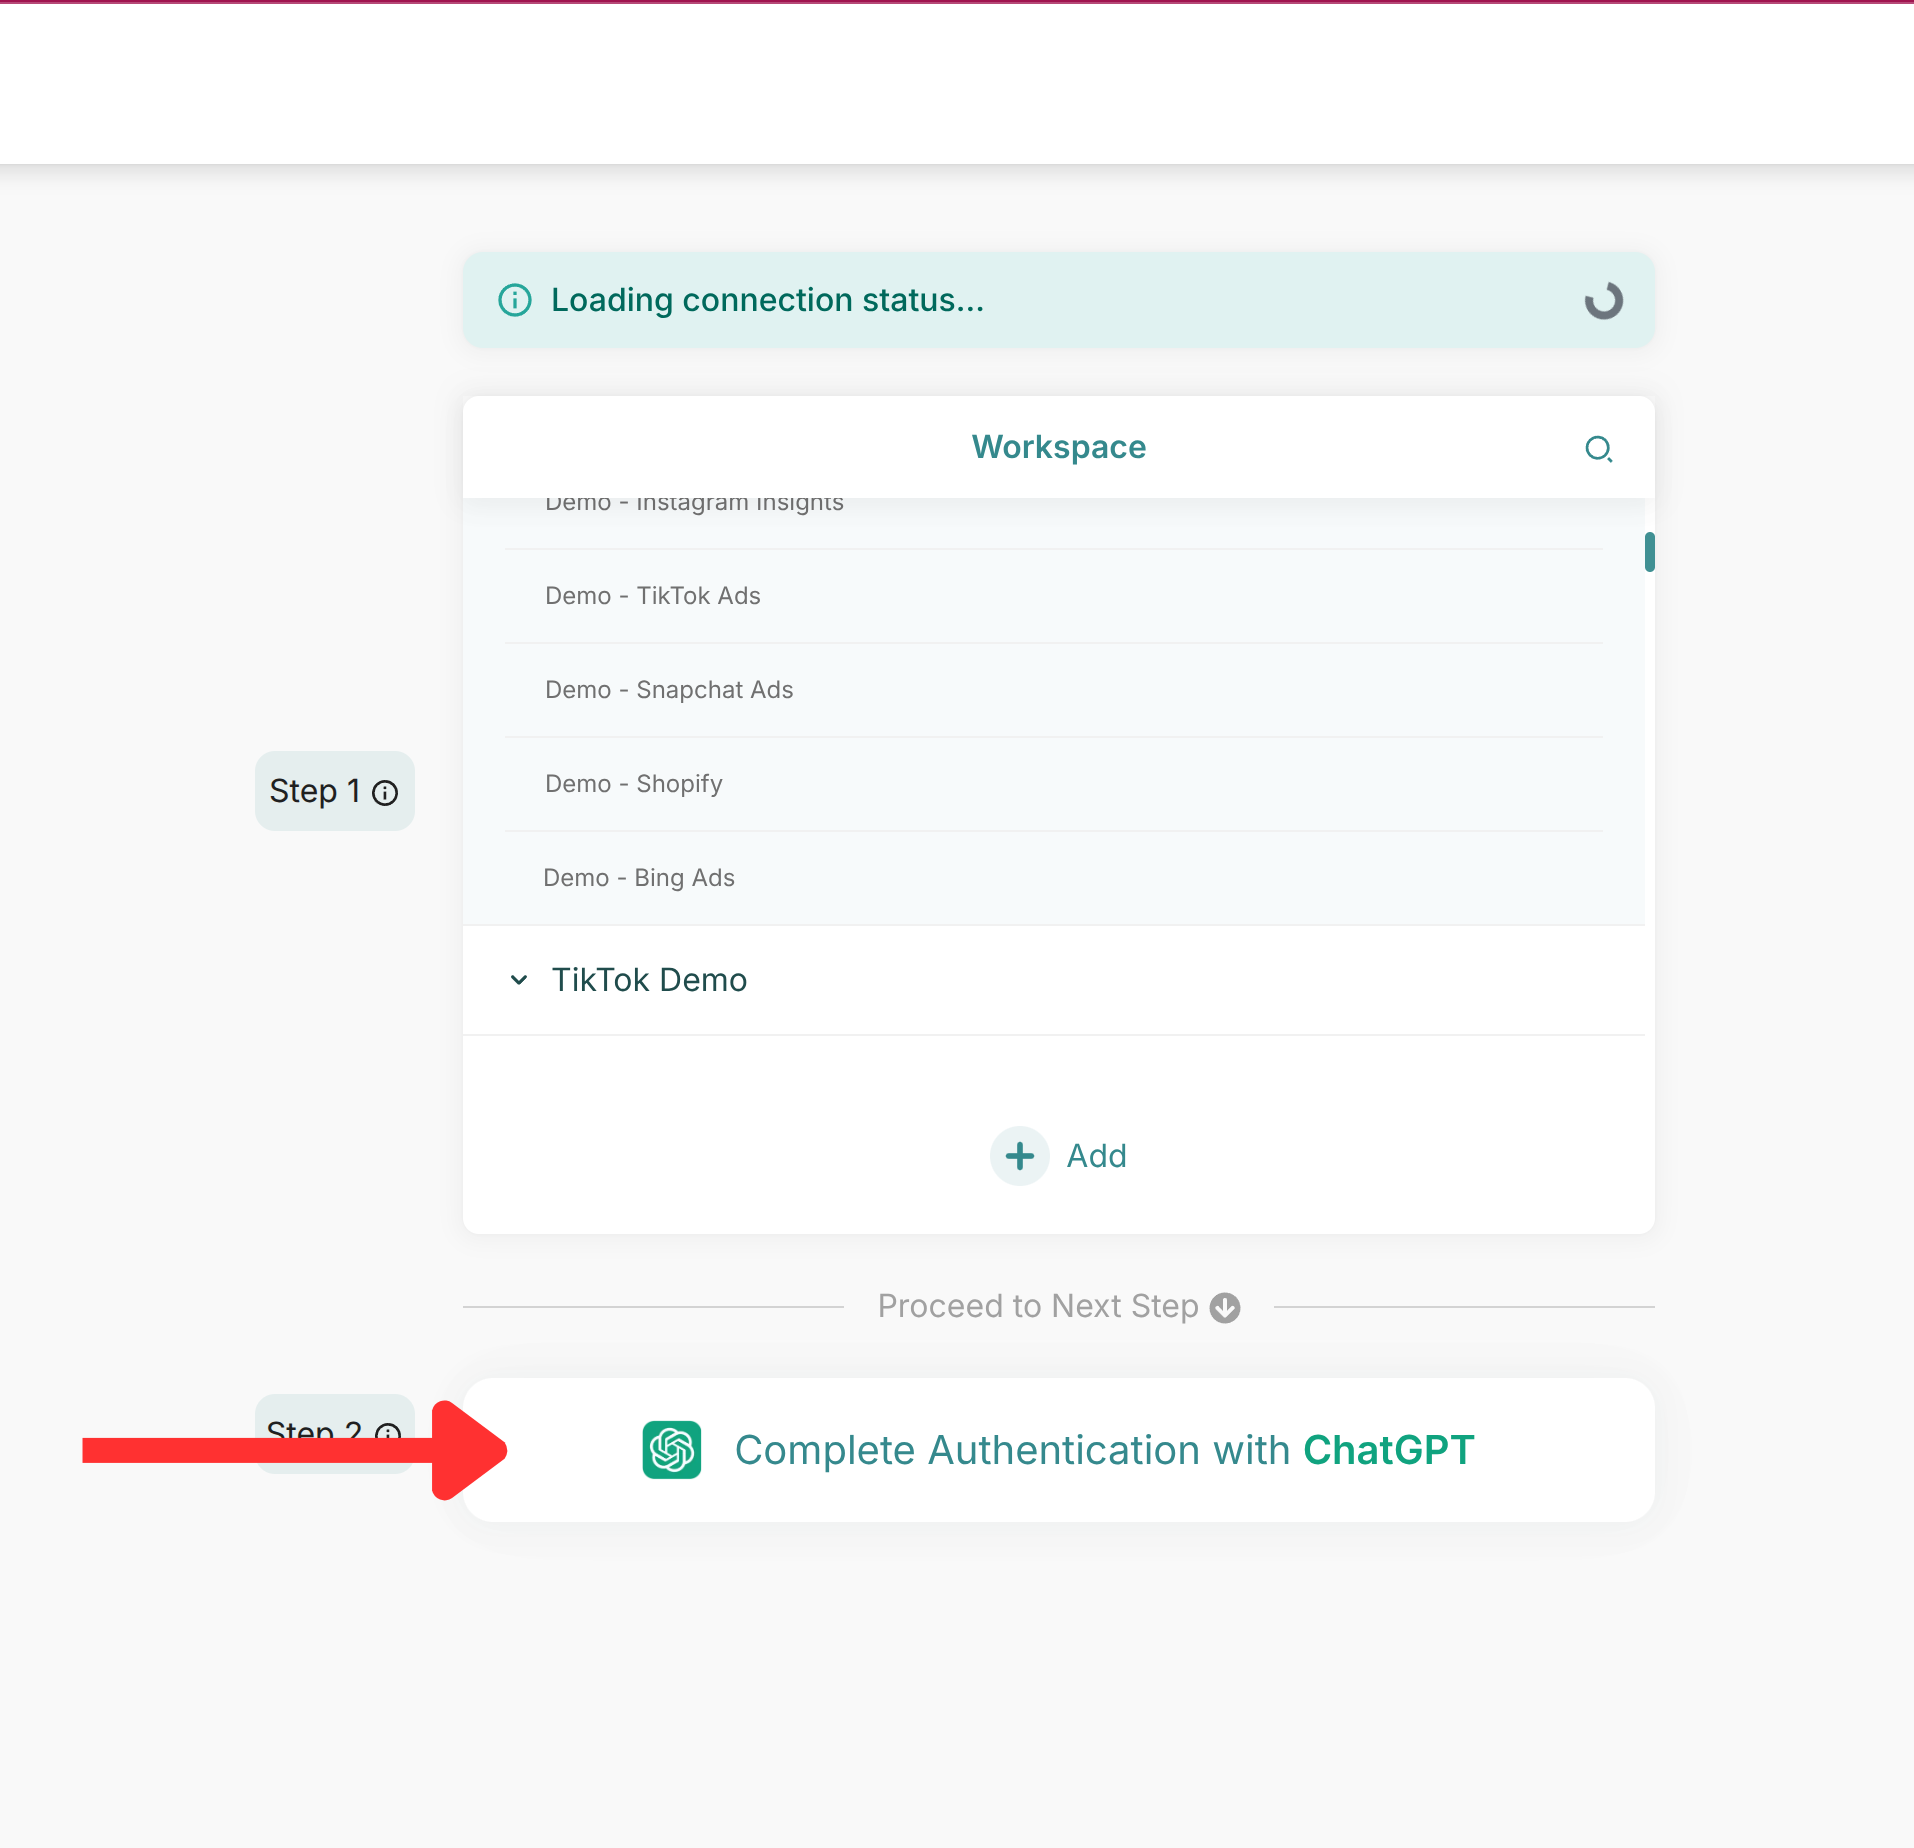
Once you have upgraded your subscription plan, and created workspaces with connected data sources, you are ready to finish the OAuth flow. To complete the process, select "Complete Authentication with ChatGPT" for redirection to the GPT interface. Here are instructions for how to upgrade your subscription plan, and how to create a new workspace.
You will notice a confirmation sign following the redirect.

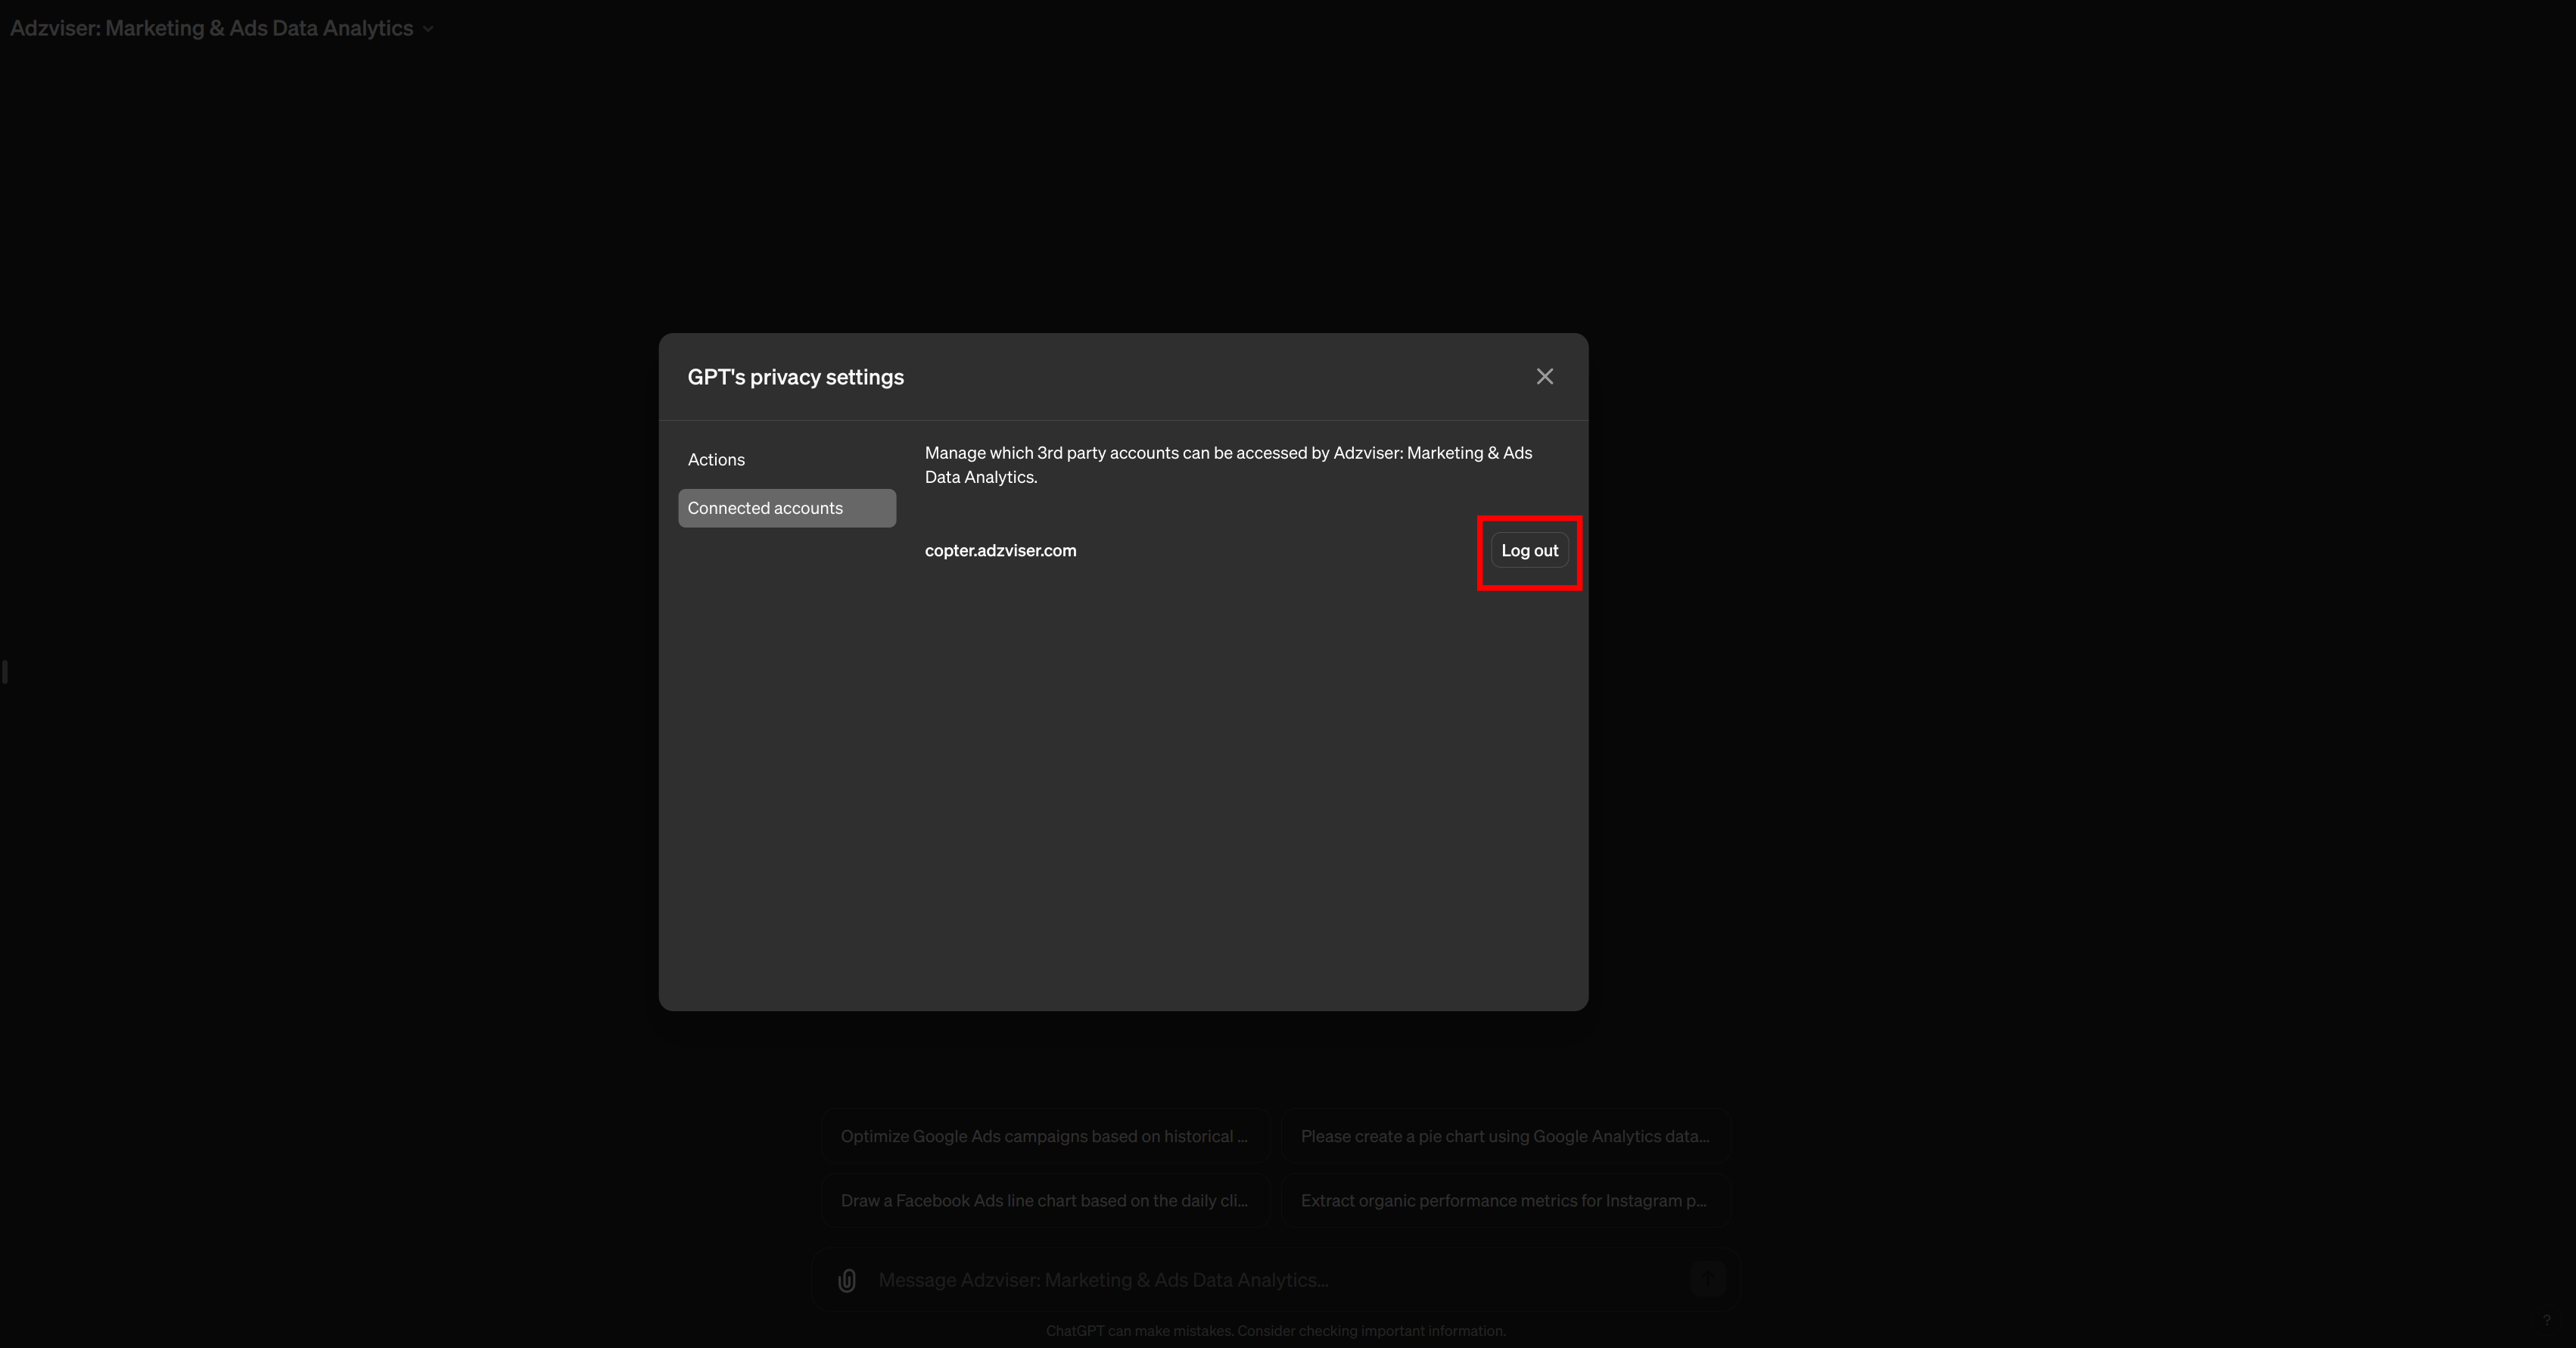
Re-authorize
You can log out from our GPT and re-authorize. It takes a few steps:
- Click "Adzviser: Talk to Your Marketing & Sales Data" on the top left corner.
- Select "Privacy settings".
- Switch to "Connected accounts".
- Click "Log out".