Create a workspace
Watch this step-by-step guide to get started
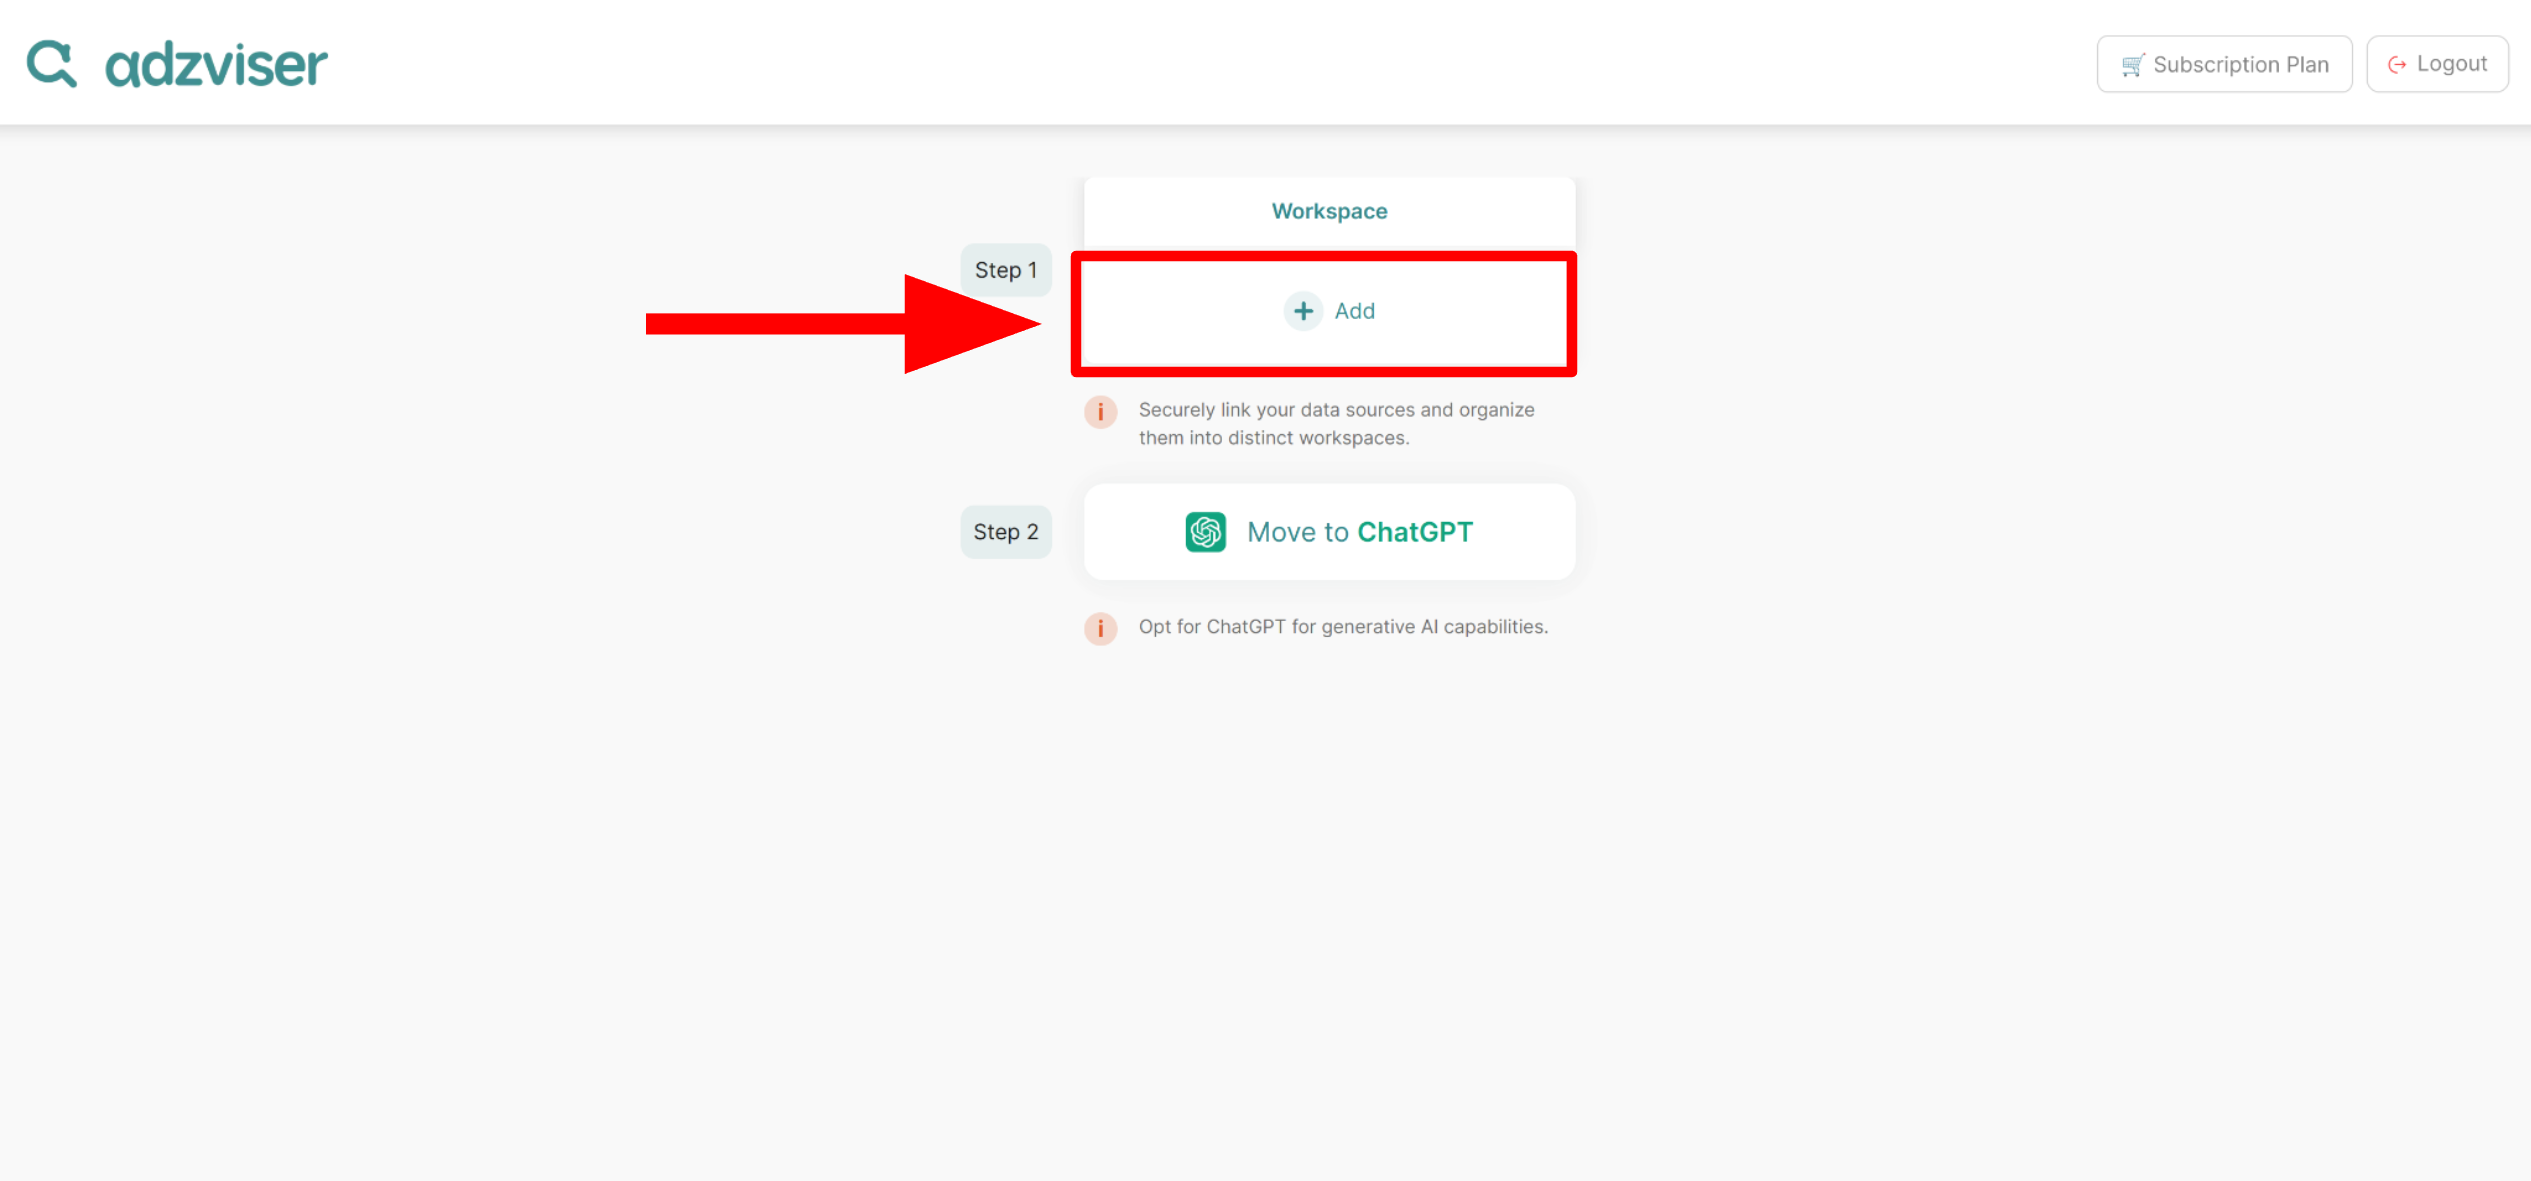
Step 1: Create a new workspace
After your payment is successfully processed, you'll gain the ability to link your data sources with Adzviser. To do this, simply click on the “+ Add” button found under the “Workspace” section to connect your desired sources.
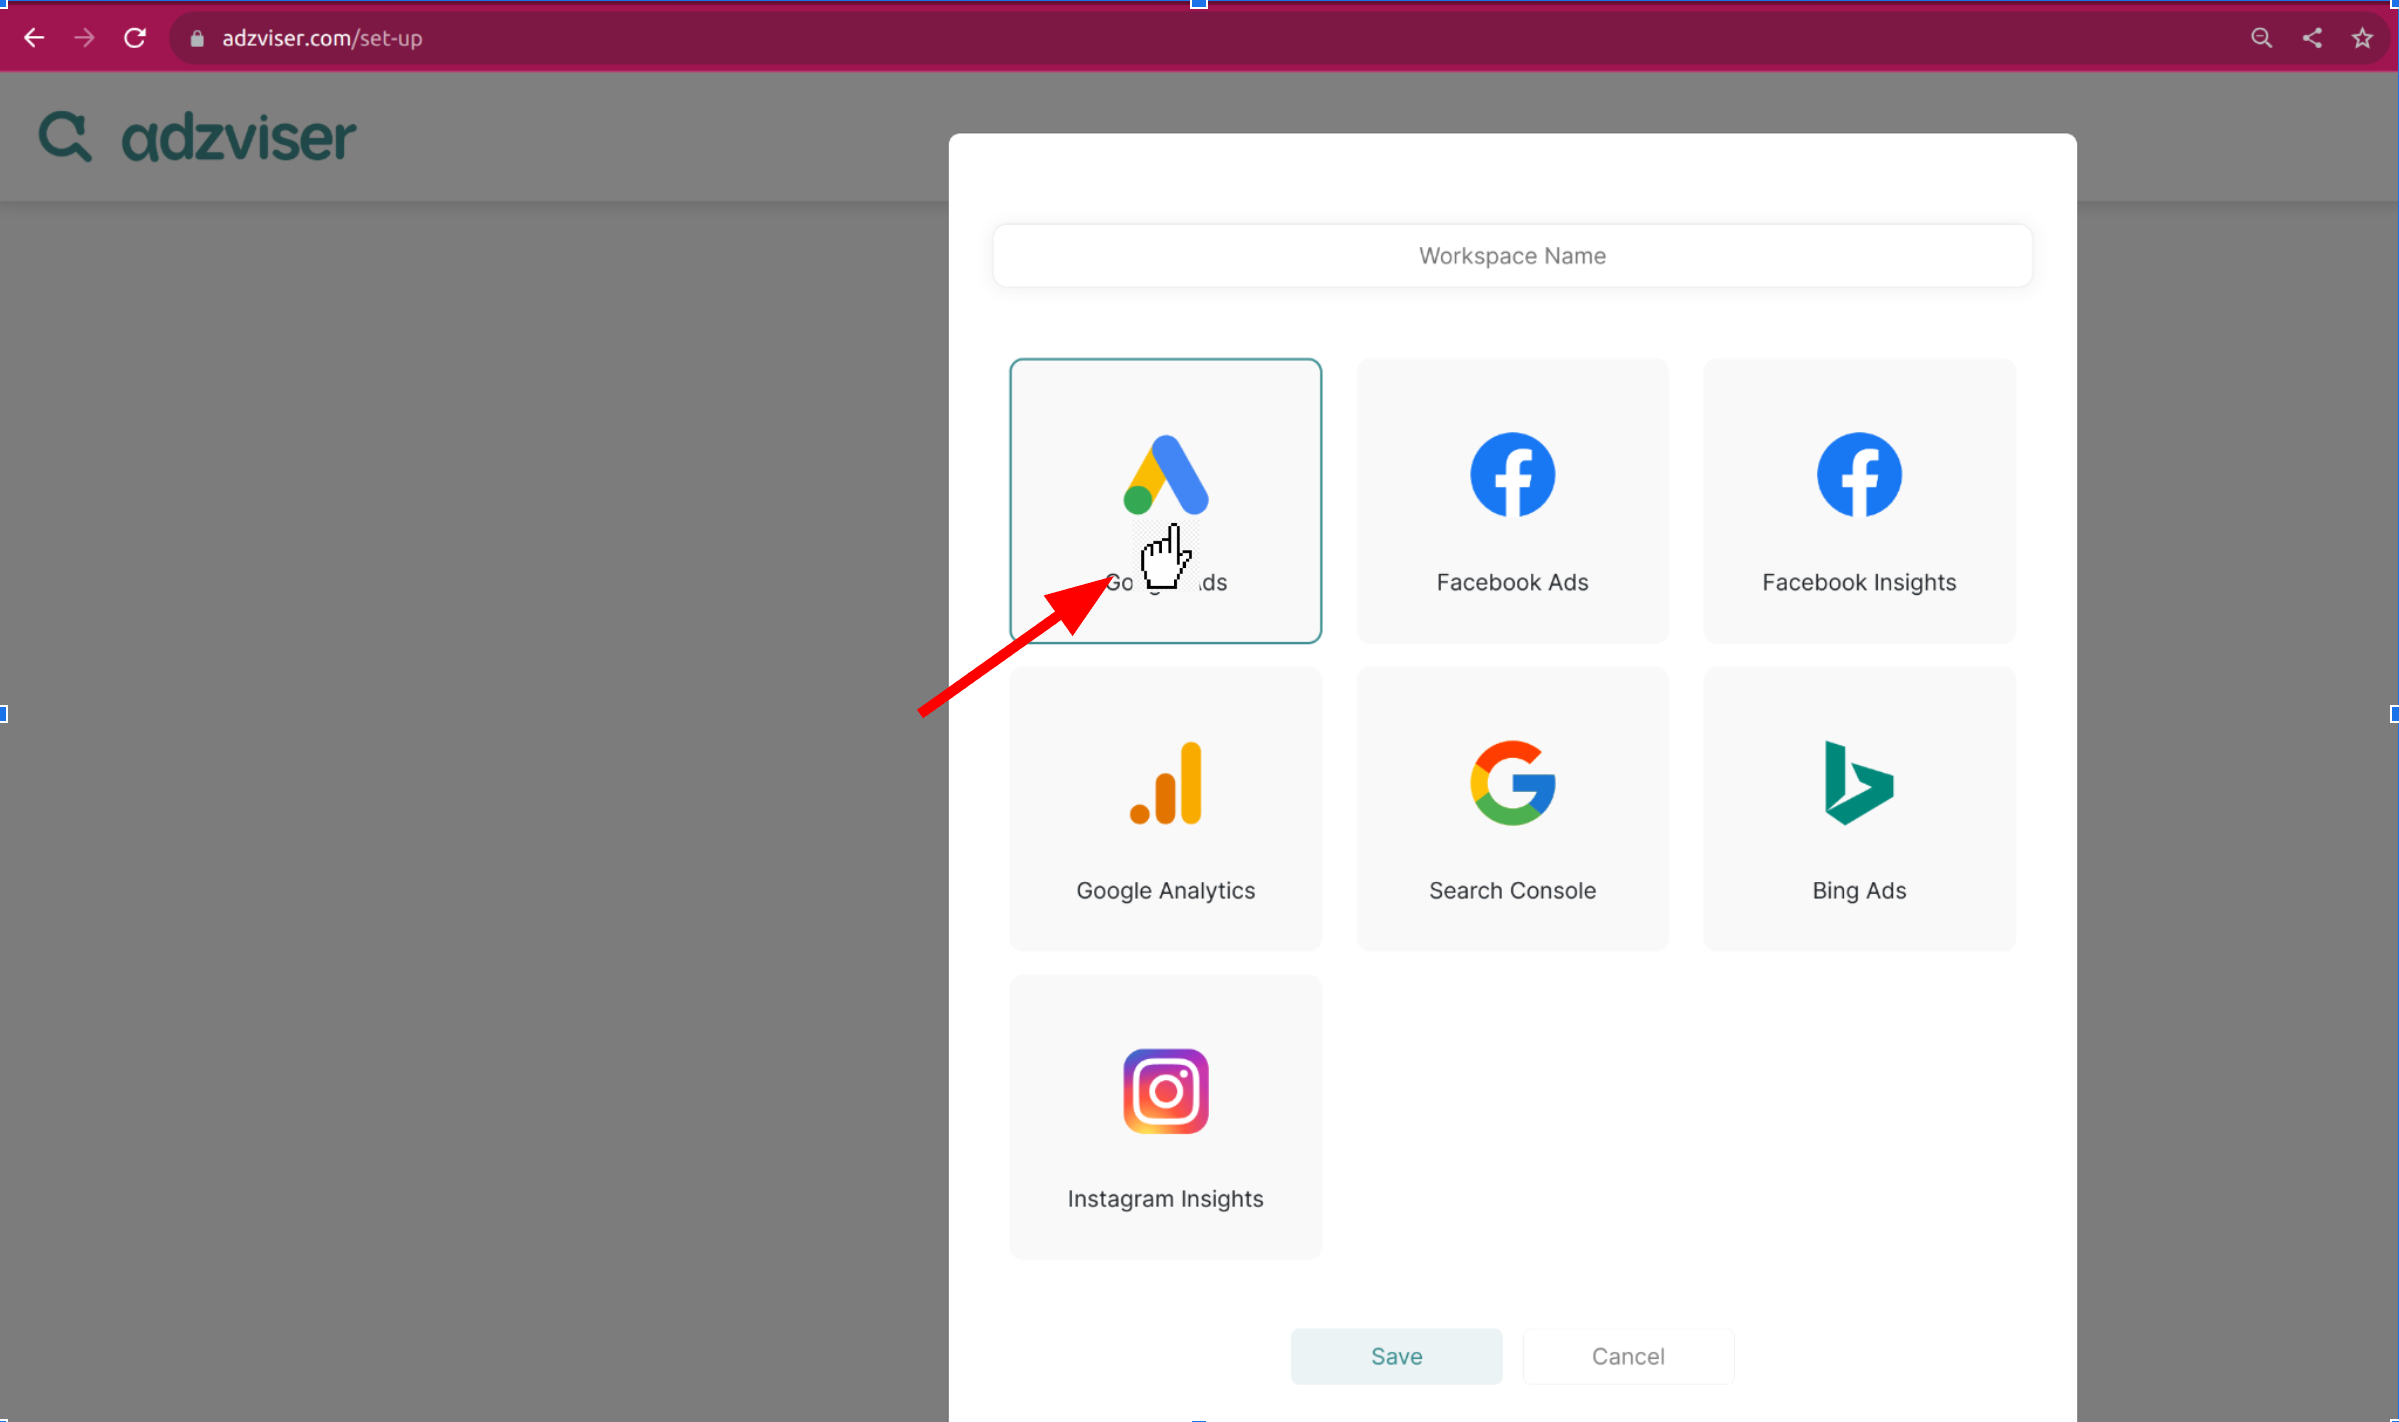
Step 2: Connect to a data source
Click on the data source that you woud like to connect. Multiple data sources can be connected to a single workspace.
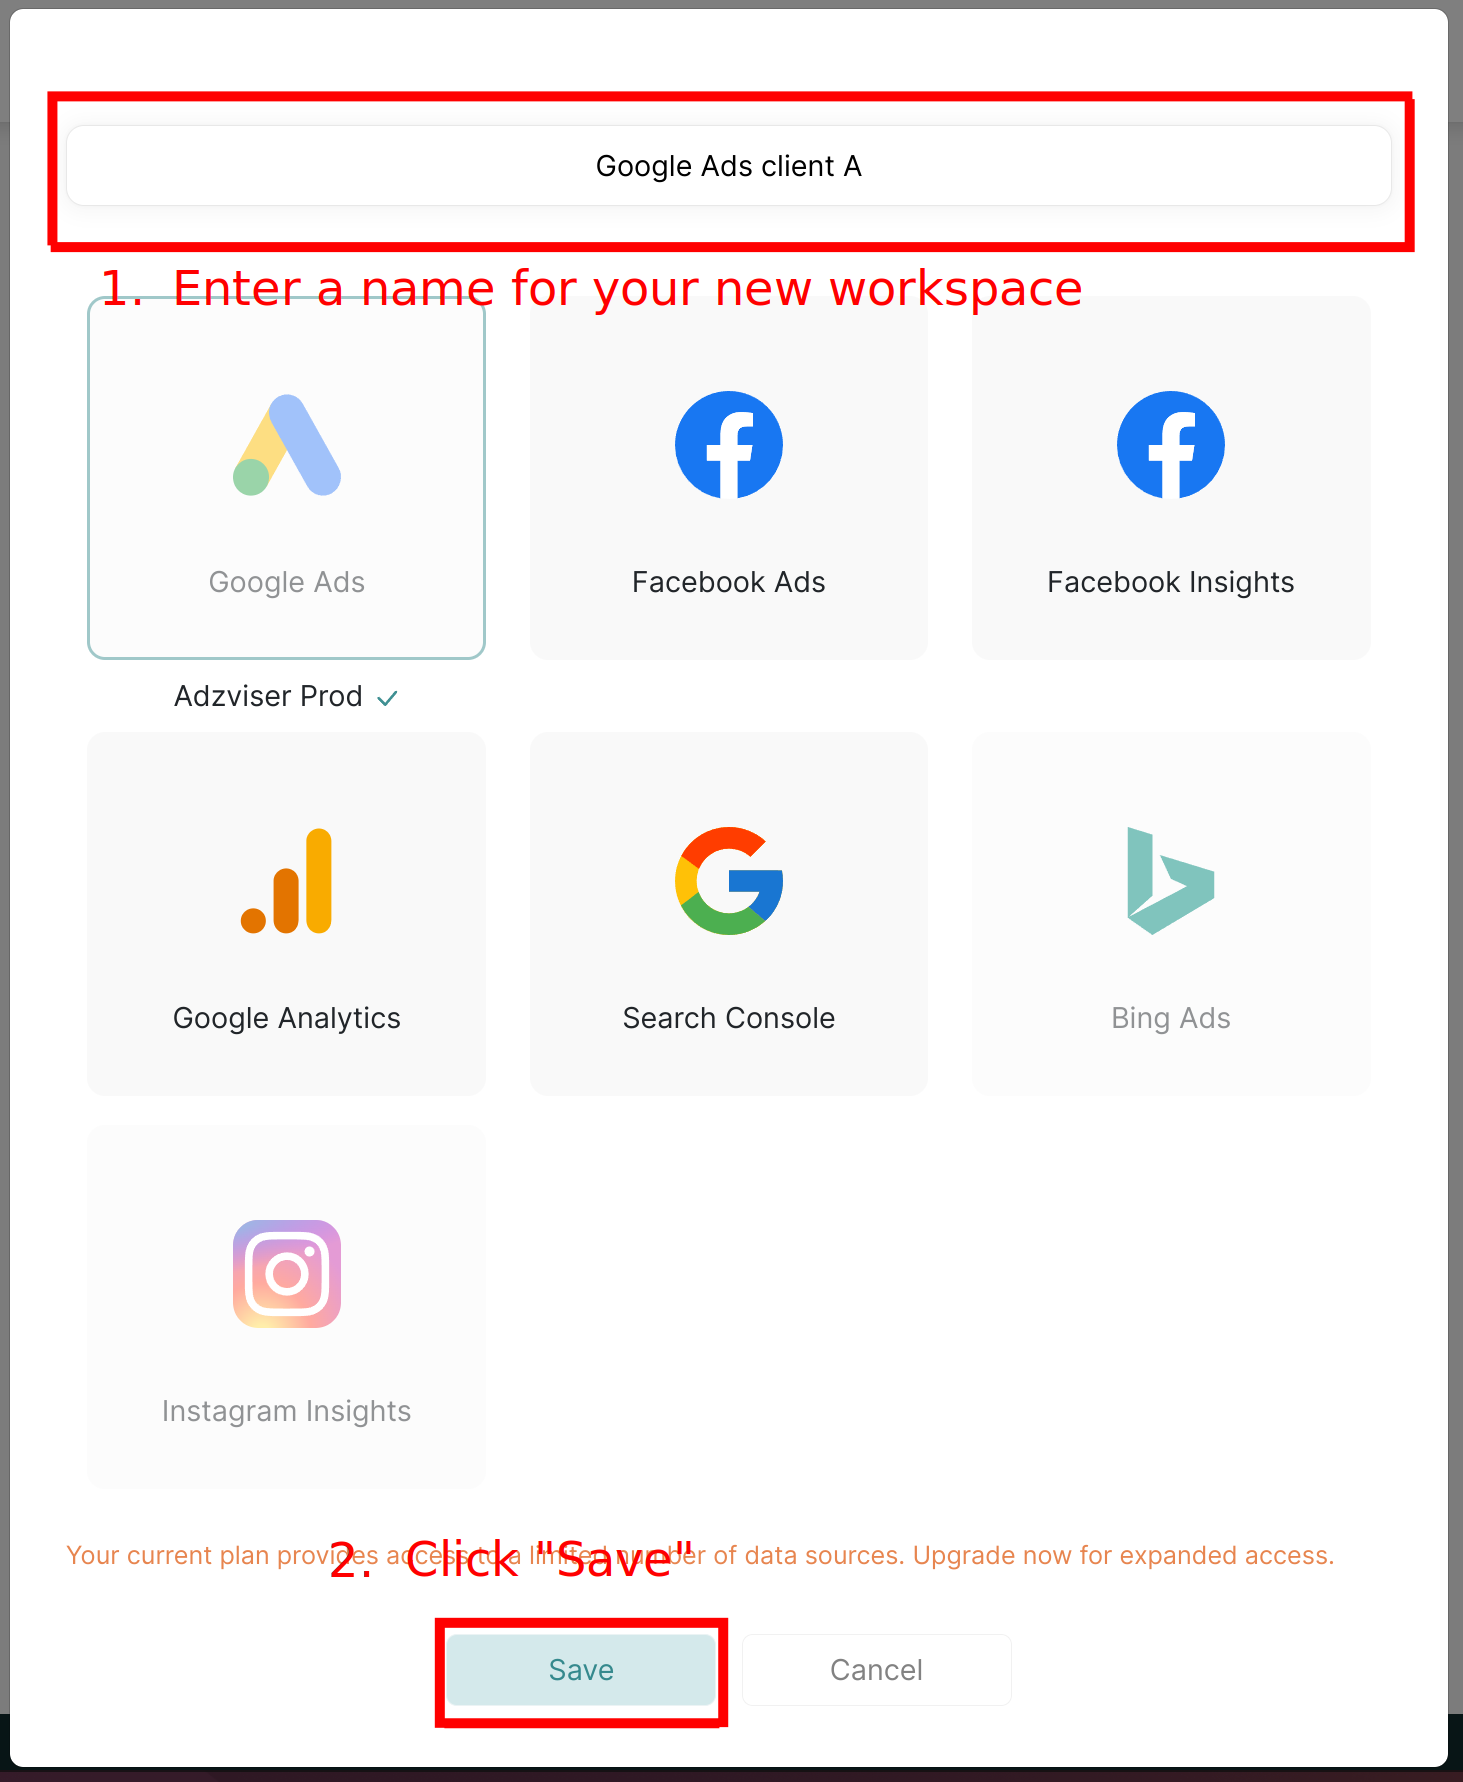
Step 3: Save your workspace
After connecting data sources to your new workspace, assign a name to your workspace and then click on “Save” to finalize the setup.