Installing the Adzviser Excel Add-in
Installing the Adzviser Excel add-in is straightforward. You can add it to your Microsoft Excel in a couple of easy steps.
Installation Methods
Via Microsoft AppSource Marketplace (Recommended)
- Visit Adzviser on Microsoft AppSource
- Click the "Get it now" button
- Sign in with your Microsoft account if prompted
- Follow the installation prompts to add Adzviser to your Excel
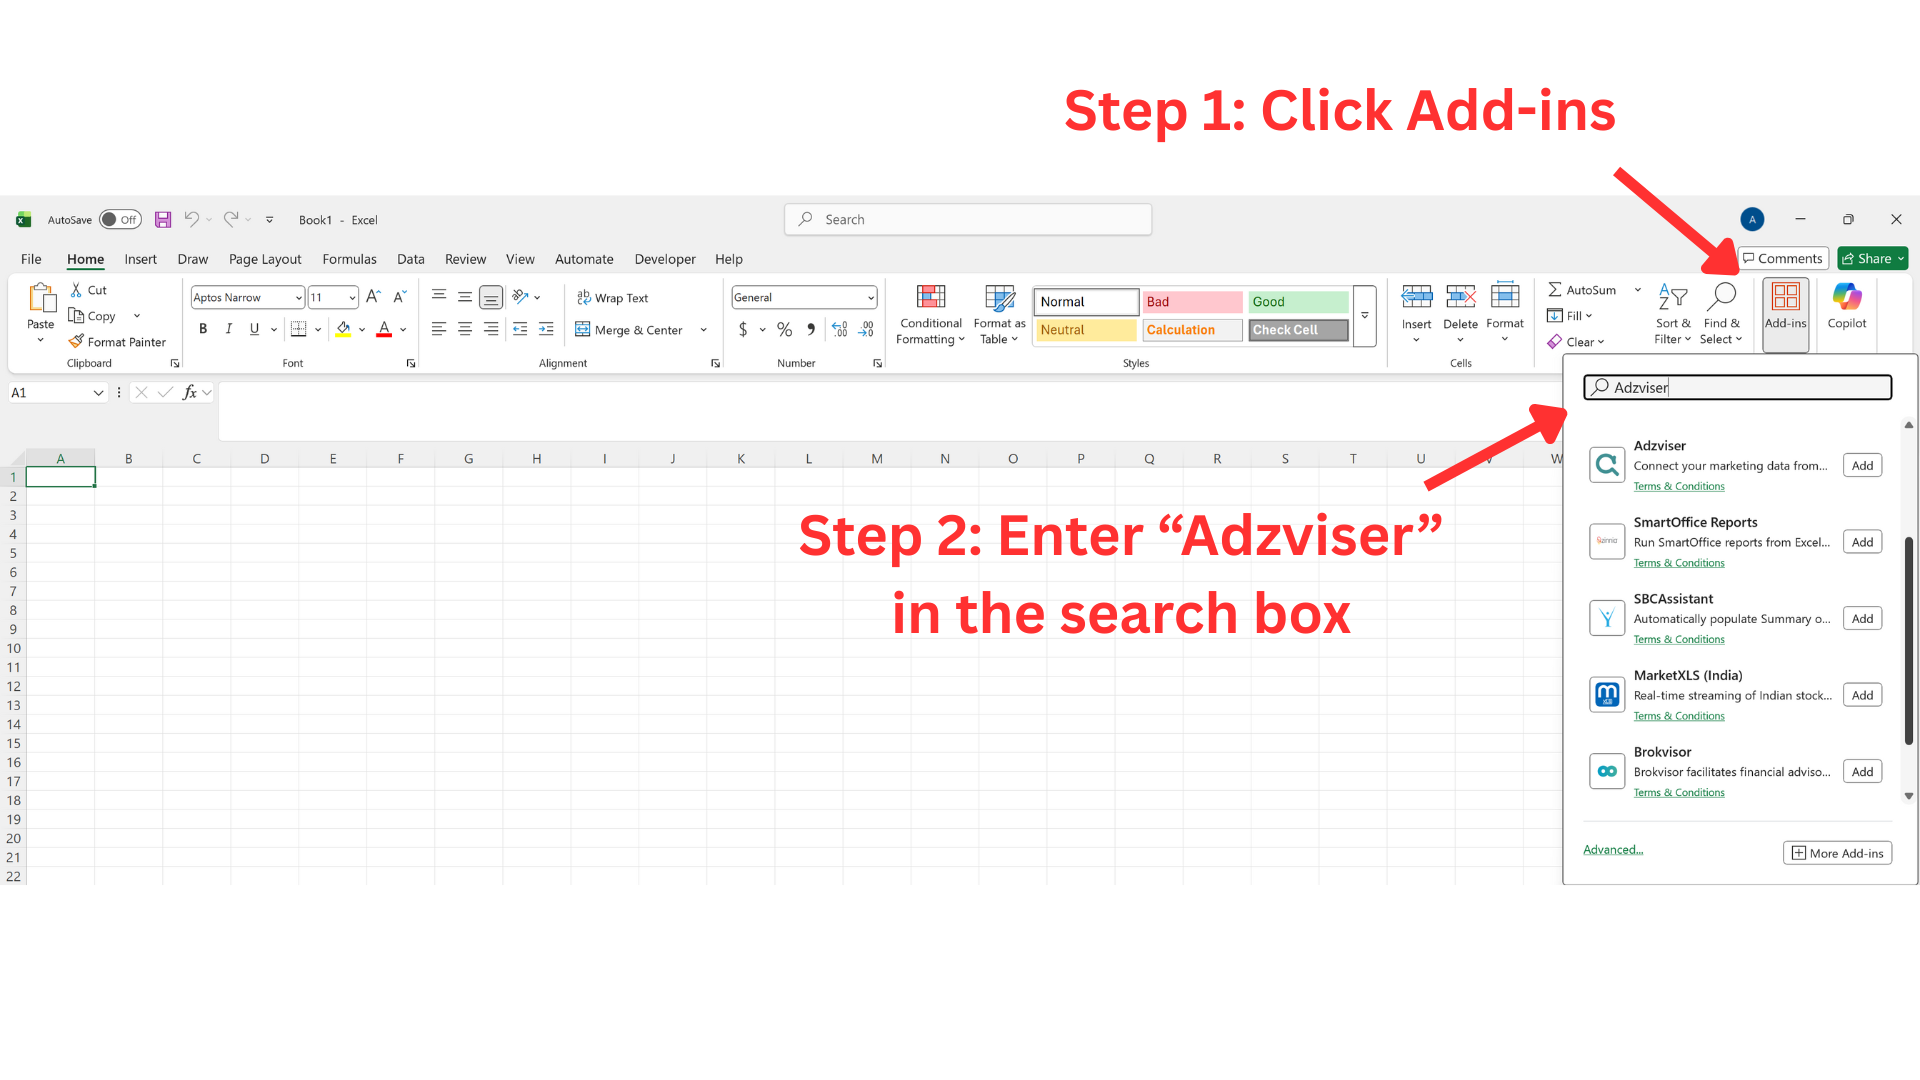
Directly through Excel
- Open Microsoft Excel (desktop or web version)
- Go to the Home tab in the ribbon
- Click on "Add-ins" on the right side of the ribbon
- In the Office Add-ins dialog, search for "Adzviser"
- Click "Add" next to the Adzviser add-in
- Follow the prompts to complete installation
Launching Adzviser in Excel
Once installed, launching Adzviser is simple:
- Open any Excel workbook
- Go to the Home tab in the ribbon
- Look for the Adzviser button in the ribbon (usually on the right side)
- Click the Adzviser button to open the task pane
💡
The Adzviser task pane will appear on the right side of your Excel window, providing easy access to all features while you work with your data.
System Requirements
The Adzviser Excel add-in works with:
- Excel for Windows (Microsoft 365, Excel 2019, Excel 2021)
- Excel for Mac (Microsoft 365, Excel 2019, Excel 2021)
- Excel on the web (via Office 365)
⚠️
Make sure your Excel is up to date for the best experience with the Adzviser add-in.
Next Steps
🎉 Congratulations! You've successfully installed the Adzviser Excel add-in.
Now you're ready to:
- Complete the authentication with your Adzviser account
- Start pulling data into your Excel spreadsheets