Connect Adzviser to Claude
Starting in July 2026, Adzviser is available as a community connector in Claude's Connector Directory. You no longer need to create a custom integration or enter the Adzviser MCP server URL manually.
Watch this guide to using Adzviser on Claude.ai
Step 1: Sign in to Claude.ai
Sign in to the Claude.ai account where you want to use Adzviser. If you use Claude through an organization, an organization owner may need to enable the connector for your team.
Step 2: Open Adzviser in Claude's Connector Directory
Go to the Adzviser community connector page.
Step 3: Connect Adzviser to Claude
Click Connect to Claude. Claude will add the Adzviser connector without asking you to enter an integration name or MCP server URL.
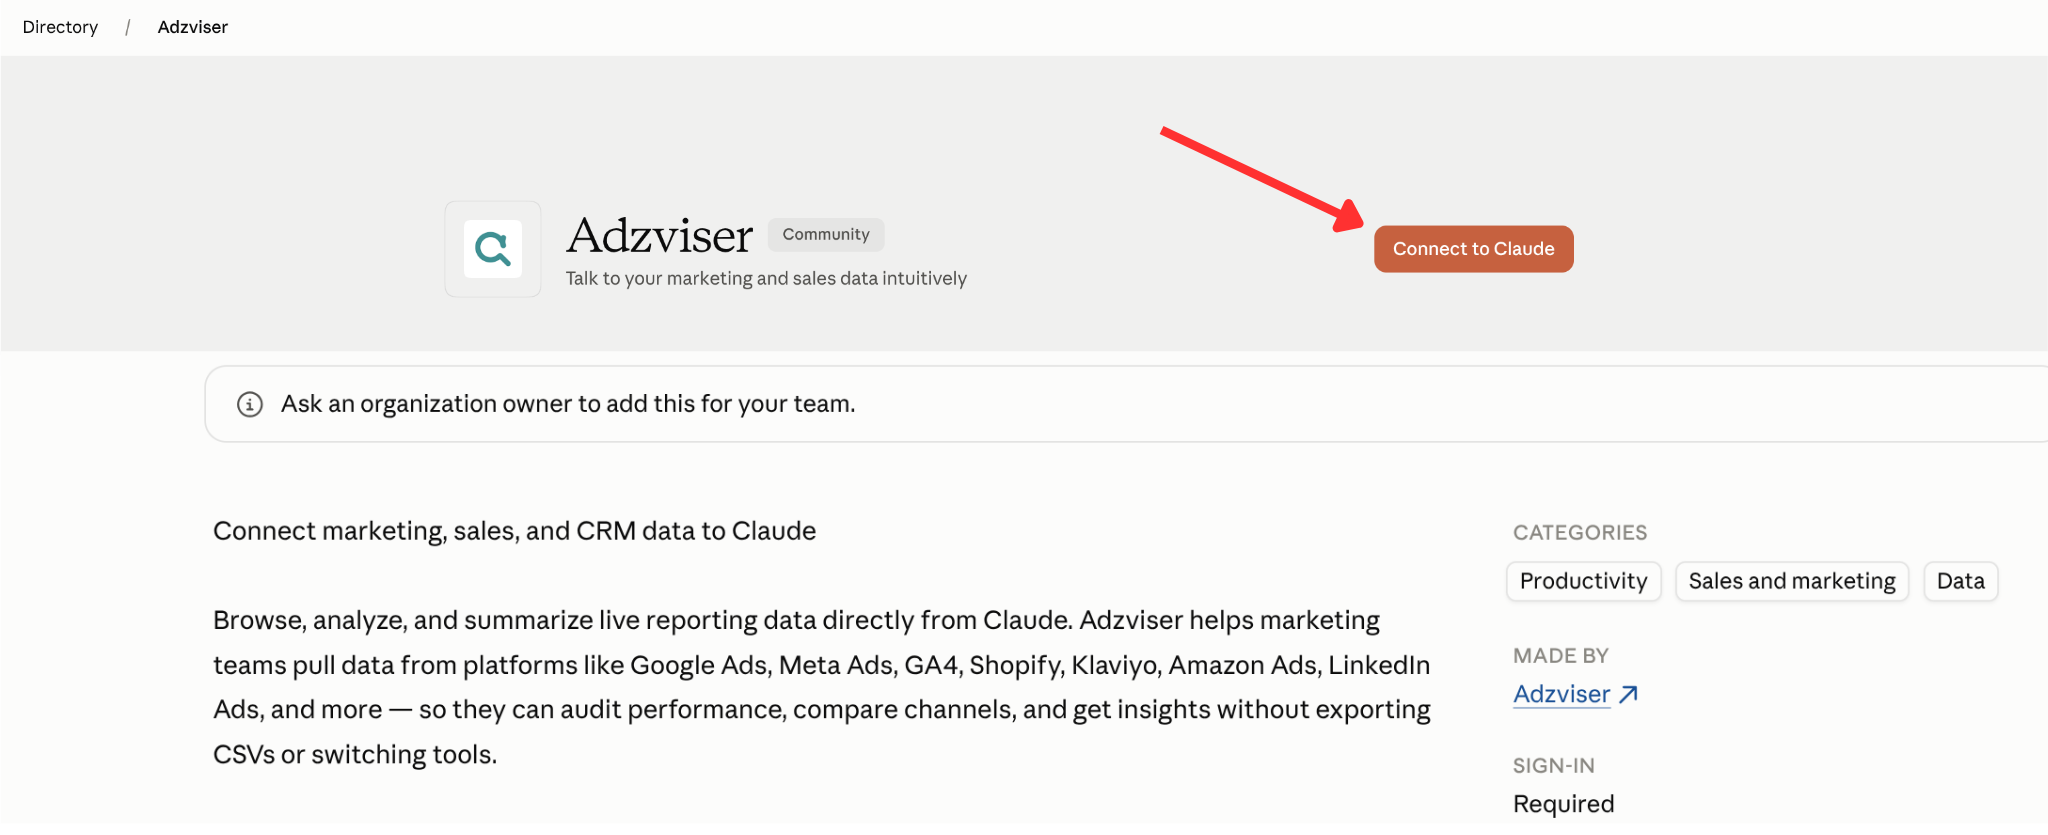
Step 4: Sign in to Adzviser and authorize Claude
After you click Connect to Claude, you will be redirected to Adzviser's authorization page. Sign in with Google or your Adzviser email and password, then click Authorize. If you do not have an Adzviser account yet, select Sign up first.
Step 5: Finish OAuth procedure
After signing in and connecting your data sources, select Complete authorization via MCP to return to Claude. The recording and screenshot below show an earlier button label.
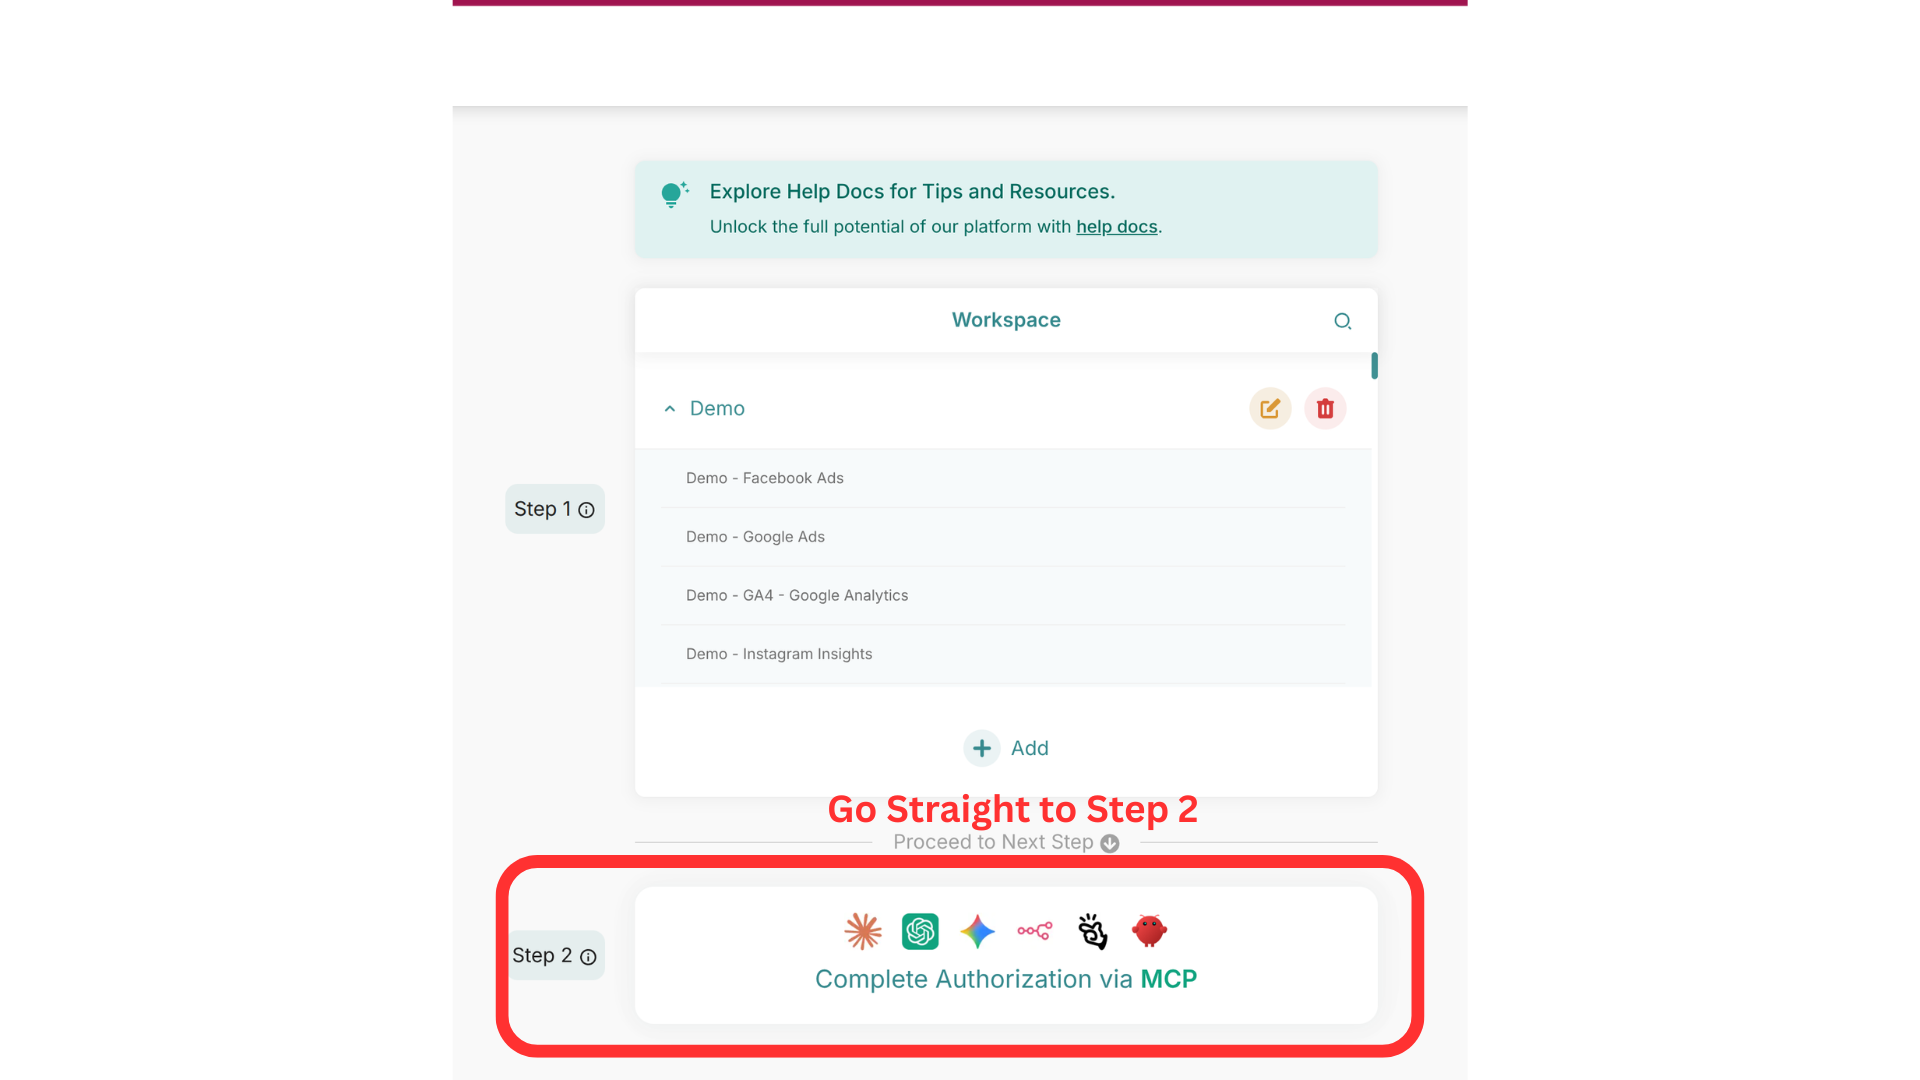
Step 6: Add the Adzviser Claude Skill
The skill is optional: it gives Claude reporting instructions for choosing workspaces, dates, and fields. Connecting Adzviser does not require uploading a skill.
- Download the Adzviser Claude Skill.
- Navigate to Claude.ai > Customize > Skills.
- Select + → Create skill → Upload a skill, then upload the ZIP. See Claude’s skill instructions if your account requires organization approval.
If you installed an older Adzviser skill, replace that copy with this updated download.
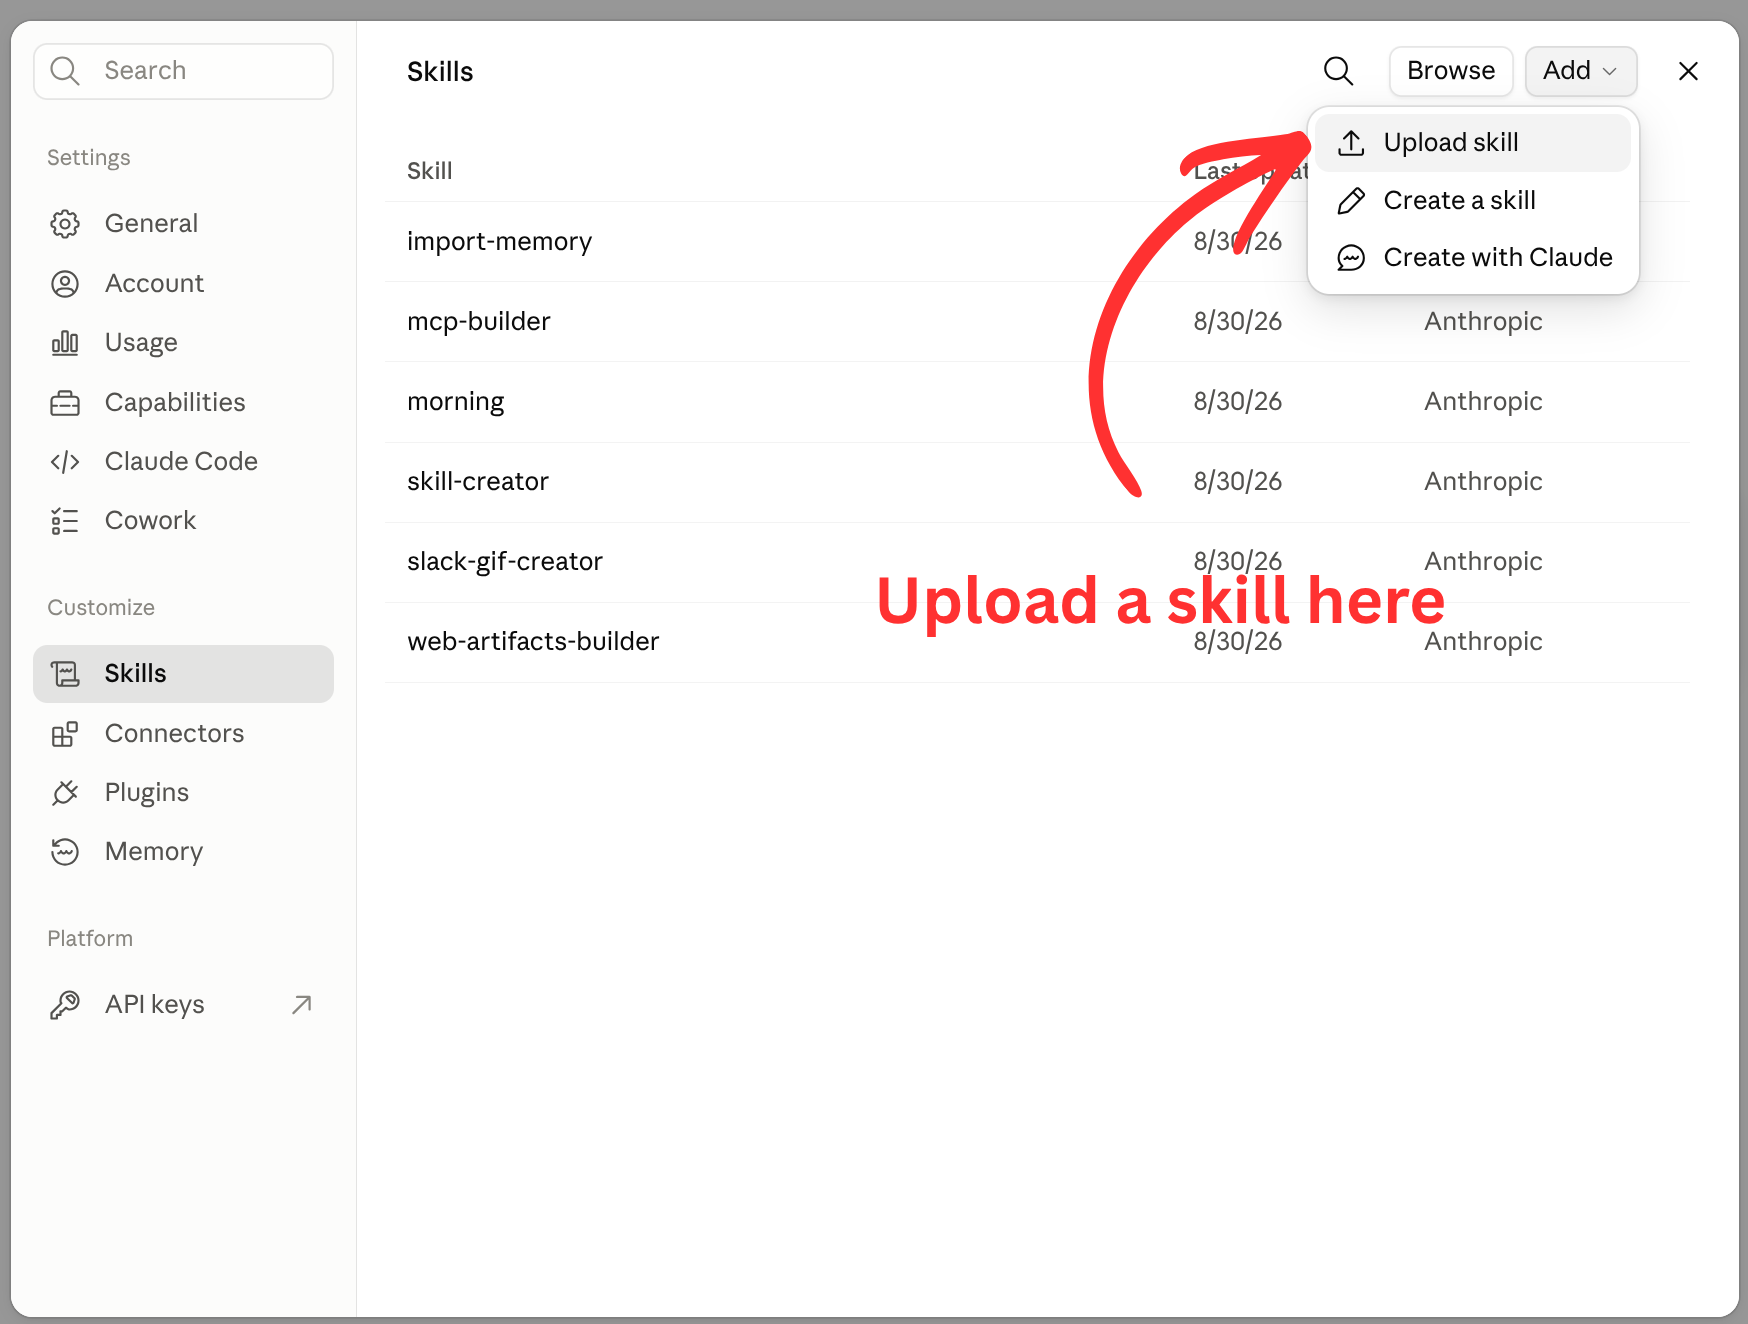
Step 7: Always allow all tool permissions
Open Customize → Connectors, select Adzviser, then Tool permissions. You can choose Always allow for its read-only reporting tools to avoid repeated prompts, or keep approval prompts enabled. This permits access to the reporting data available through your connected Adzviser account. See Claude’s connector permissions guide.
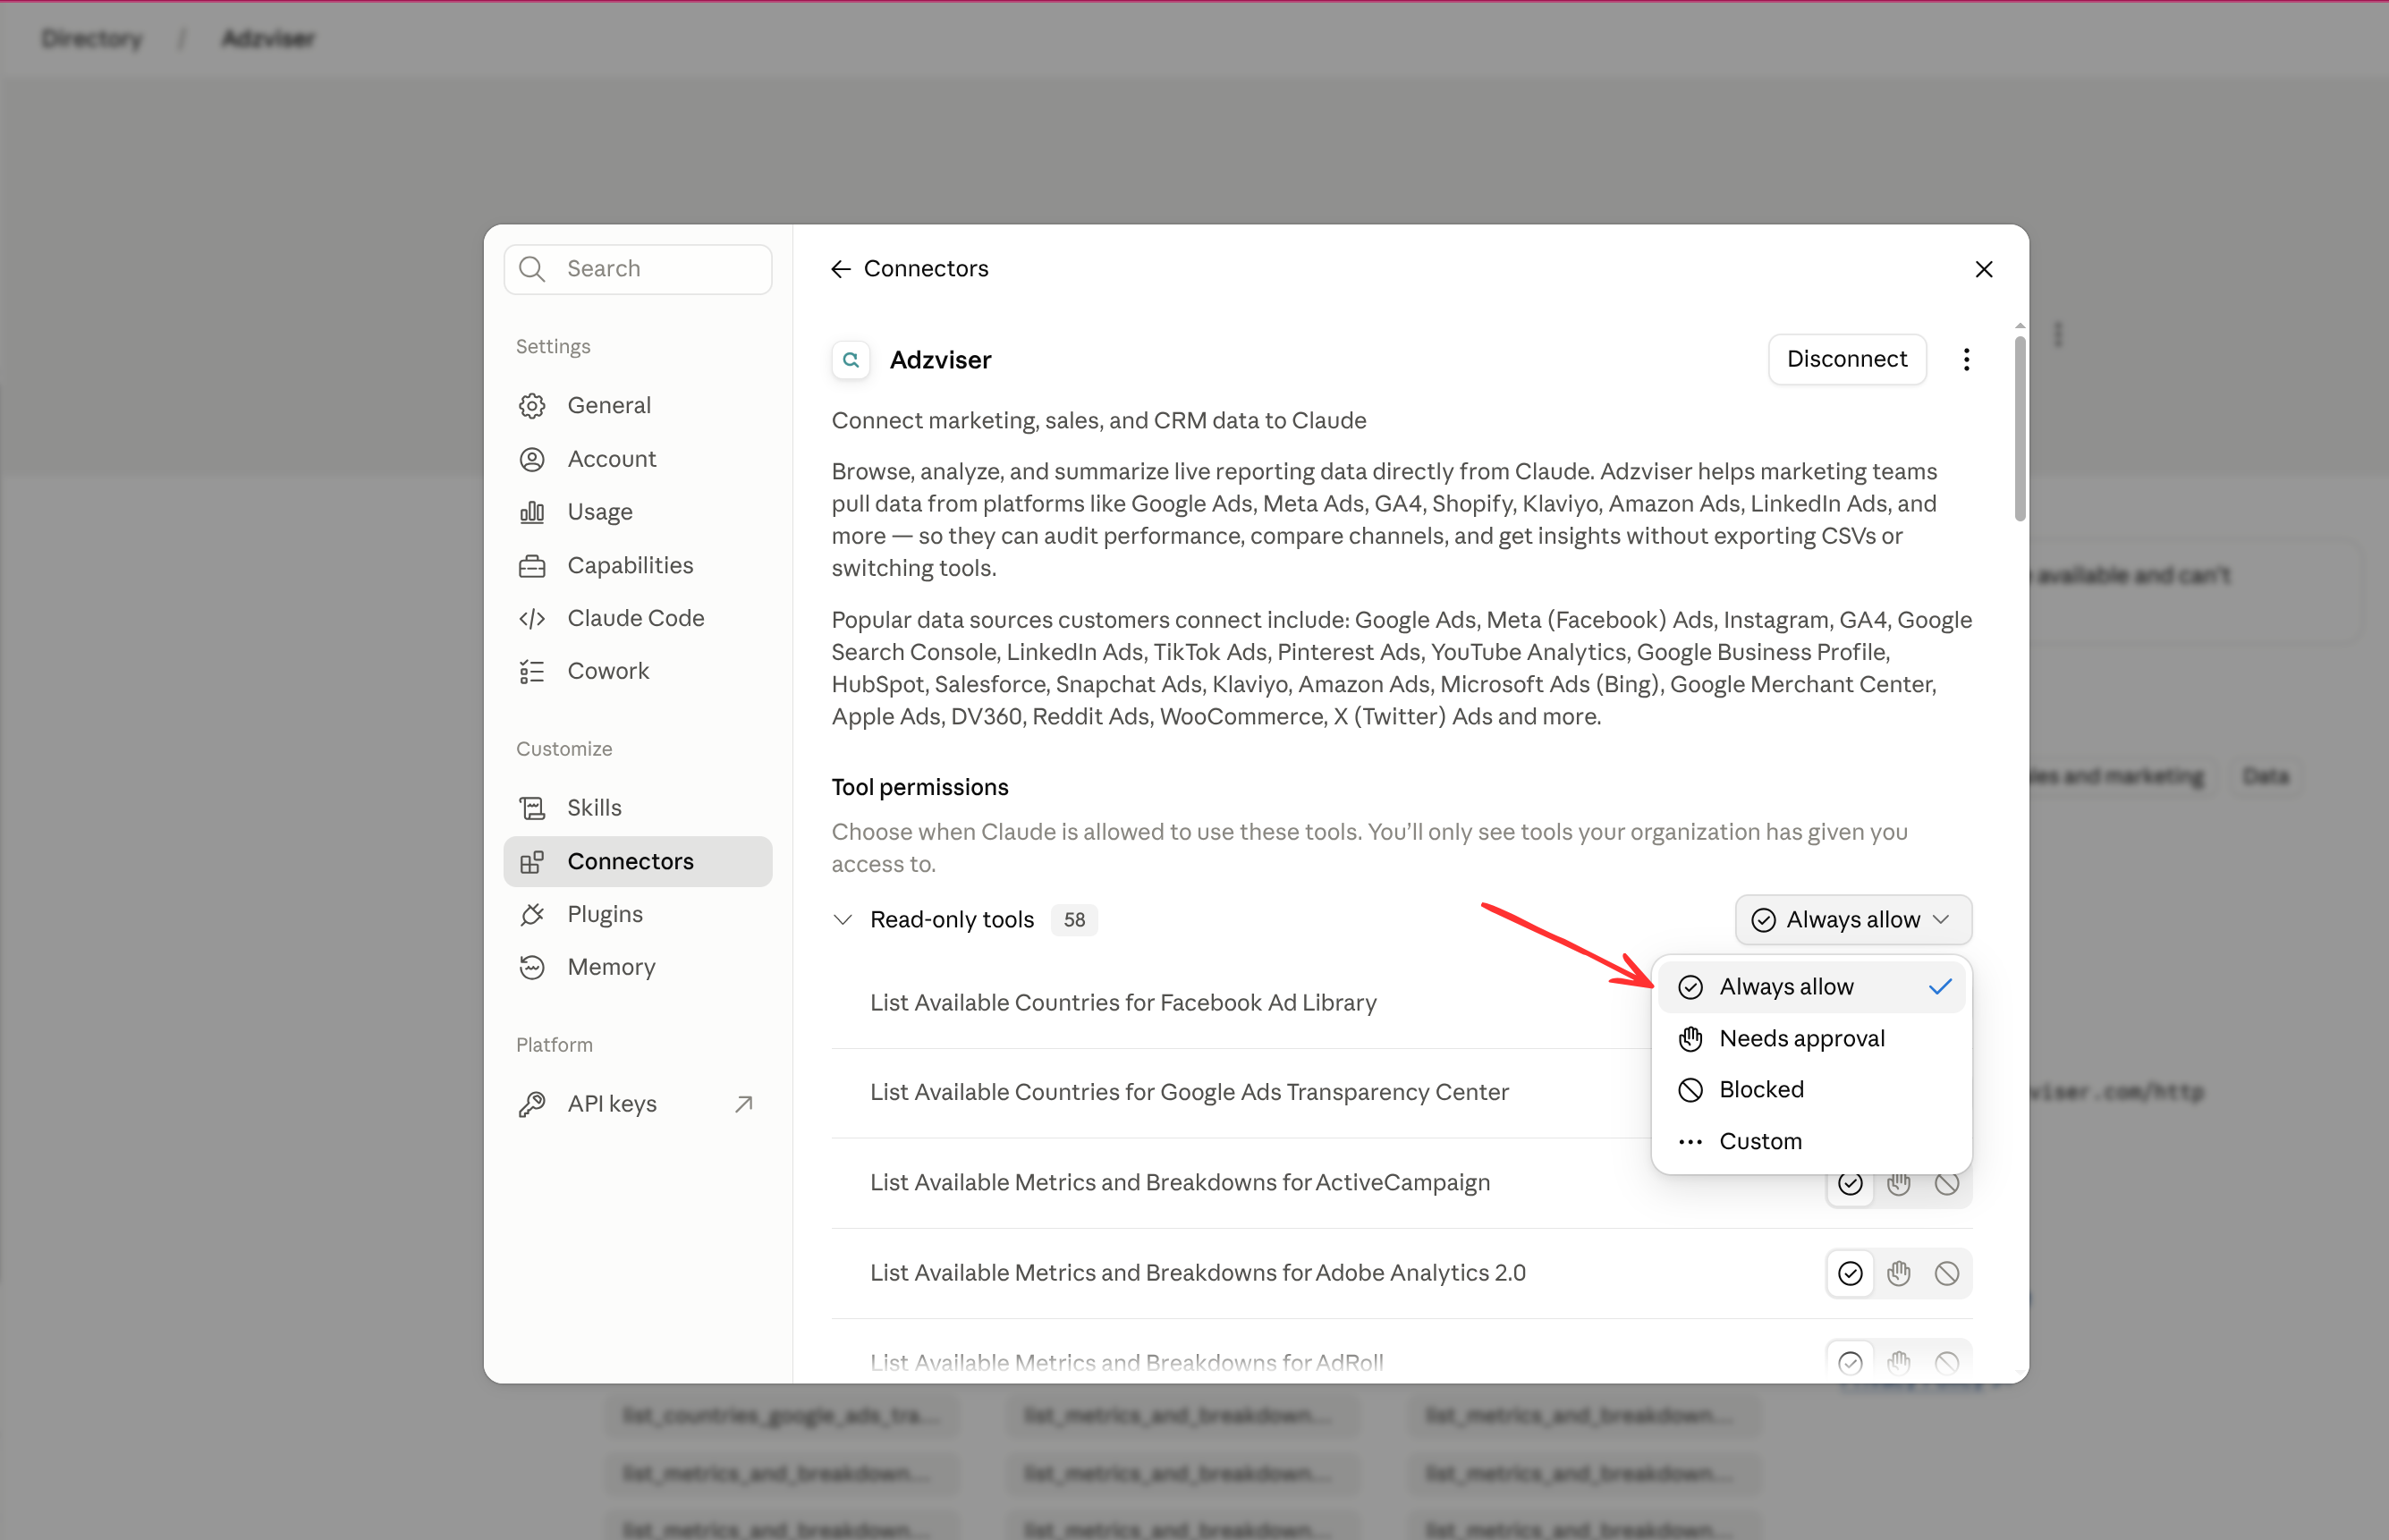
Step 8: Start using Adzviser MCP connectors on Claude
Now you can start retrieving data from Adzviser MCP connectors on Claude. Ask Claude to analyze your marketing data, create reports, and more.