n8n + Adzviser MCP Tutorial: Automate Marketing Reports with AI-driven workflows
This guide walks you through connecting Adzviser to n8n for automated, AI-powered marketing reports.
Video Tutorial
Watch this quick walkthrough to see the complete setup process:
Prerequisites
Before you begin, make sure you have:
- An Adzviser account with at least one connected data source (Sign up here)
- An n8n instance - either n8n Cloud or self-hosted
- API key from an AI provider - OpenAI, Anthropic, or Google AI for generating reports
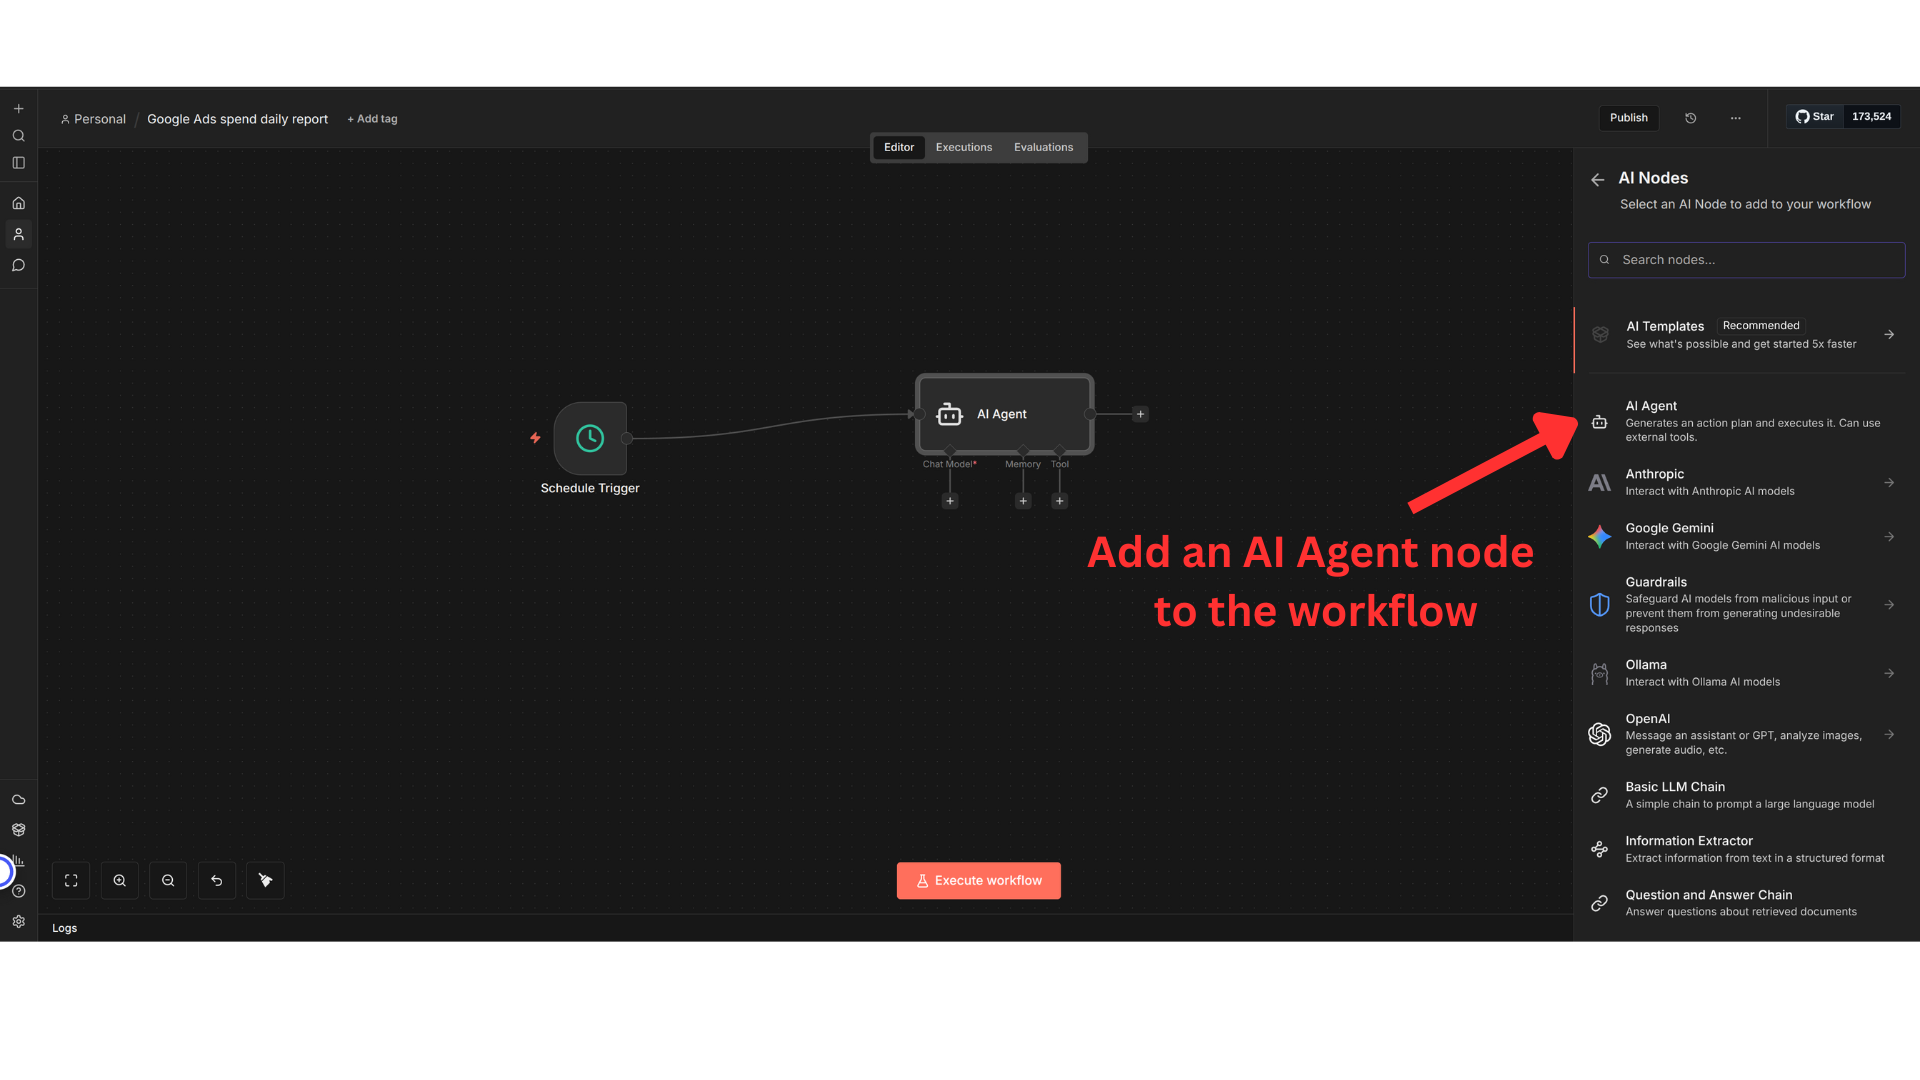
Step 1: Add an AI Agent Node
Start by creating a new workflow in n8n and adding an AI Agent node:
Step 2: Add a Chat Model
The AI Agent needs a chat model to generate responses. Click the + button and add your preferred model (OpenAI, Anthropic, etc.). You'll then need to enter your API key to set up credentials that empower the AI Agent:
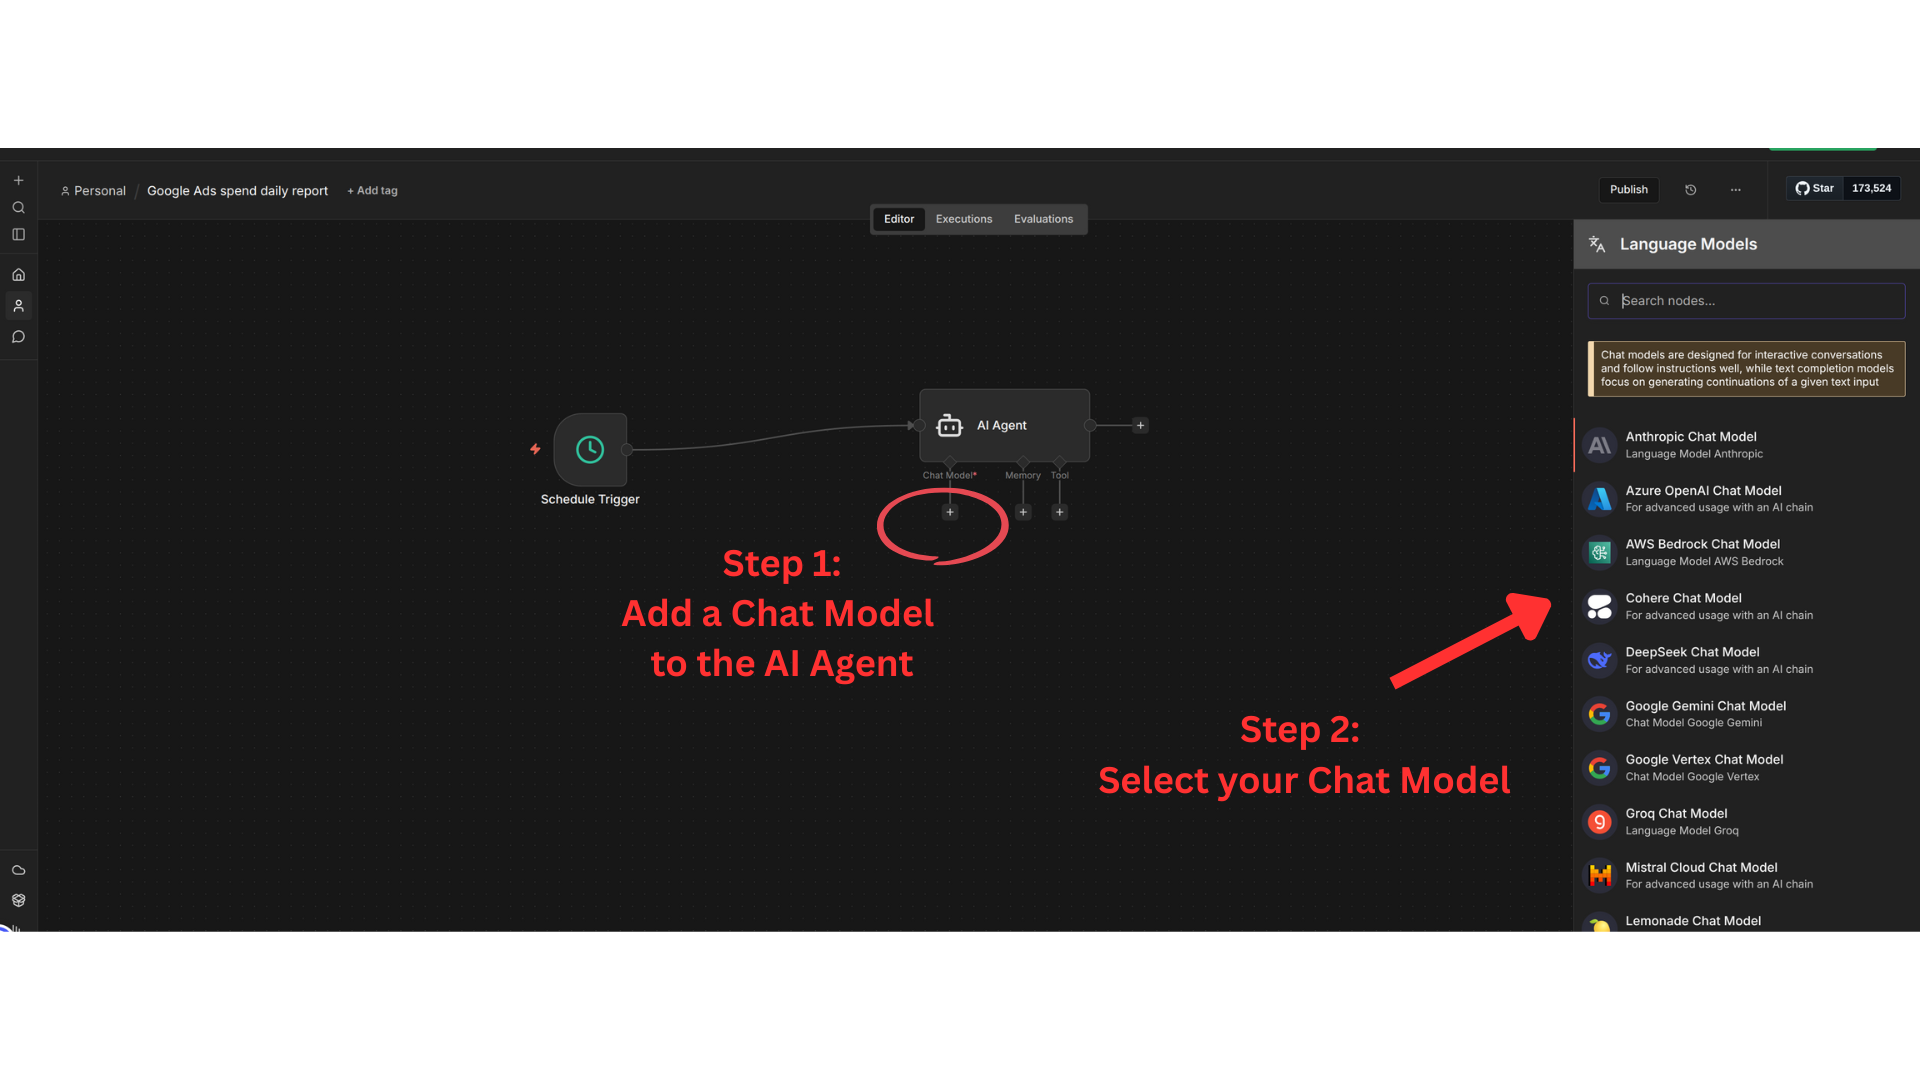
Keep your API key secure! Never share it publicly or commit it to version control.
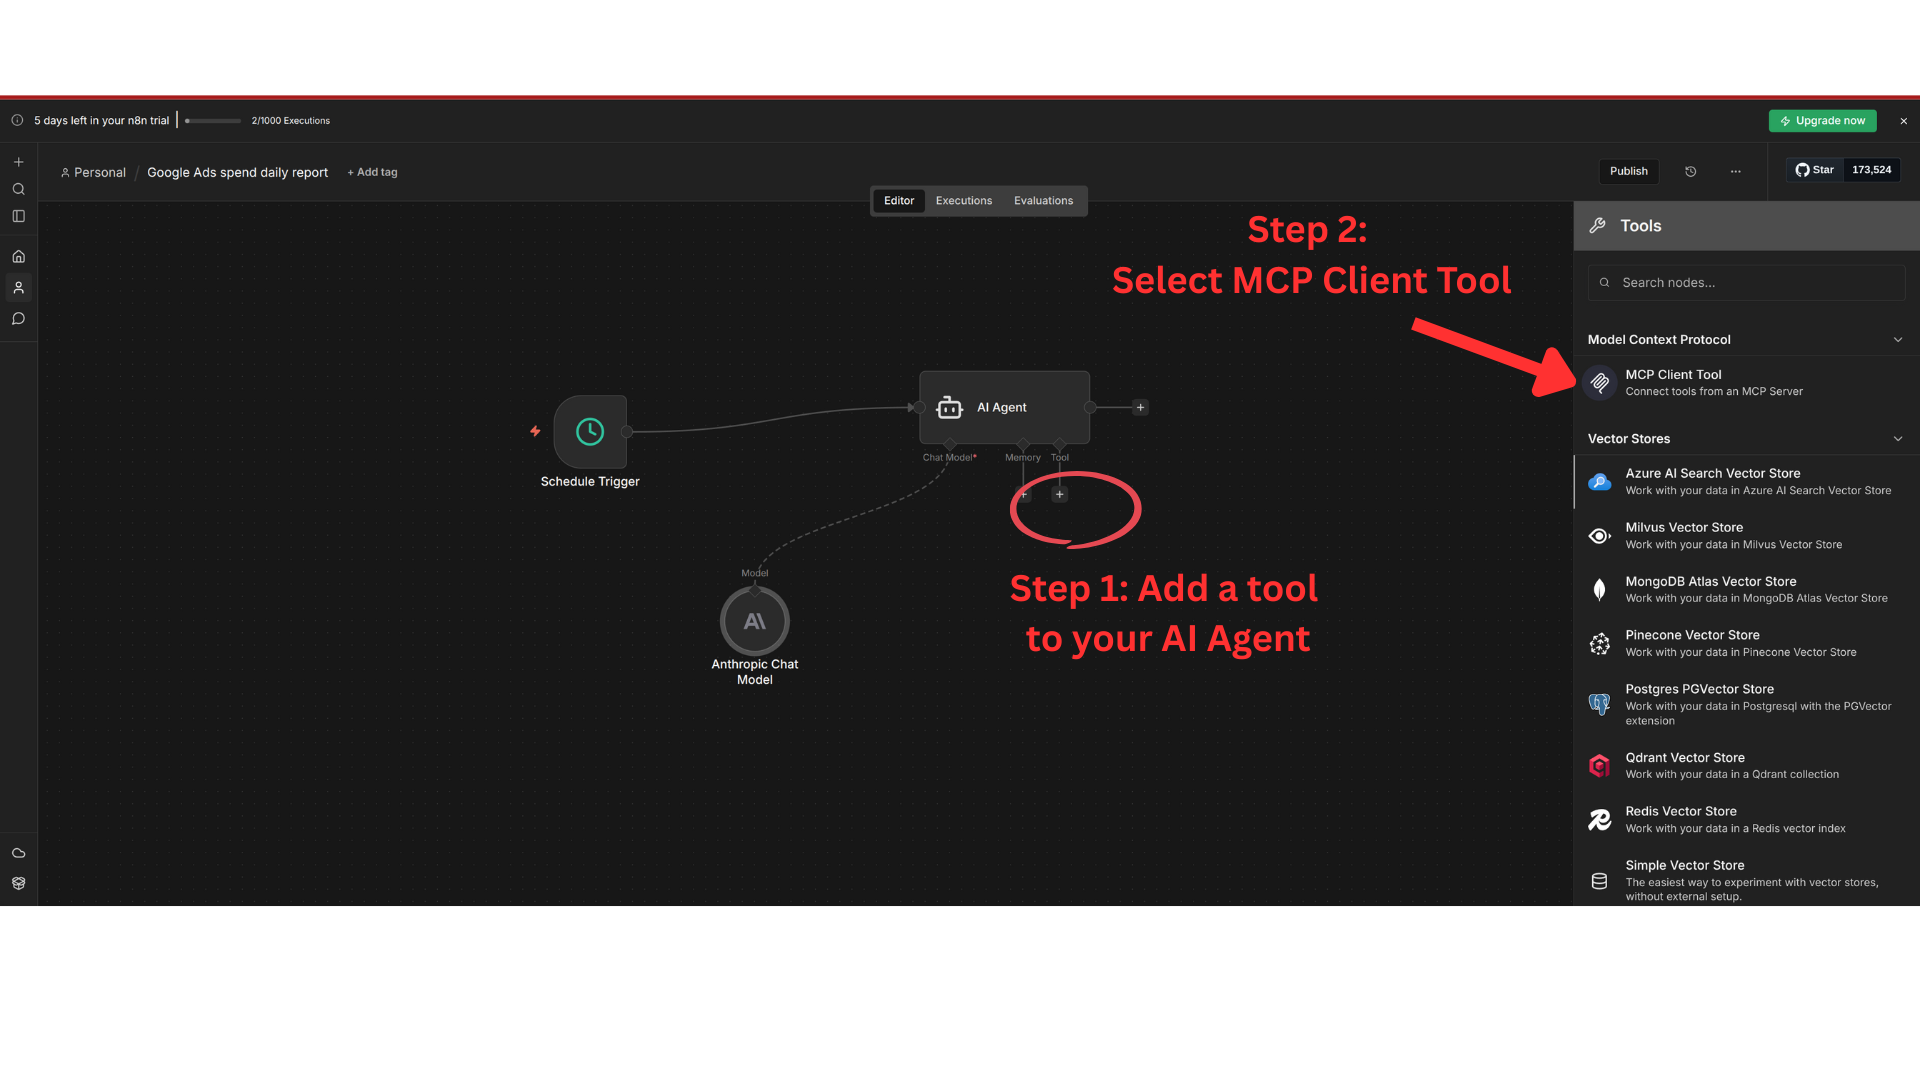
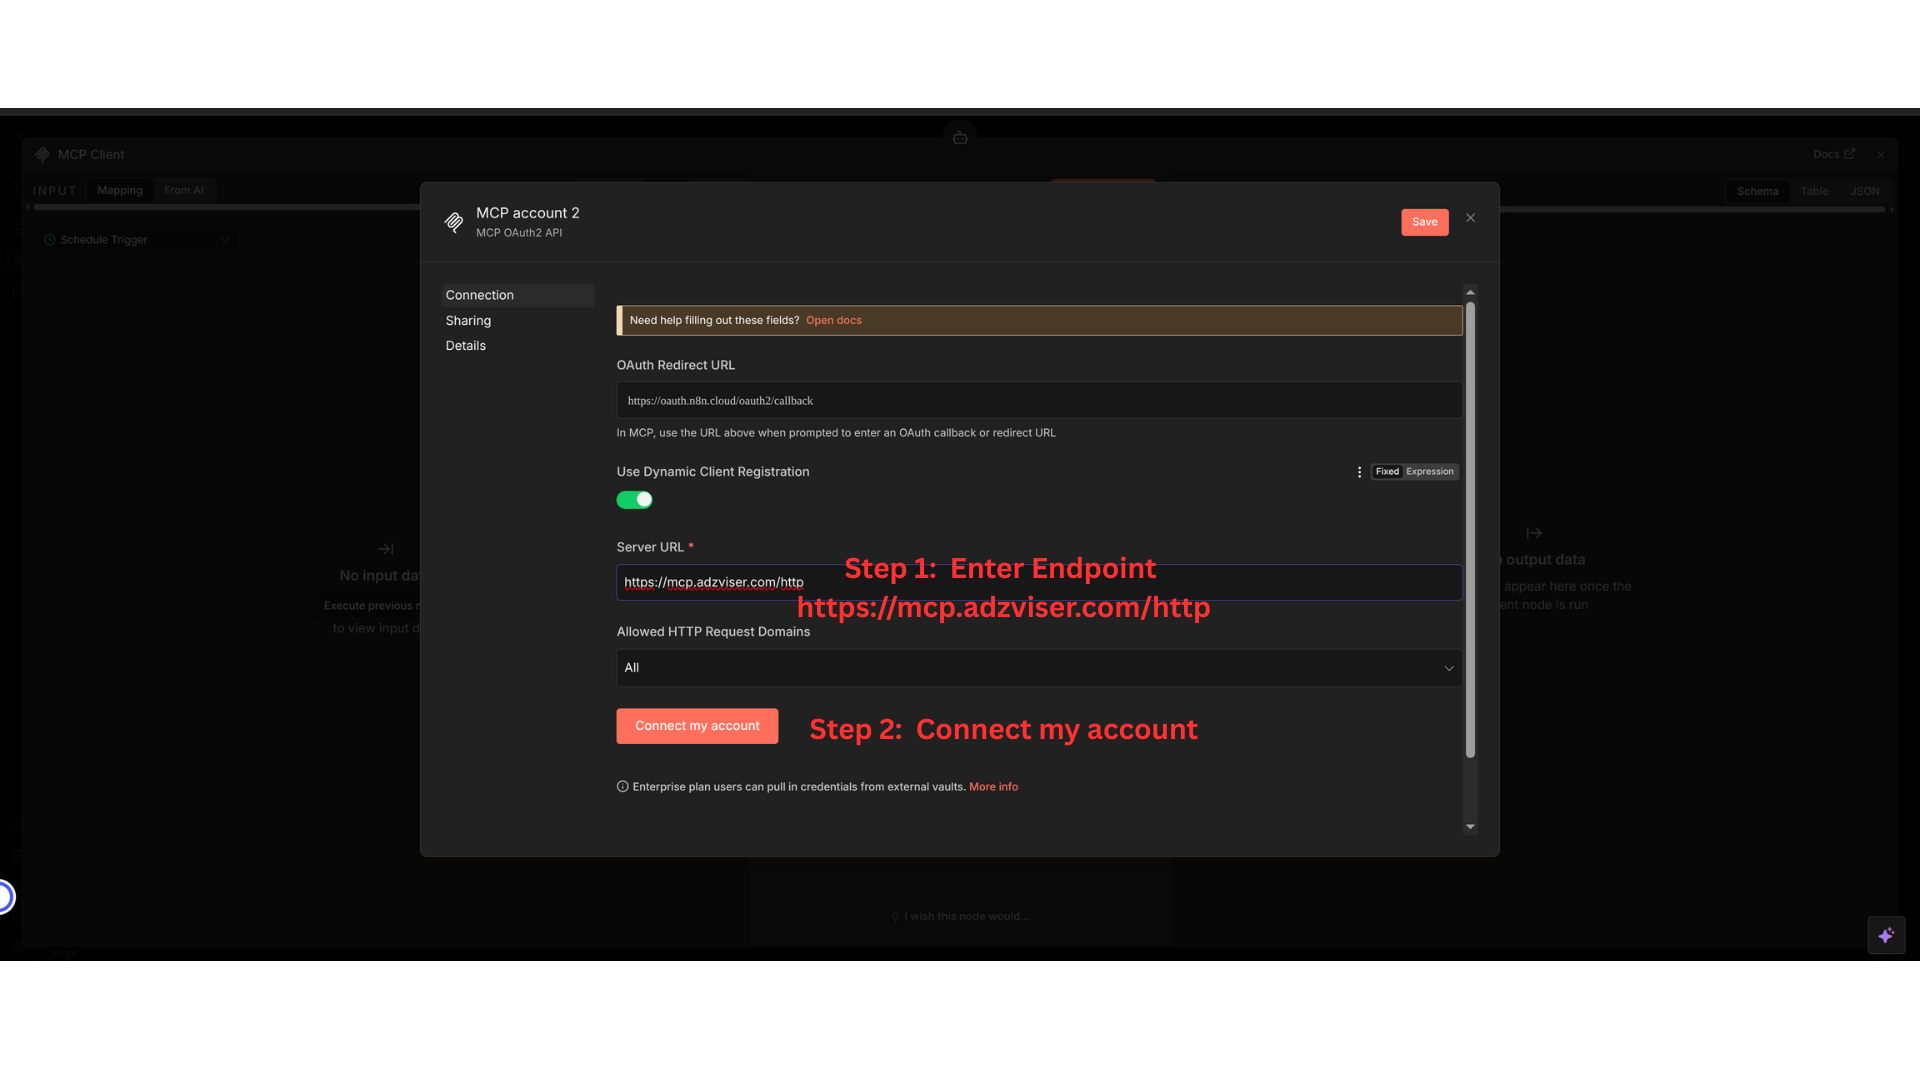
Step 3: Add and Configure Adzviser MCP Tool
Now add Adzviser as an MCP tool so the AI Agent can access your marketing data:
- Click the + button under Tools and select MCP
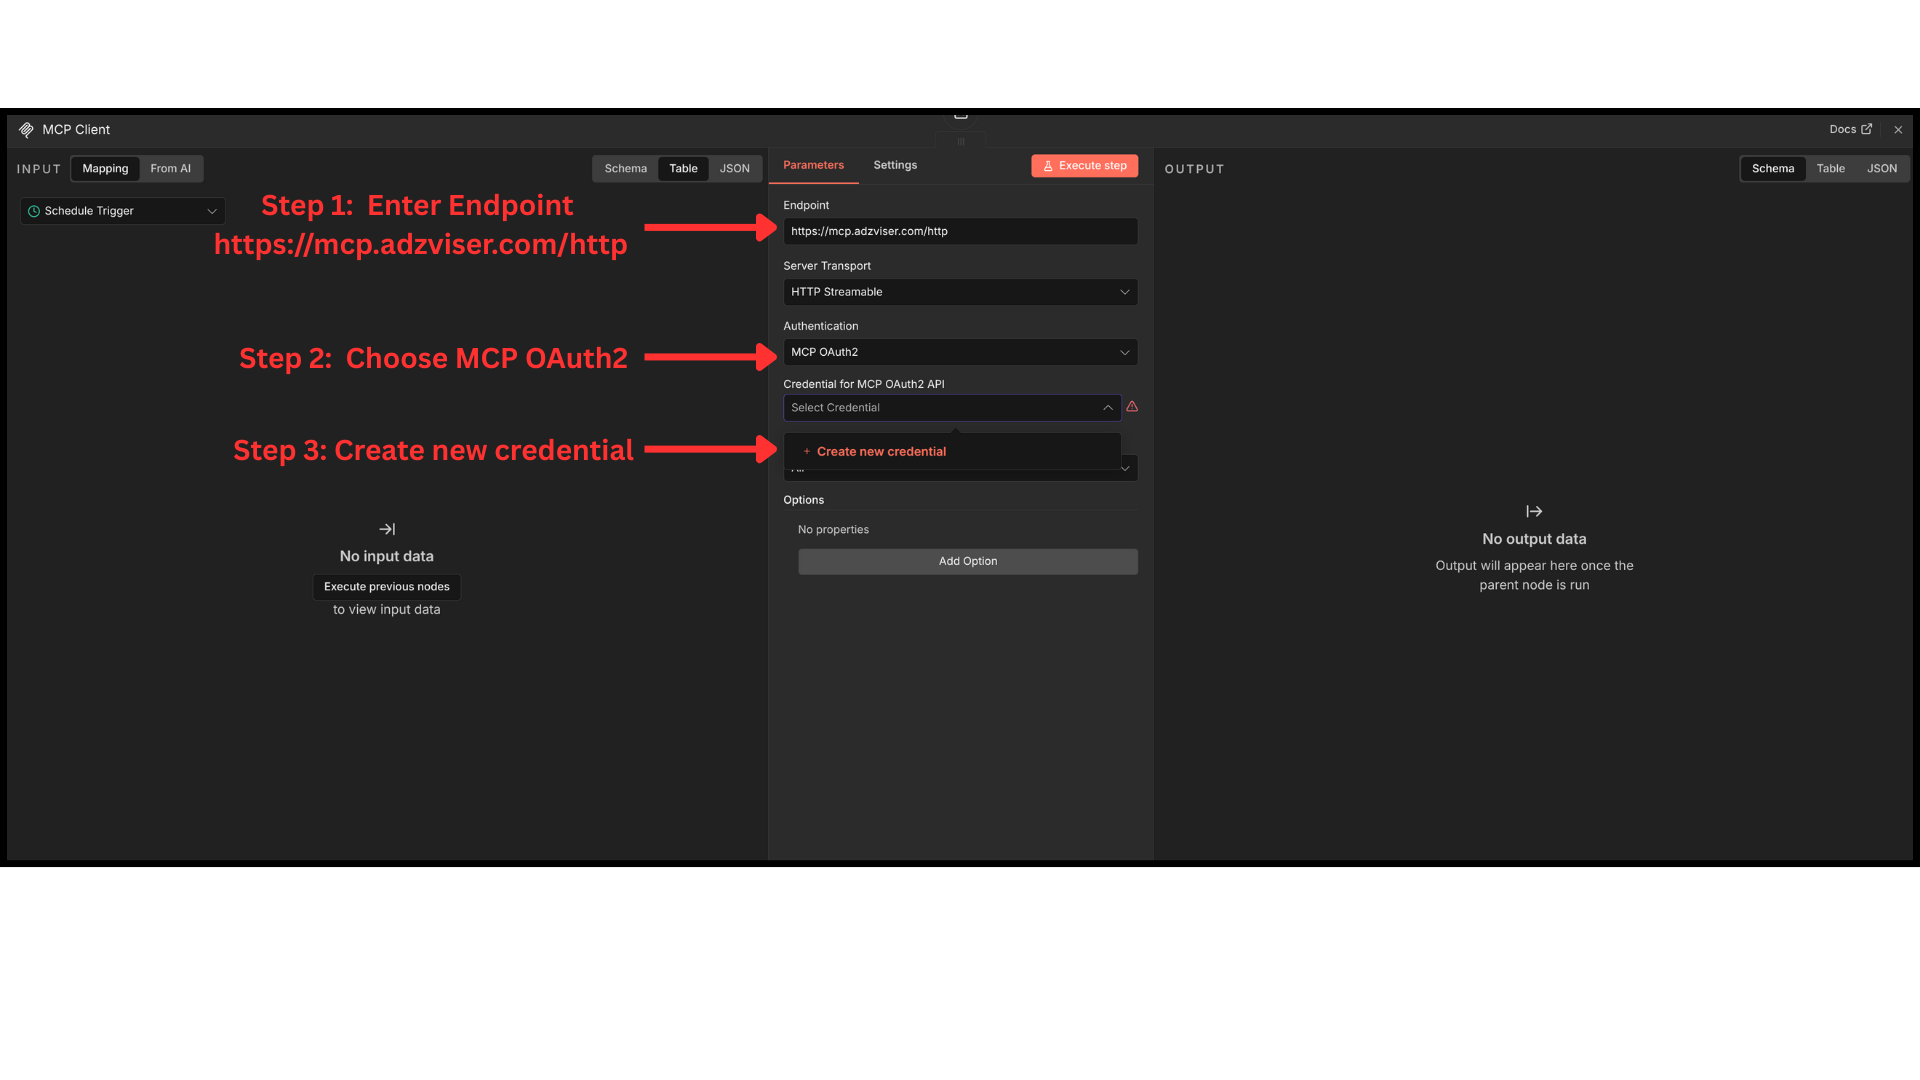
- Enter
https://mcp.adzviser.com/httpin Endpoint - Choose MCP OAuth2 for Authentication
- Click Create new credentials
Once the credentials setup window opens, enter https://mcp.adzviser.com/http for Server URL, then click Connect my account to complete the OAuth flow.
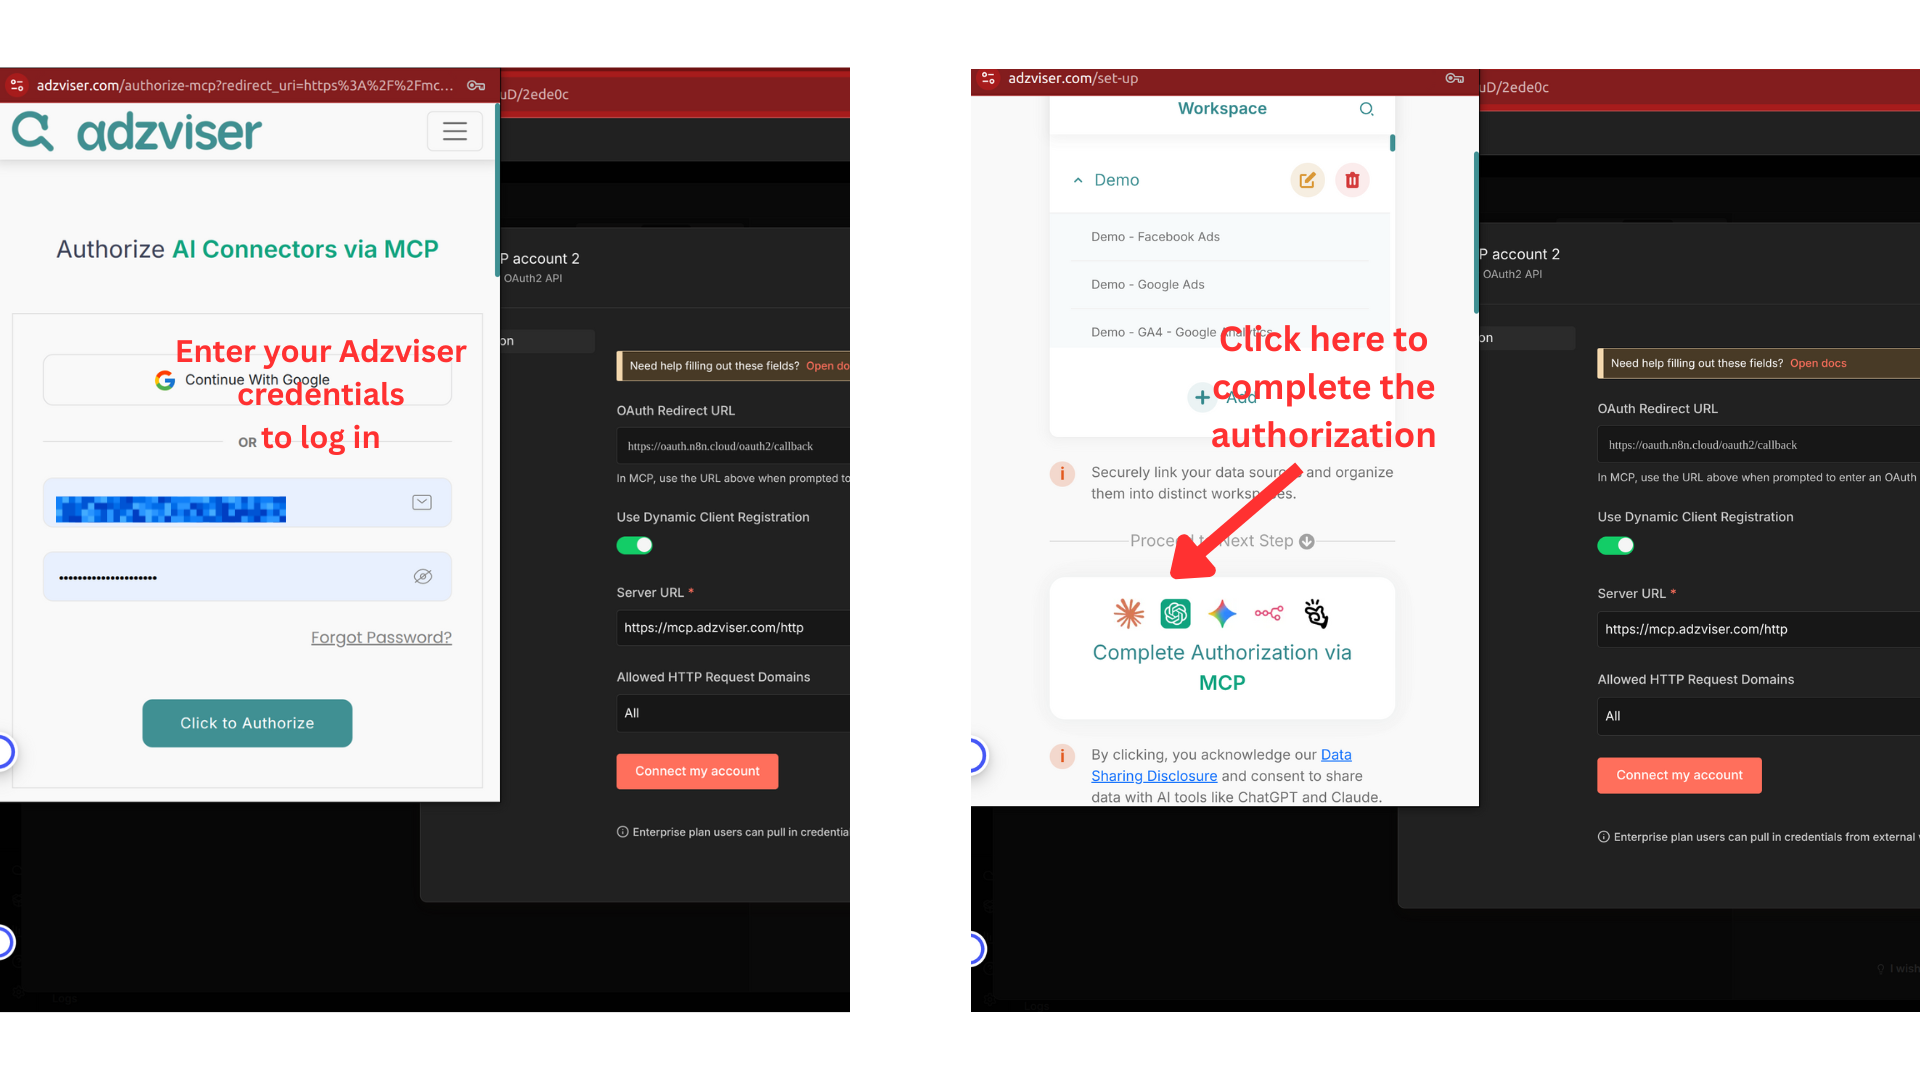
Step 4: Complete Authentication
Authorize n8n to access your Adzviser account:
Step 5: Enter Your Prompt
Configure what you want the AI Agent to do with your marketing data:
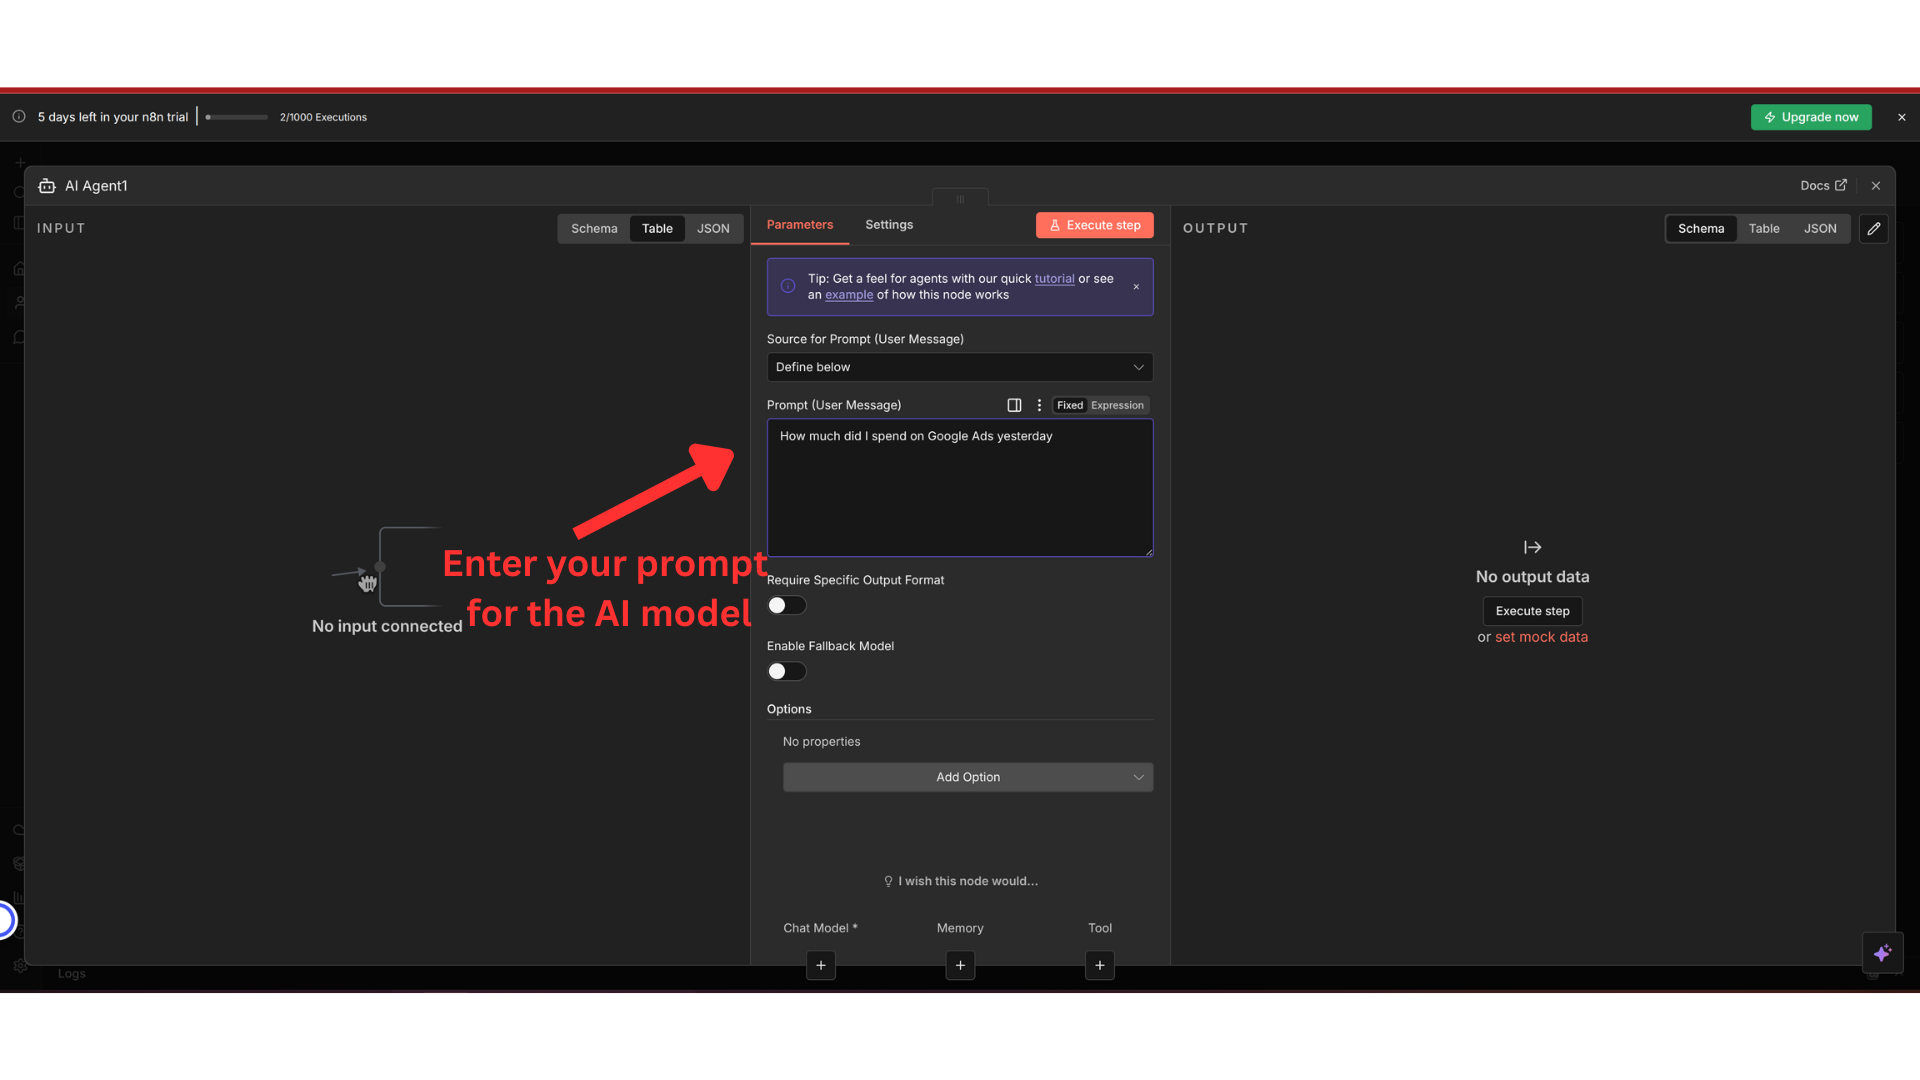
Example Prompts
Analyze my Google Ads performance for yesterday and create a summary report.Compare this week's ad spend and conversions across Google Ads, Facebook Ads, and LinkedIn Ads.Show me the top 5 best performing campaigns by ROAS from Facebook Ads this month.Generate a weekly Instagram engagement report with impressions, reach, and follower growth.List all Google Analytics 4 events from the past 7 days and highlight any traffic anomalies.Step 6: Configure Email Delivery (Optional)
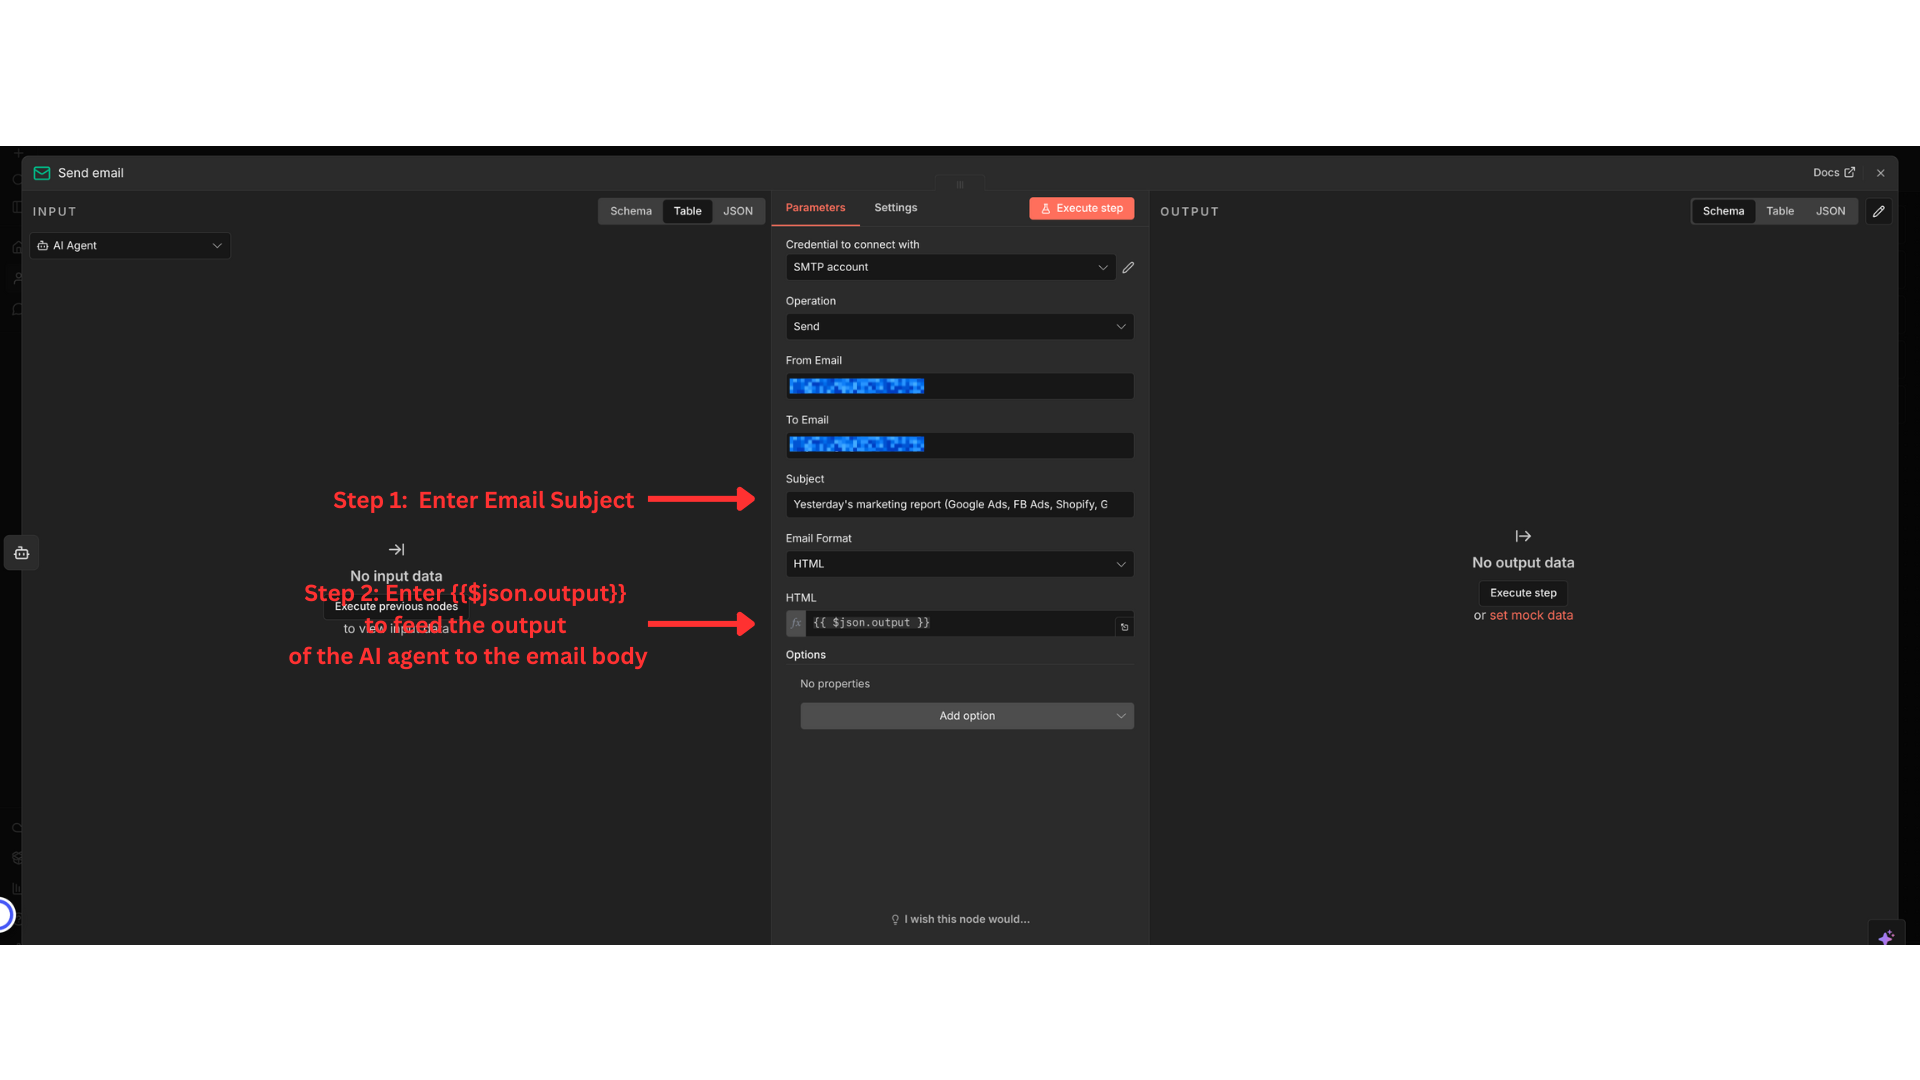
To automatically send reports via email, add an Email node:
- Set up email credentials for your "from" email to enable emailing
- Enter your email subject
- Enter
{{$json.output}}in the email body to include the AI-generated report
Step 7: Test and Deploy
- Test your workflow using the manual trigger
- Review the output to ensure the AI is generating useful reports
- Activate the workflow to run on schedule
Need help? Contact us at https://adzviser.com/contact-us.