Authentication from Excel
If you have used our ChatGPT integration or Google Sheets add-on, this process should be very familiar.
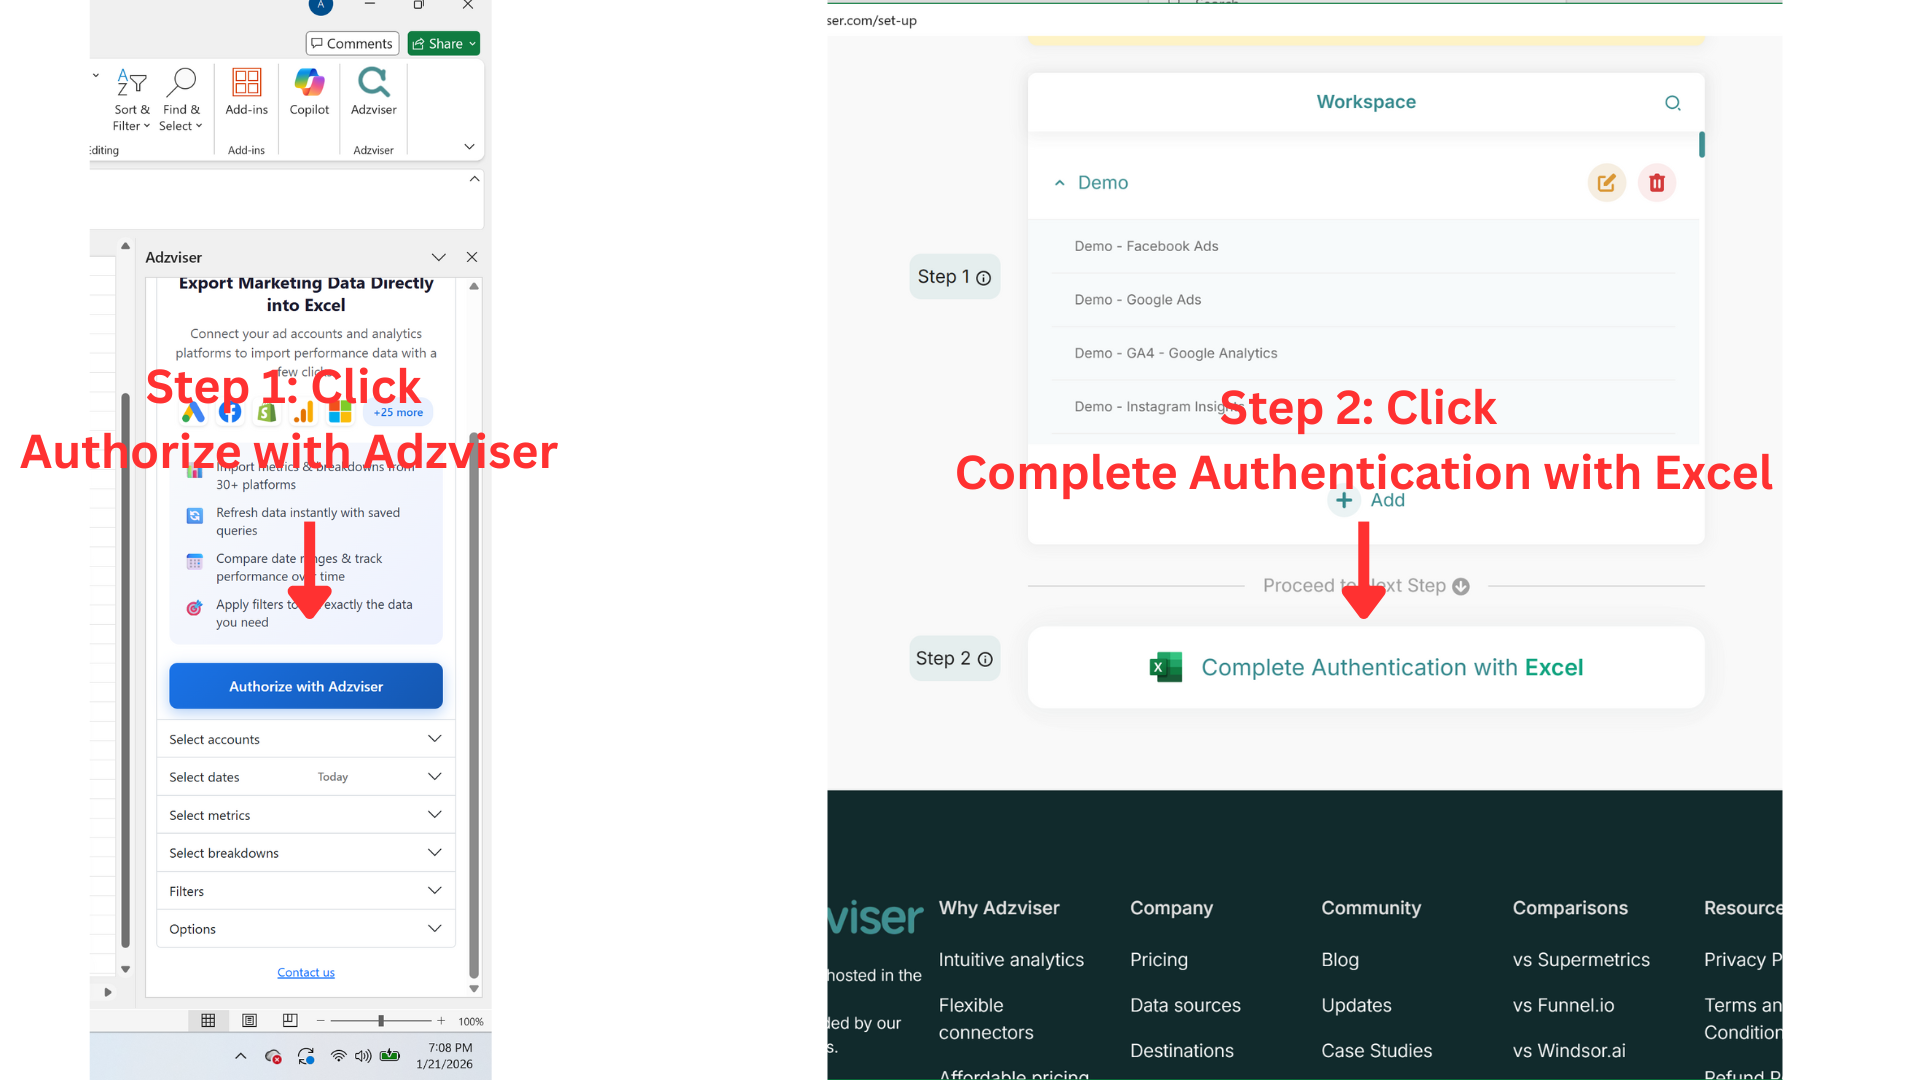
Step 1: Launch Adzviser Add-in
Open the Adzviser add-in by clicking on the Adzviser button in your Excel ribbon. The Adzviser task pane will appear on the right side of your Excel window.
Step 2: Click to Authorize
In the Adzviser task pane, you'll see an "Authorize with Adzviser" button. Click it to begin the authentication process.
A browser window will open, prompting you to sign in to your Adzviser account:
- Existing users: Enter your email and password, then select "Click to Authorize"
- New users: You can sign up for an Adzviser account or use "Continue with Google" for quick access
More instructions on how to sign up for a new account can be found here.
Step 3: Complete the OAuth Flow
Once you have:
- Upgraded your subscription plan
- Created your workspace
- Connected your data sources
You are ready to complete the OAuth flow. Click "Complete Authentication with Excel" in the browser window. You should see a confirmation message: "Authorization complete. Please close this window."
Close the browser tab and return to Excel. The Adzviser task pane should now show your connected workspaces and accounts.
You're all set! You can now start pulling marketing and sales data directly into Excel.
Helpful Links
Troubleshooting
If you encounter issues during authentication:
- Clear browser cache: Try clearing your browser cache and cookies, then retry the authorization
- Check subscription status: Ensure your Adzviser subscription is active at adzviser.com/set-up
- Contact support: If issues persist, reach out to our support team for assistance