Get started with Adzviser in Power BI
Watch this guide to using Adzviser in Power BI
Pre-requisites
To start using Adzviser's custom connector in Power BI, marketers should first complete two pre-requisites:
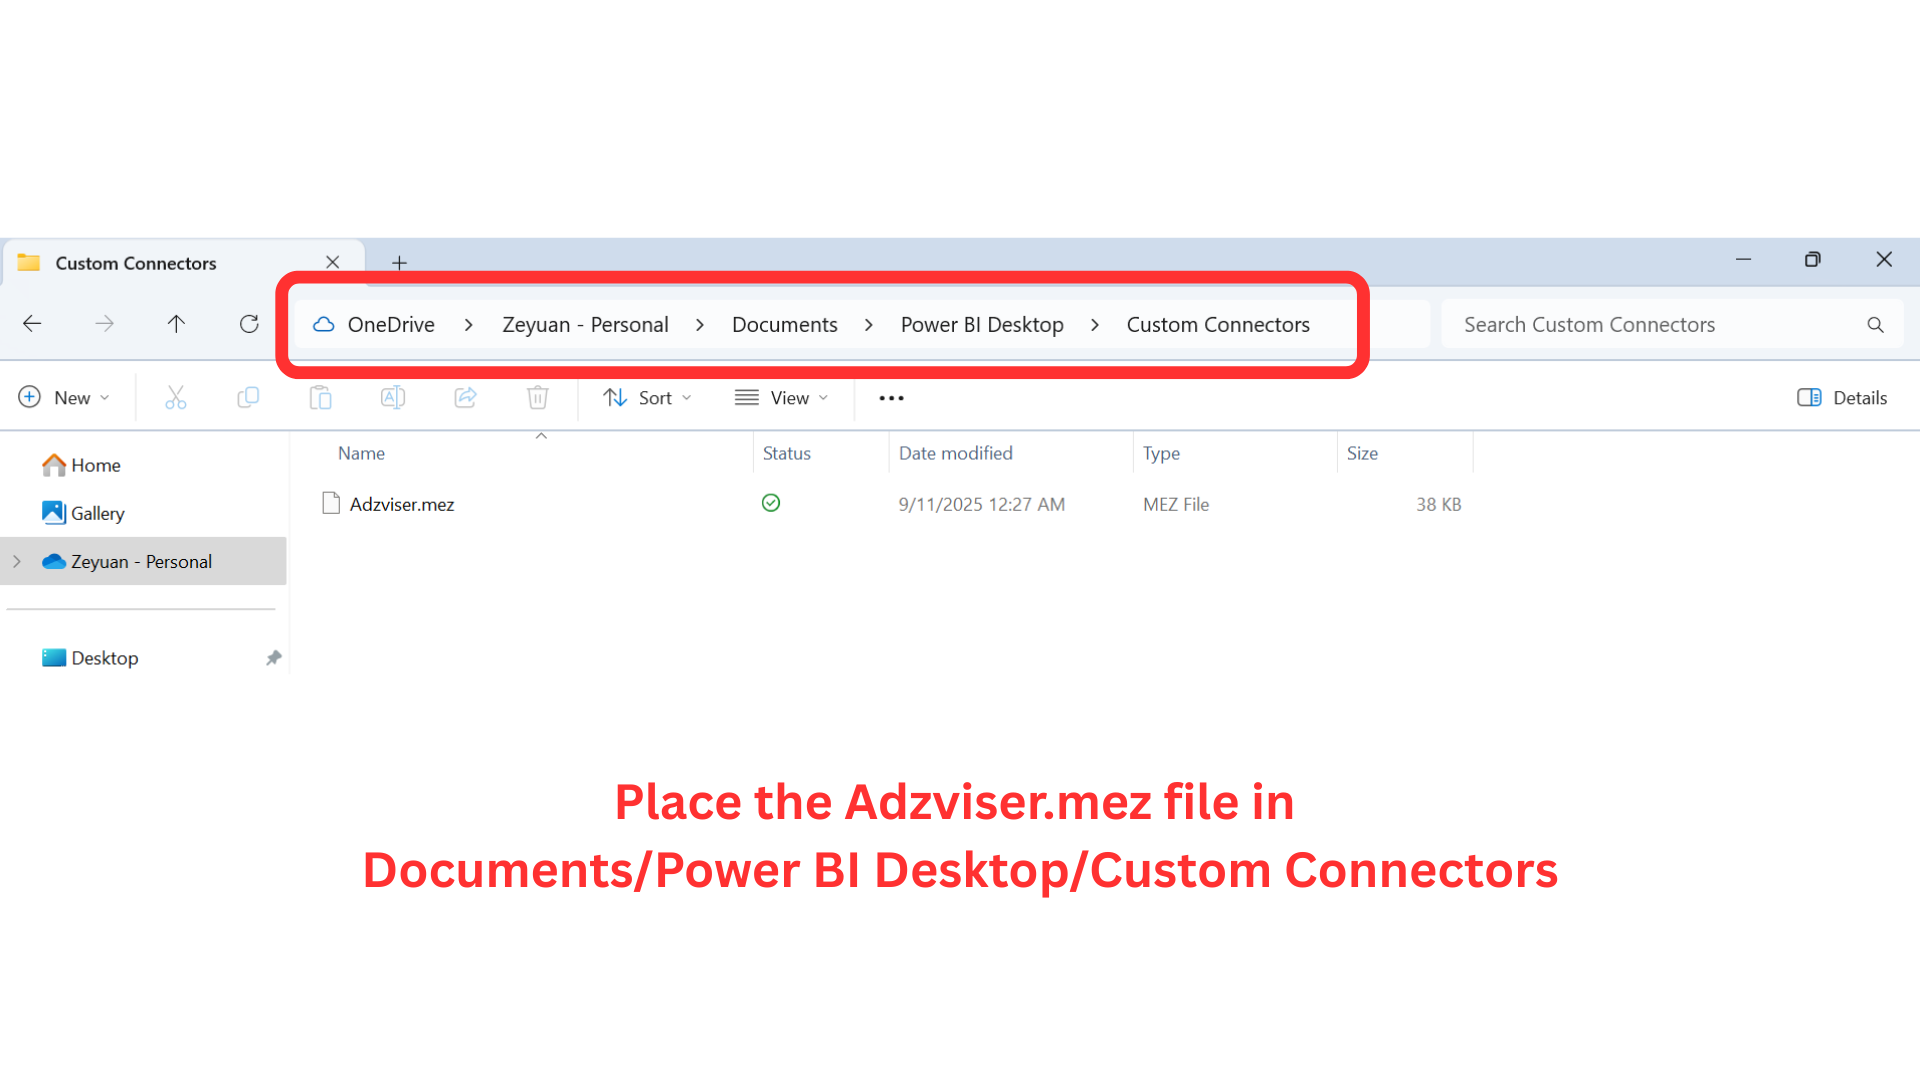
Step 1: Download and place Adzviser.mez file in the correct directory
Download our Power BI custom connector file (.mez) from here, unzip it, and place the Adzviser.mez file into the Documents/Power BI Desktop/Custom Connectors folder on your PC.
Tip: If your PC is synced with OneDrive, the correct path may be OneDrive/Documents/Power BI Desktop/Custom Connectors instead.
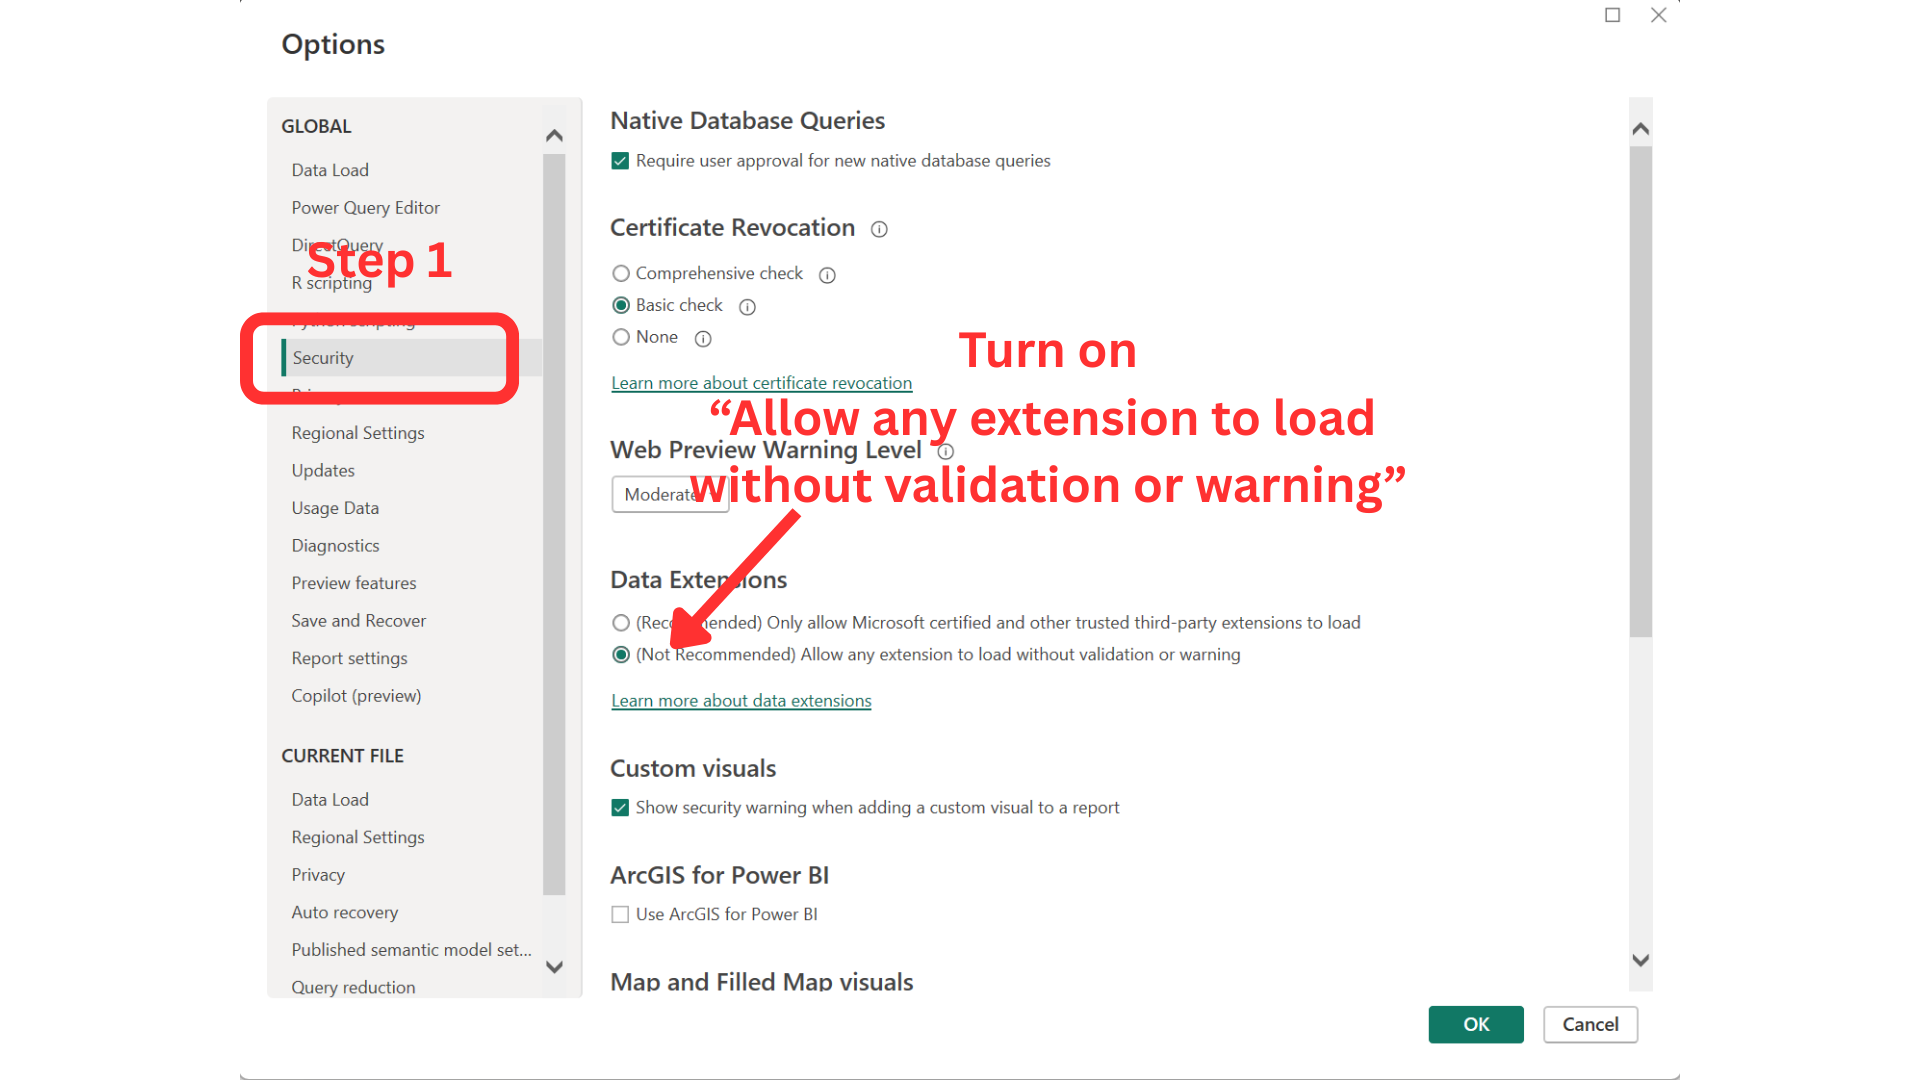
Step 2: Allow custom connectors in Power BI Desktop
Make sure that you've installed Power BI Desktop on your PC. You can download Power BI Desktop from here.
Then navigate to File > Options and settings > Options > Security, then selecting the checkbox for Allow any extension to load without validation or warning under the Data Extensions section. After making this change, please restart Power BI Desktop to apply the new settings.
Authorization
To retrieve your marketing & sales data from various platforms, you need to authorize Adzviser through OAuth. This process should be very familiar if you already use our GPTs and/or Google Sheets add-on.
Step 3: Locate Adzviser connectors
Go to Get data > More....

Step 4: Search Adzviser connector
In the search bar, type "Adzviser" to find your newly added custom connector.
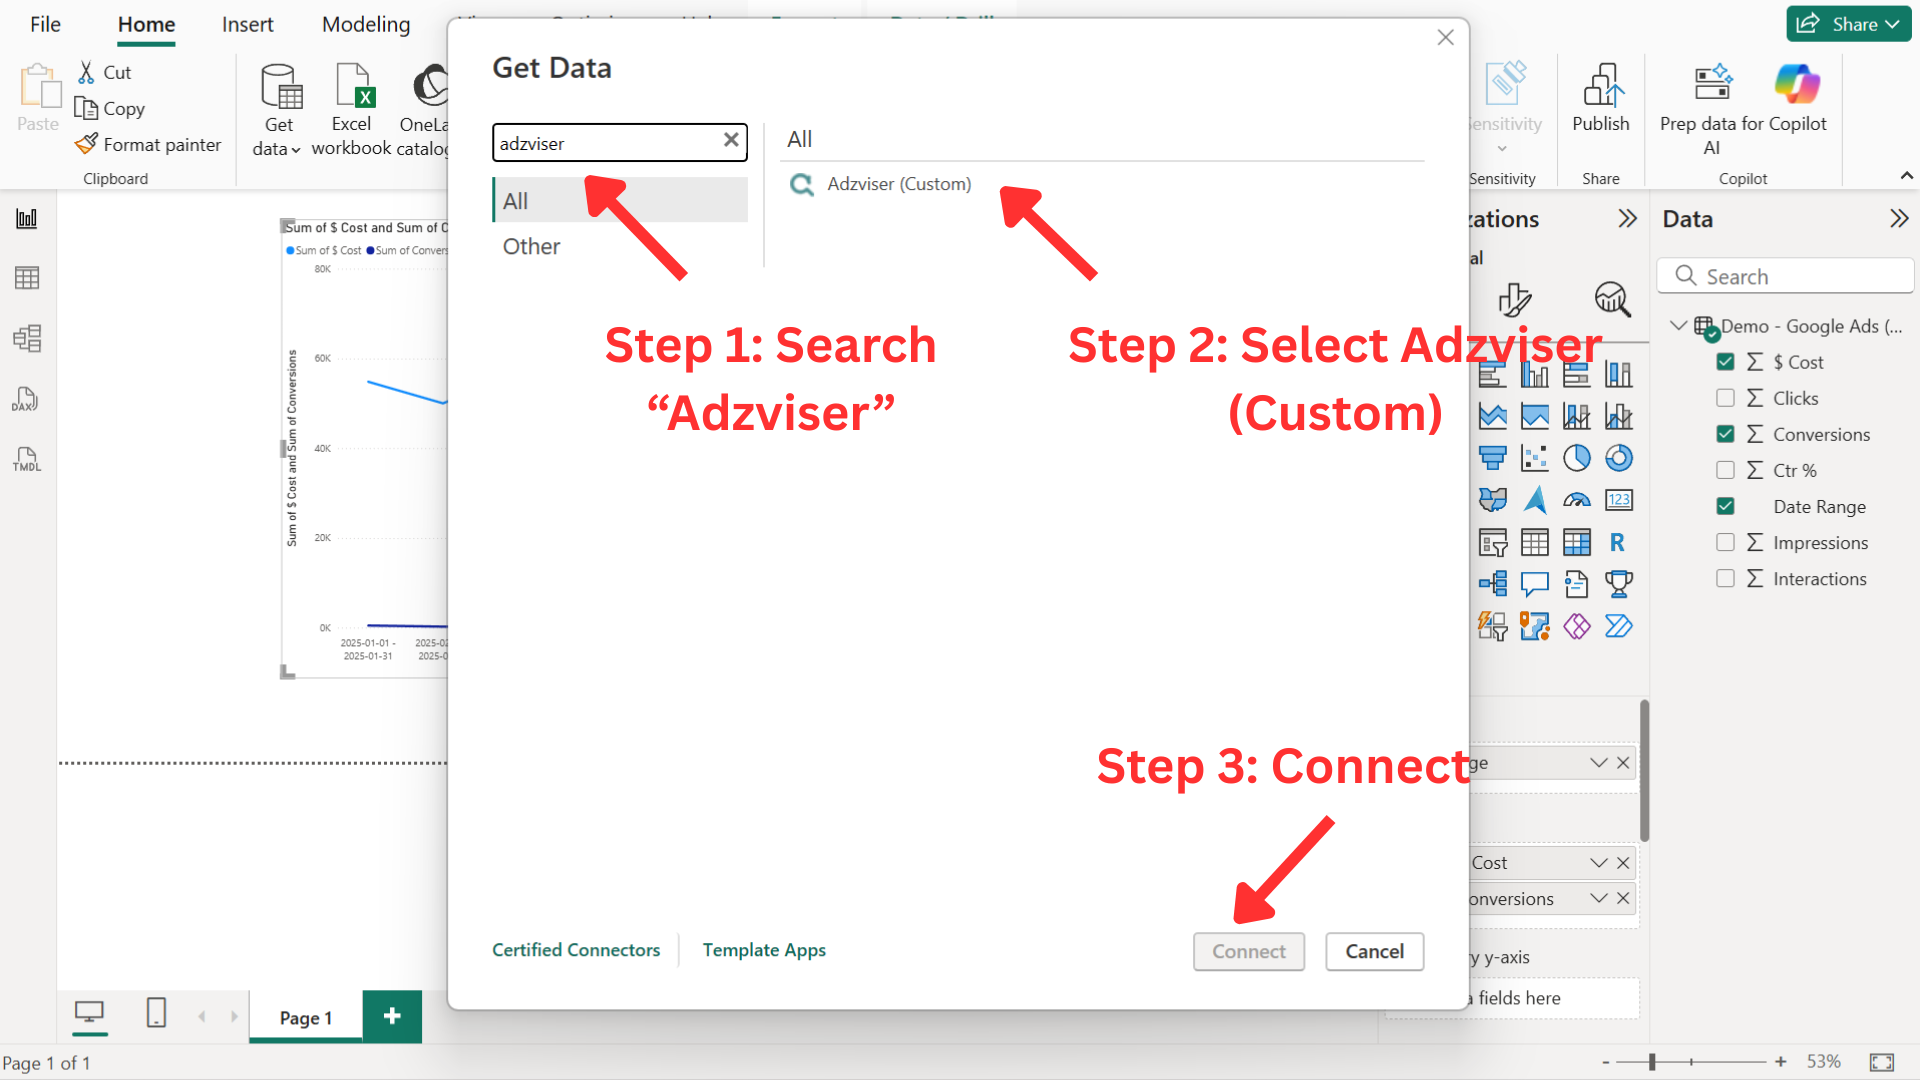
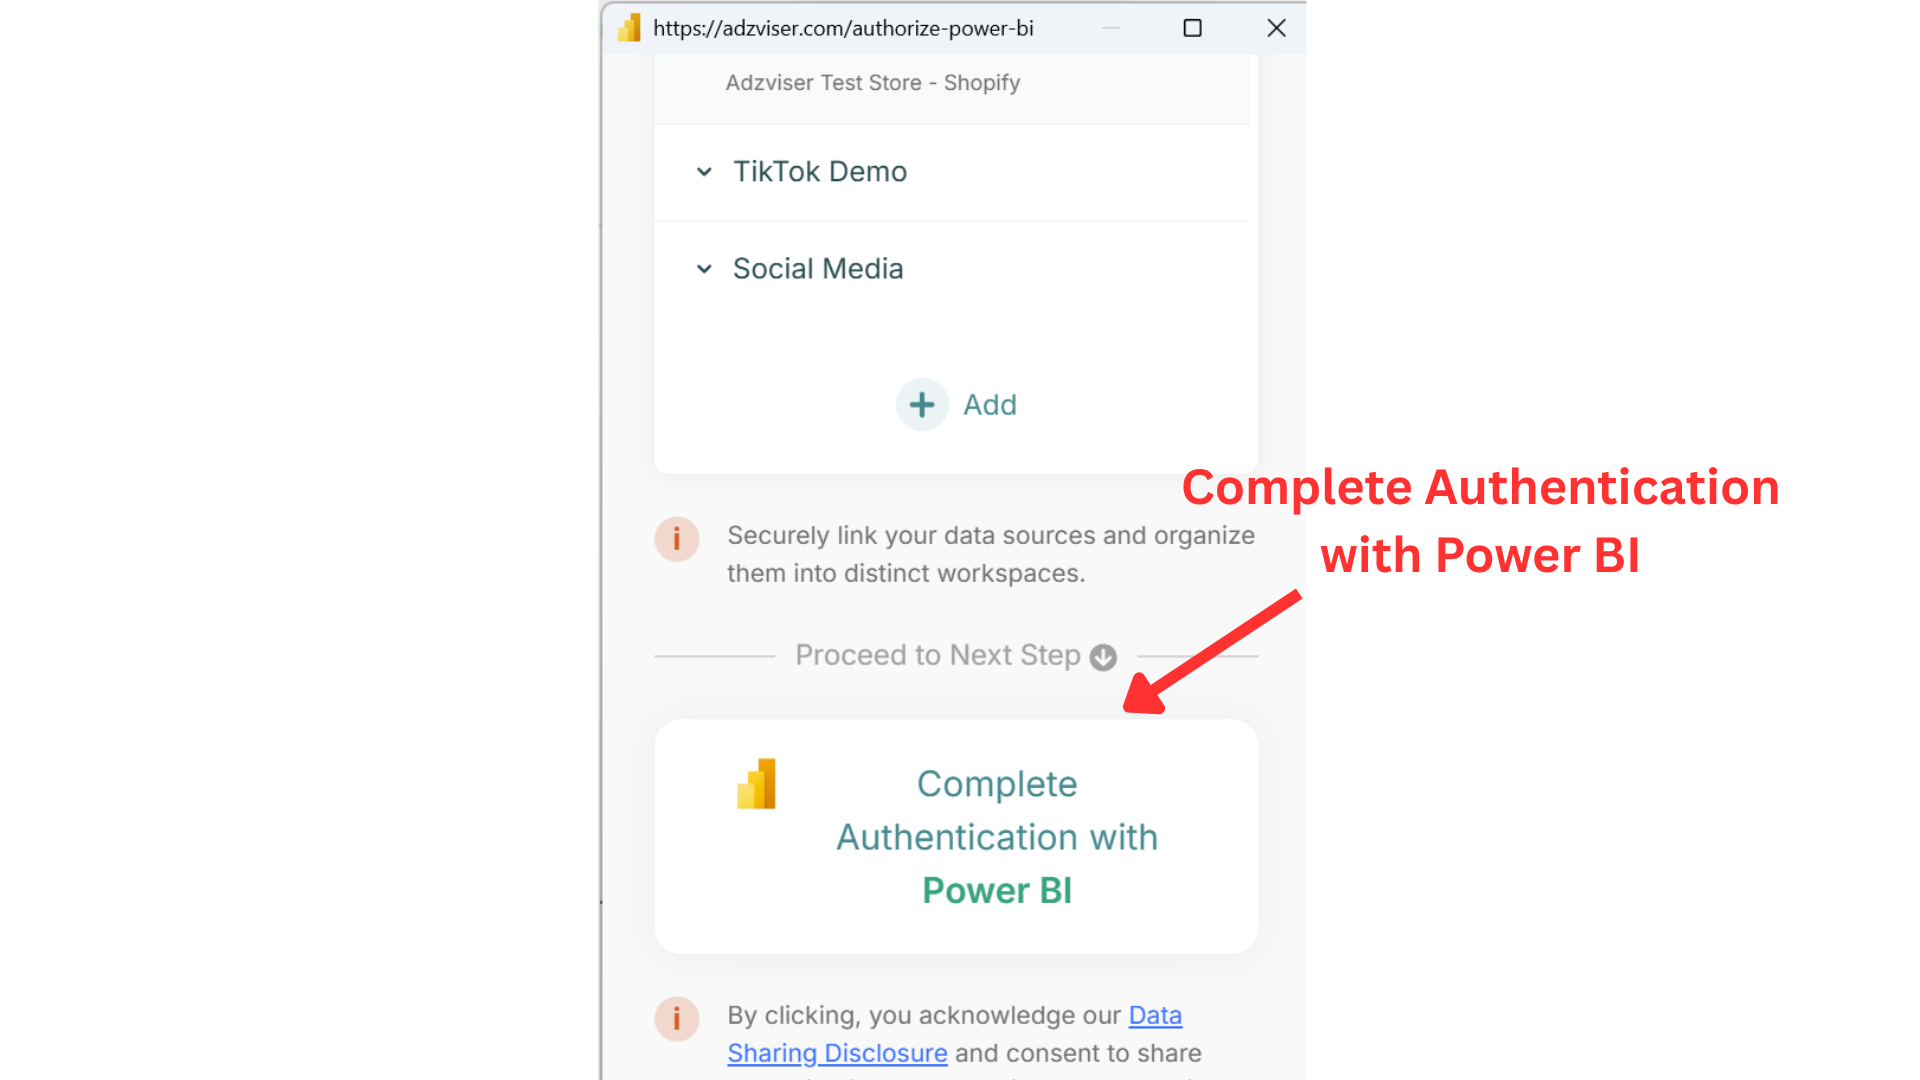
Step 5: Connect Adzviser via OAuth
After selecting the Adzviser connector, click Connect. This will redirect you to Adzviser to complete the OAuth process. If you are already an Adzviser user, please simply enter your login credentials and select "Click to Authorize". New users can either sign up for an Adzviser account or choose “Continue with Google” for immediate access to the Adzviser homepage.
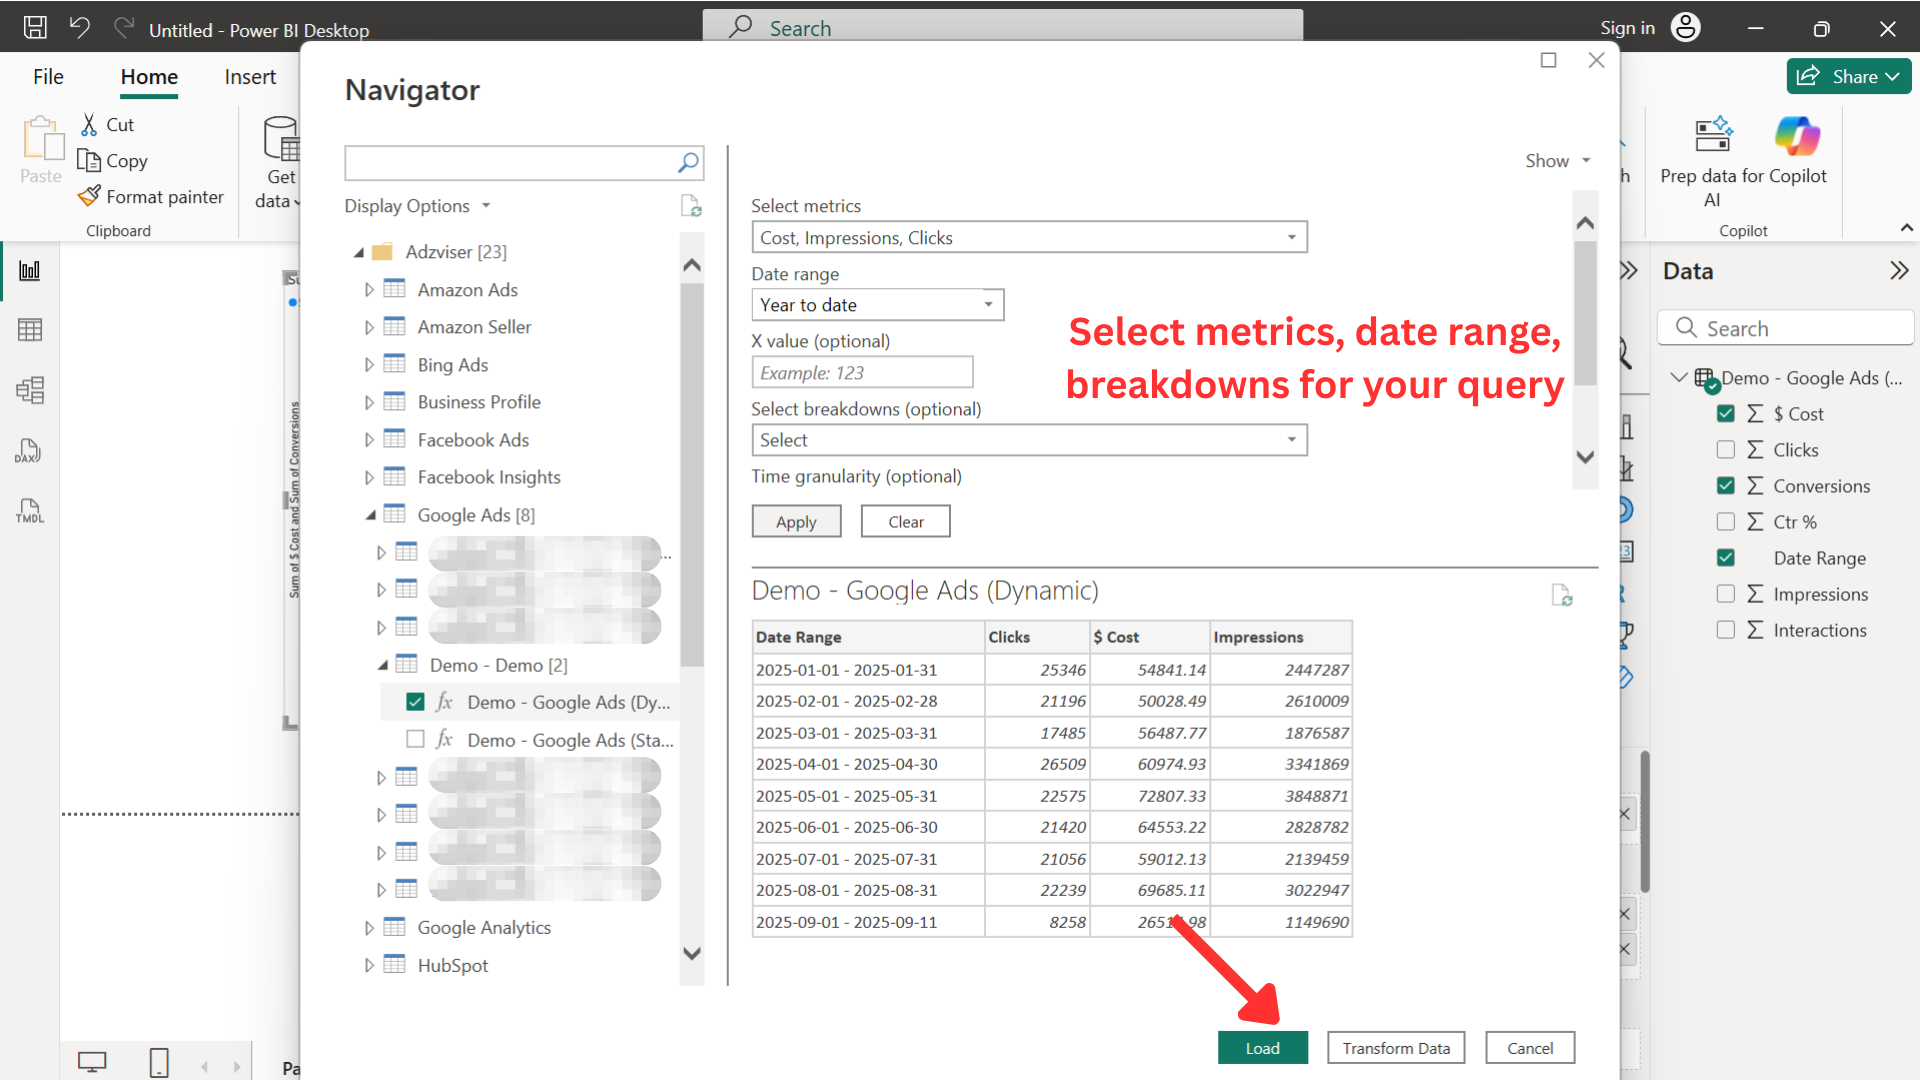
Step 6: Select metrics, breakdowns and date range
After successfully connecting Adzviser to Power BI, you can select the data source, metrics, breakdowns, and date range to pull in your marketing & sales data. Once you are done with your selection, click Load to load the data into Power BI.