Amazon S3 Pipeline Setup Guide: Export Marketing Data to Your S3 Bucket
This guide walks you through creating an automated data pipeline that exports your marketing and sales data to Amazon S3.
Prerequisites
Before you begin, make sure you have:
- An Adzviser account with at least one connected data source (Sign up here)
- An AWS account with an S3 bucket already created (Create an S3 bucket)
- AWS IAM access keys with the
AmazonS3FullAccesspermission policy
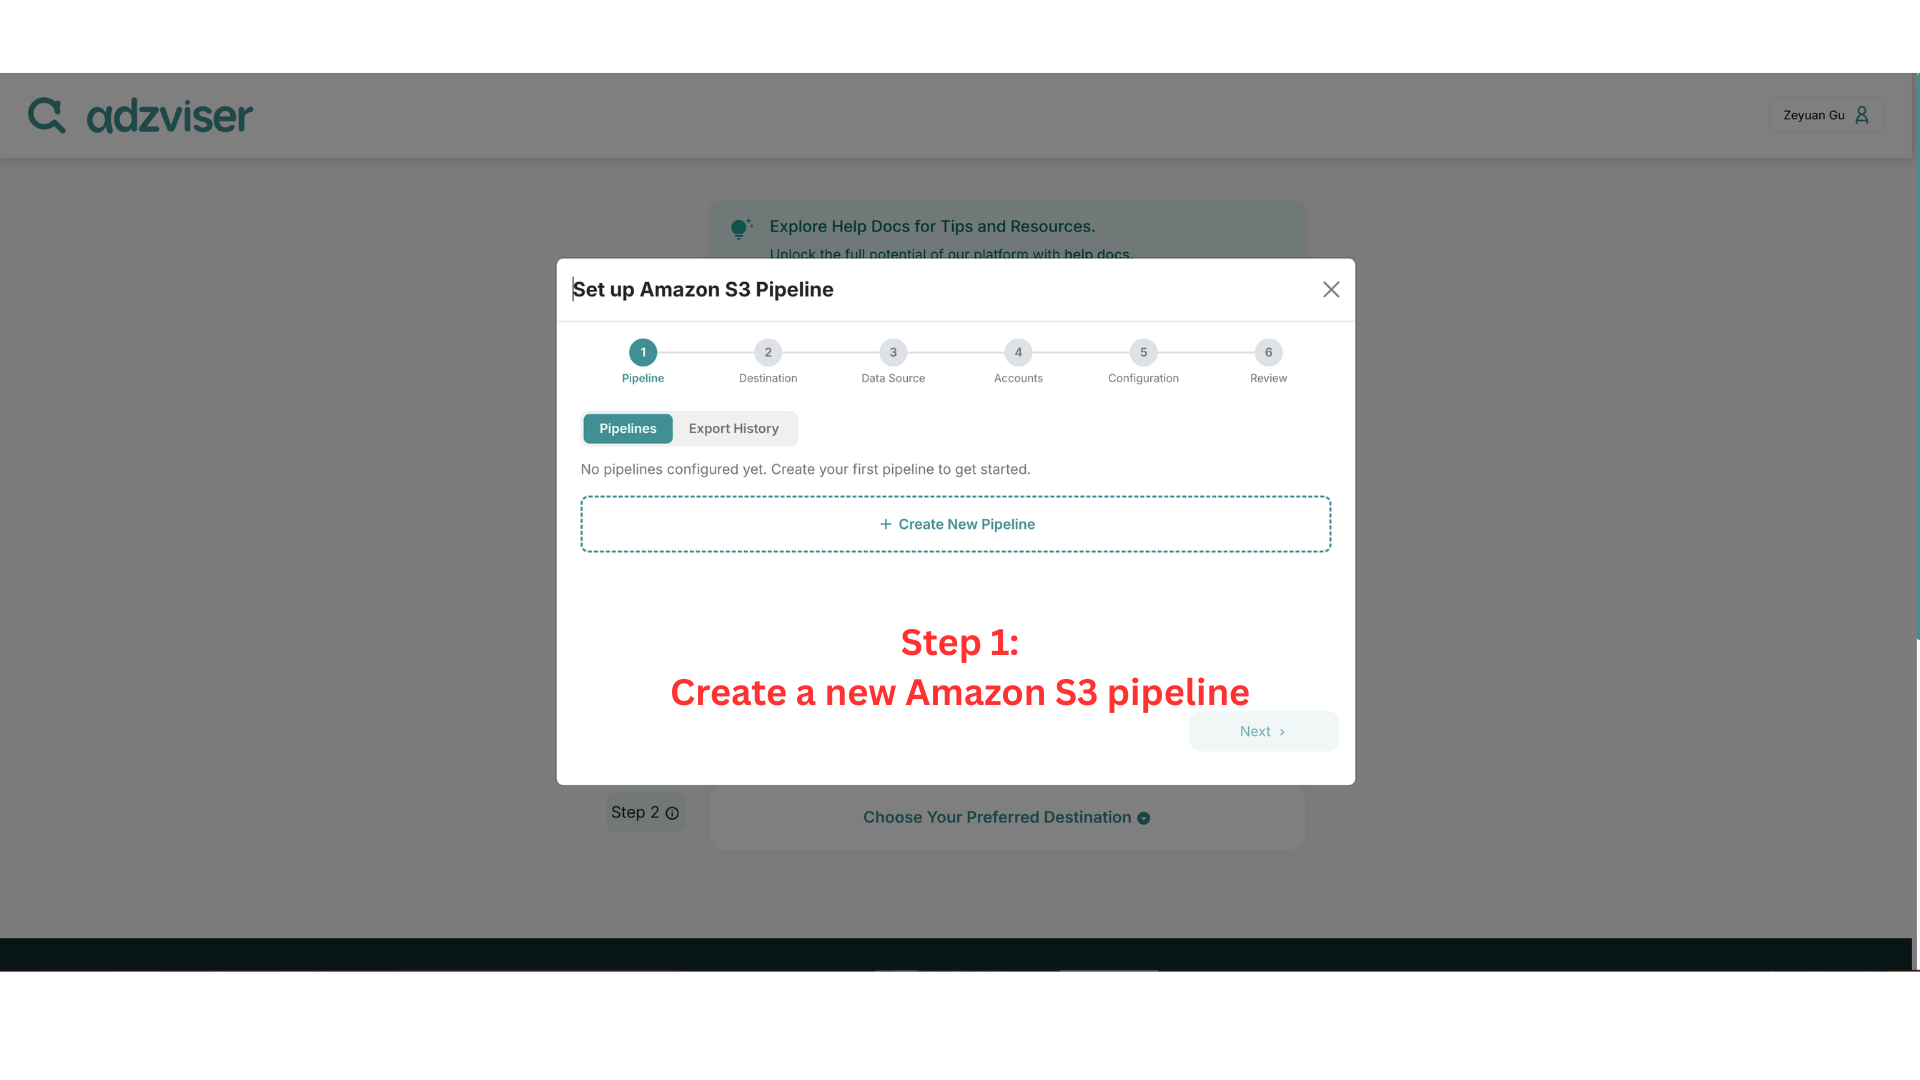
Step 1: Create a New Pipeline
Navigate to the Set Up page on Adzviser and select Amazon S3 as your destination. Click + Create New Pipeline to begin.
Step 2: Create an AWS Access Key
To allow Adzviser to write to your S3 bucket, you need an AWS access key. In the AWS Console:
- Navigate to IAM > Security credentials
- Scroll down to the Access keys section
- Click Create access key
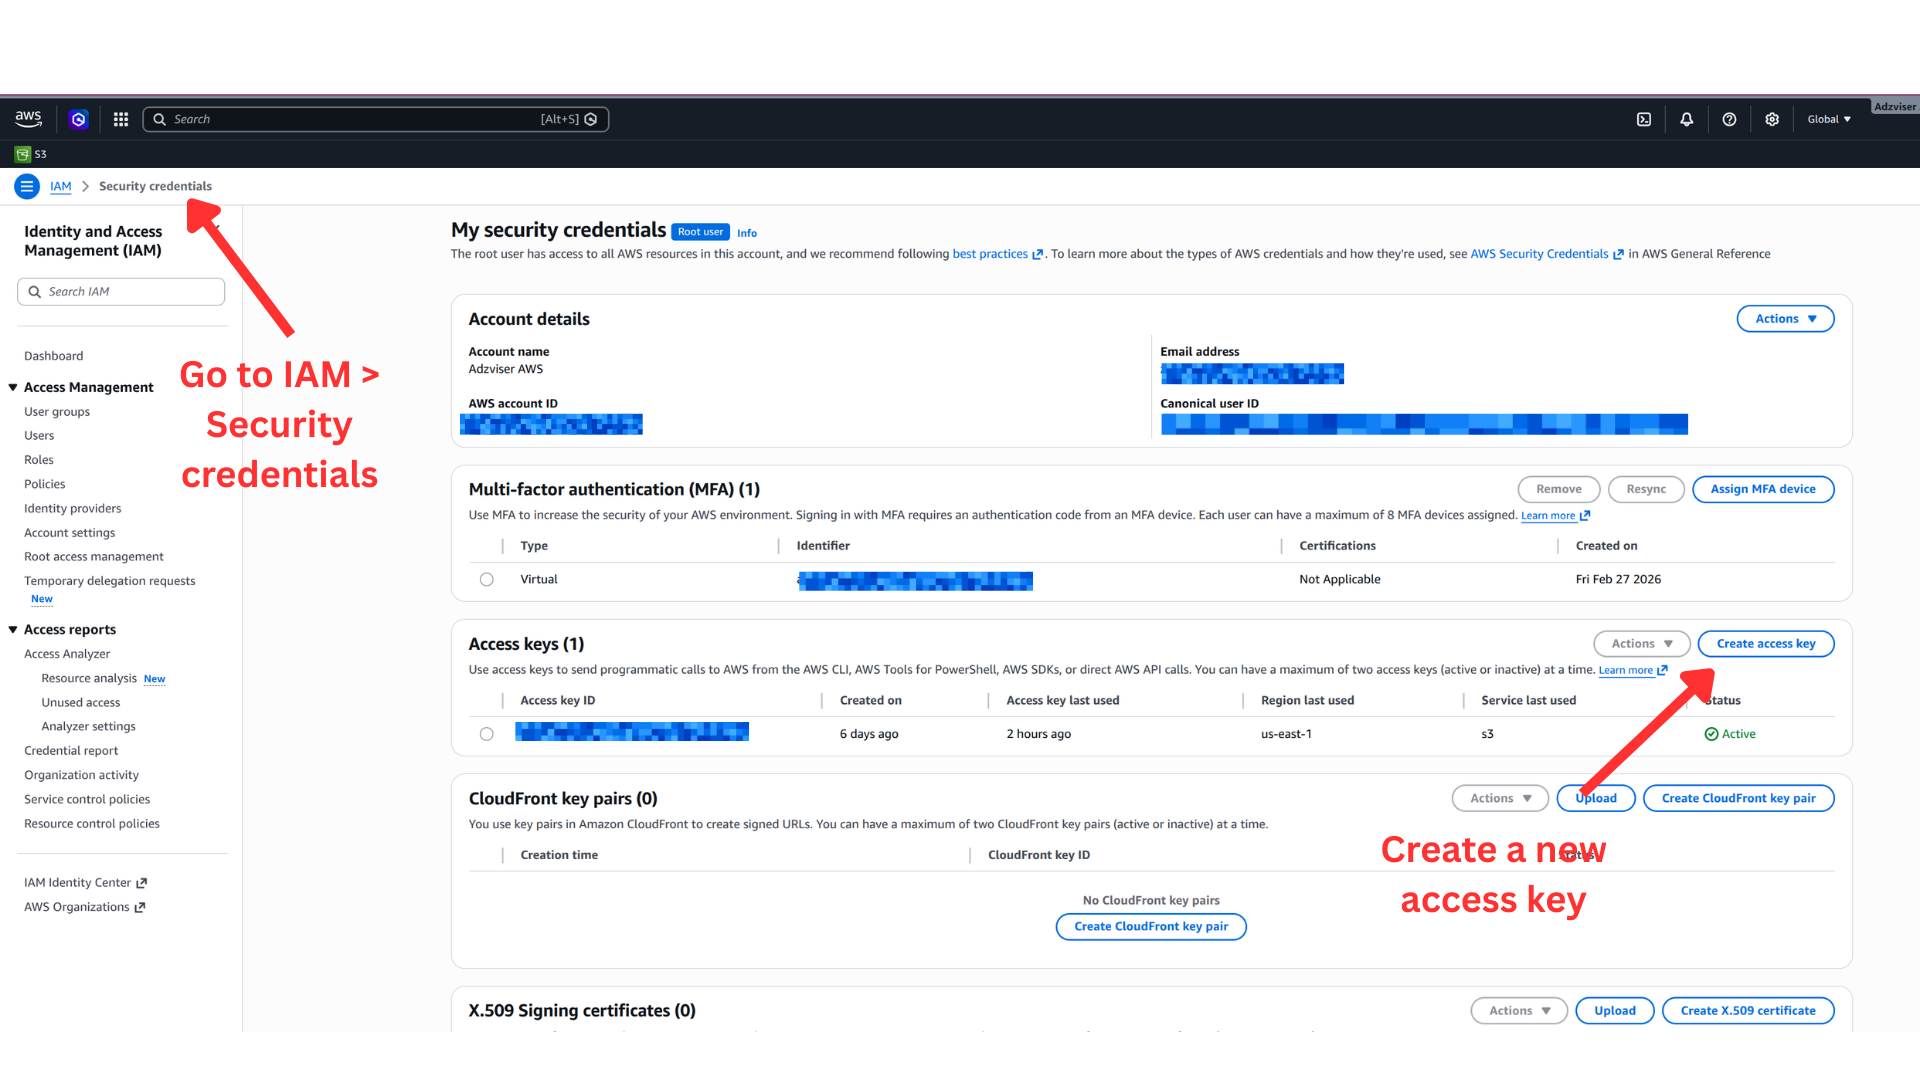
Store your secret access key securely — AWS only shows it once. If you lose it, you'll need to create a new key.
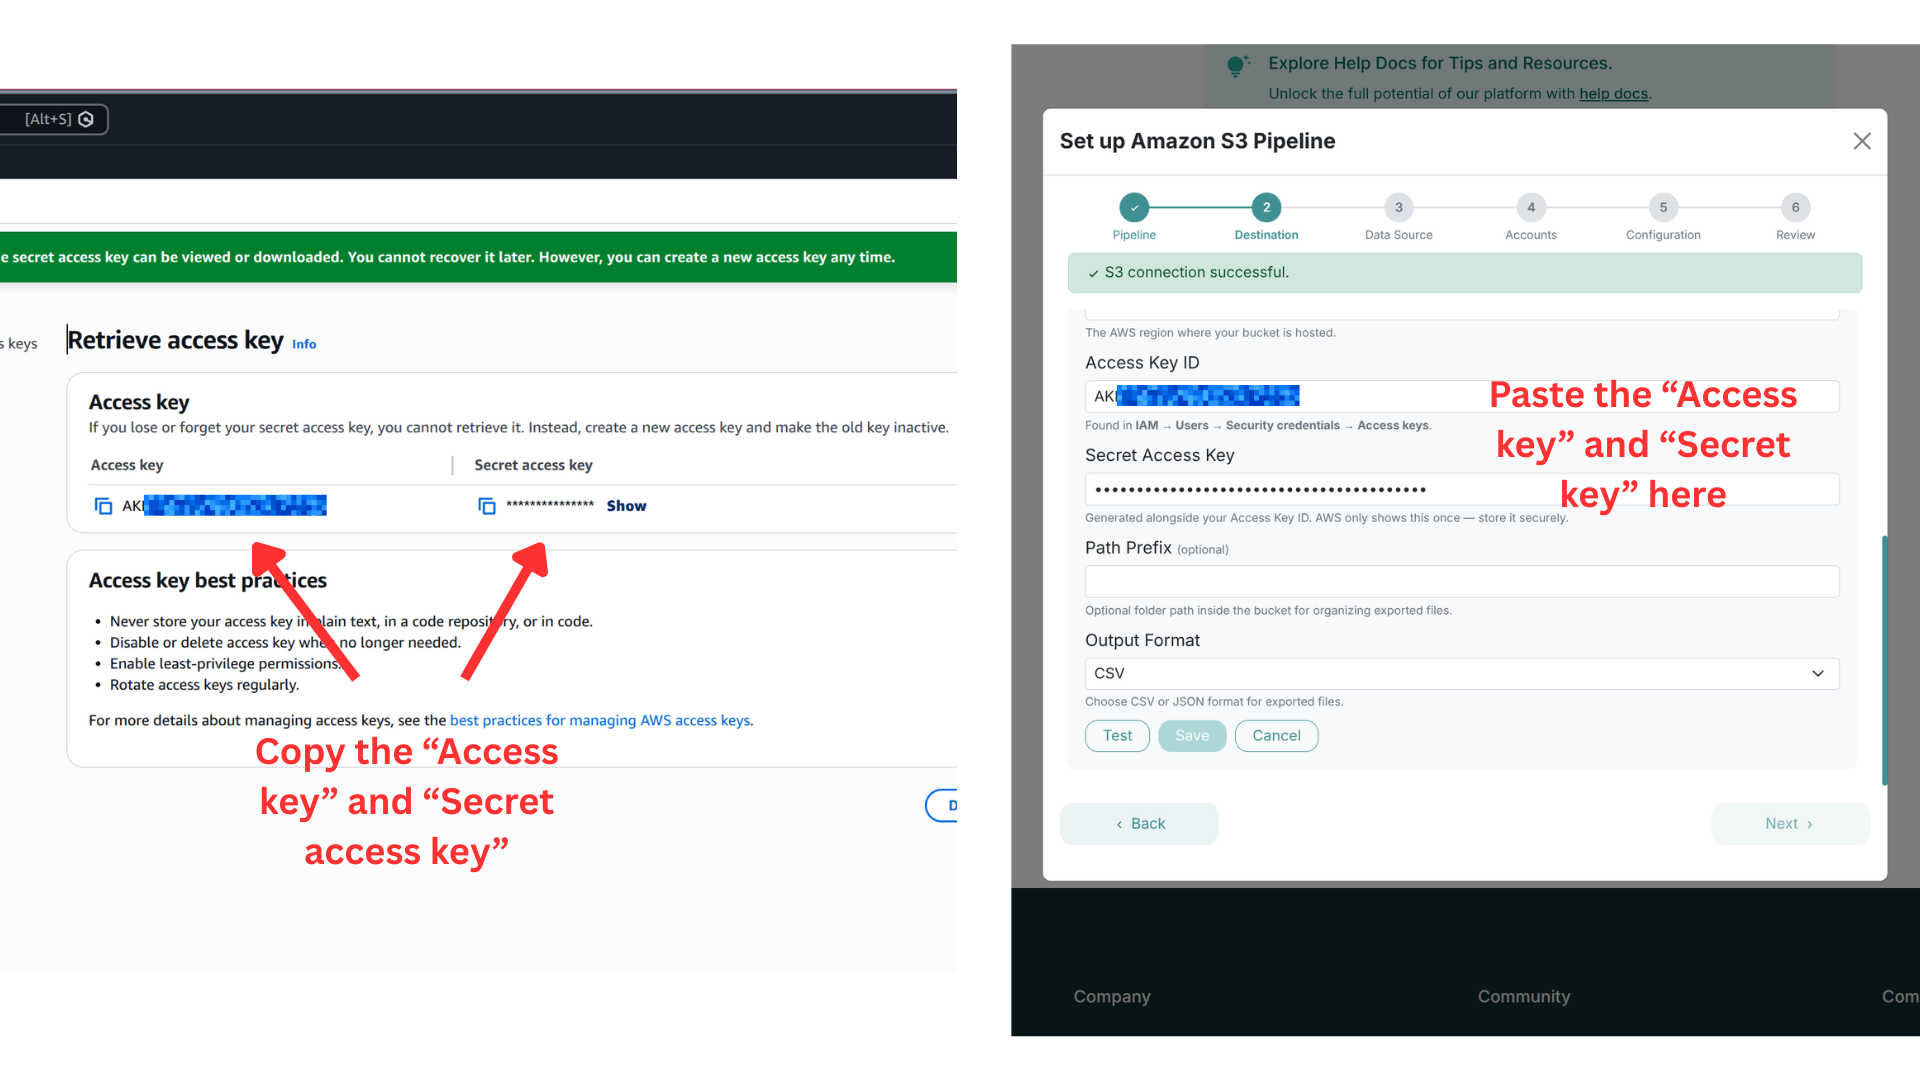
Step 3: Enter Your AWS Credentials
Copy your Access Key ID and Secret Access Key from AWS, then paste them into Adzviser. You can also optionally set a Path Prefix to organize exported files within your bucket, and choose your Output Format (CSV or JSON).
Click Test to verify the connection, then click Save.
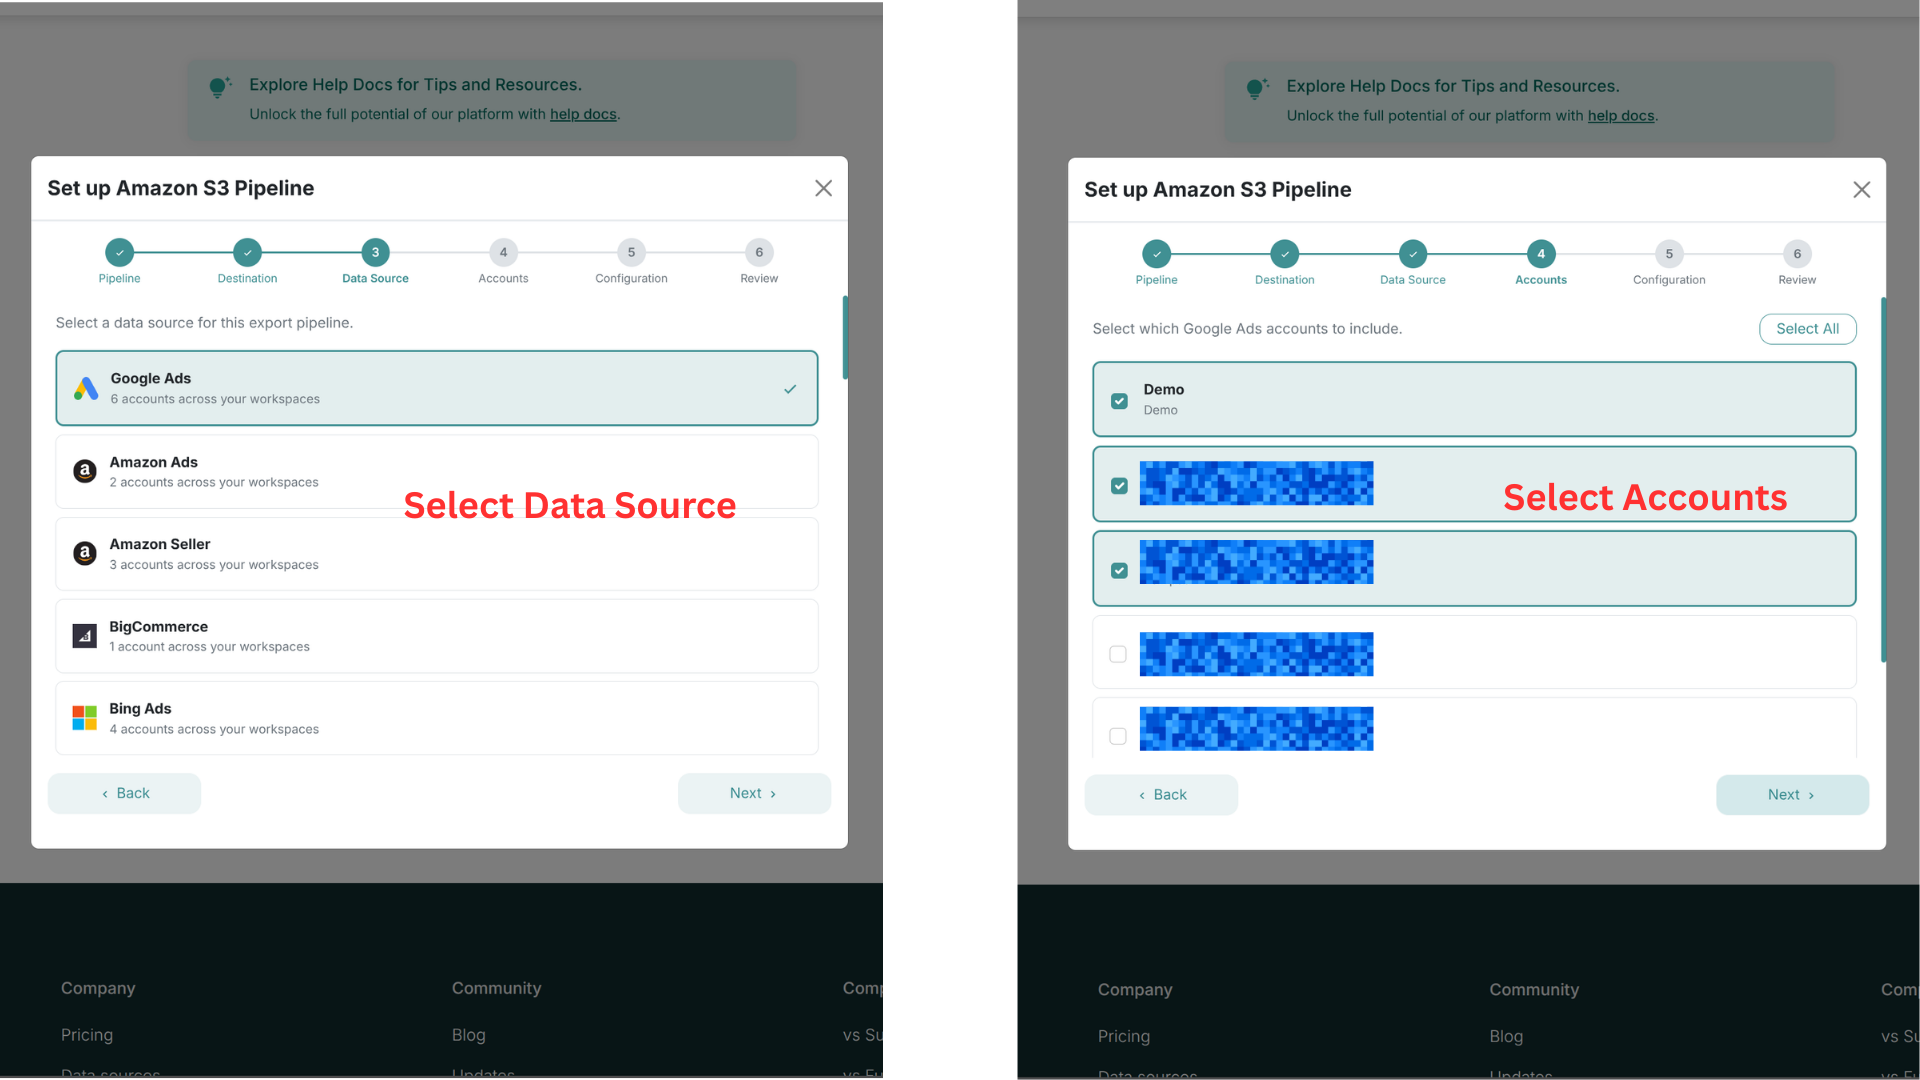
Step 4: Select Data Source and Accounts
Choose which data source you want to export (e.g., Google Ads, Meta Ads, Shopify) and then select the specific accounts to include in this pipeline.
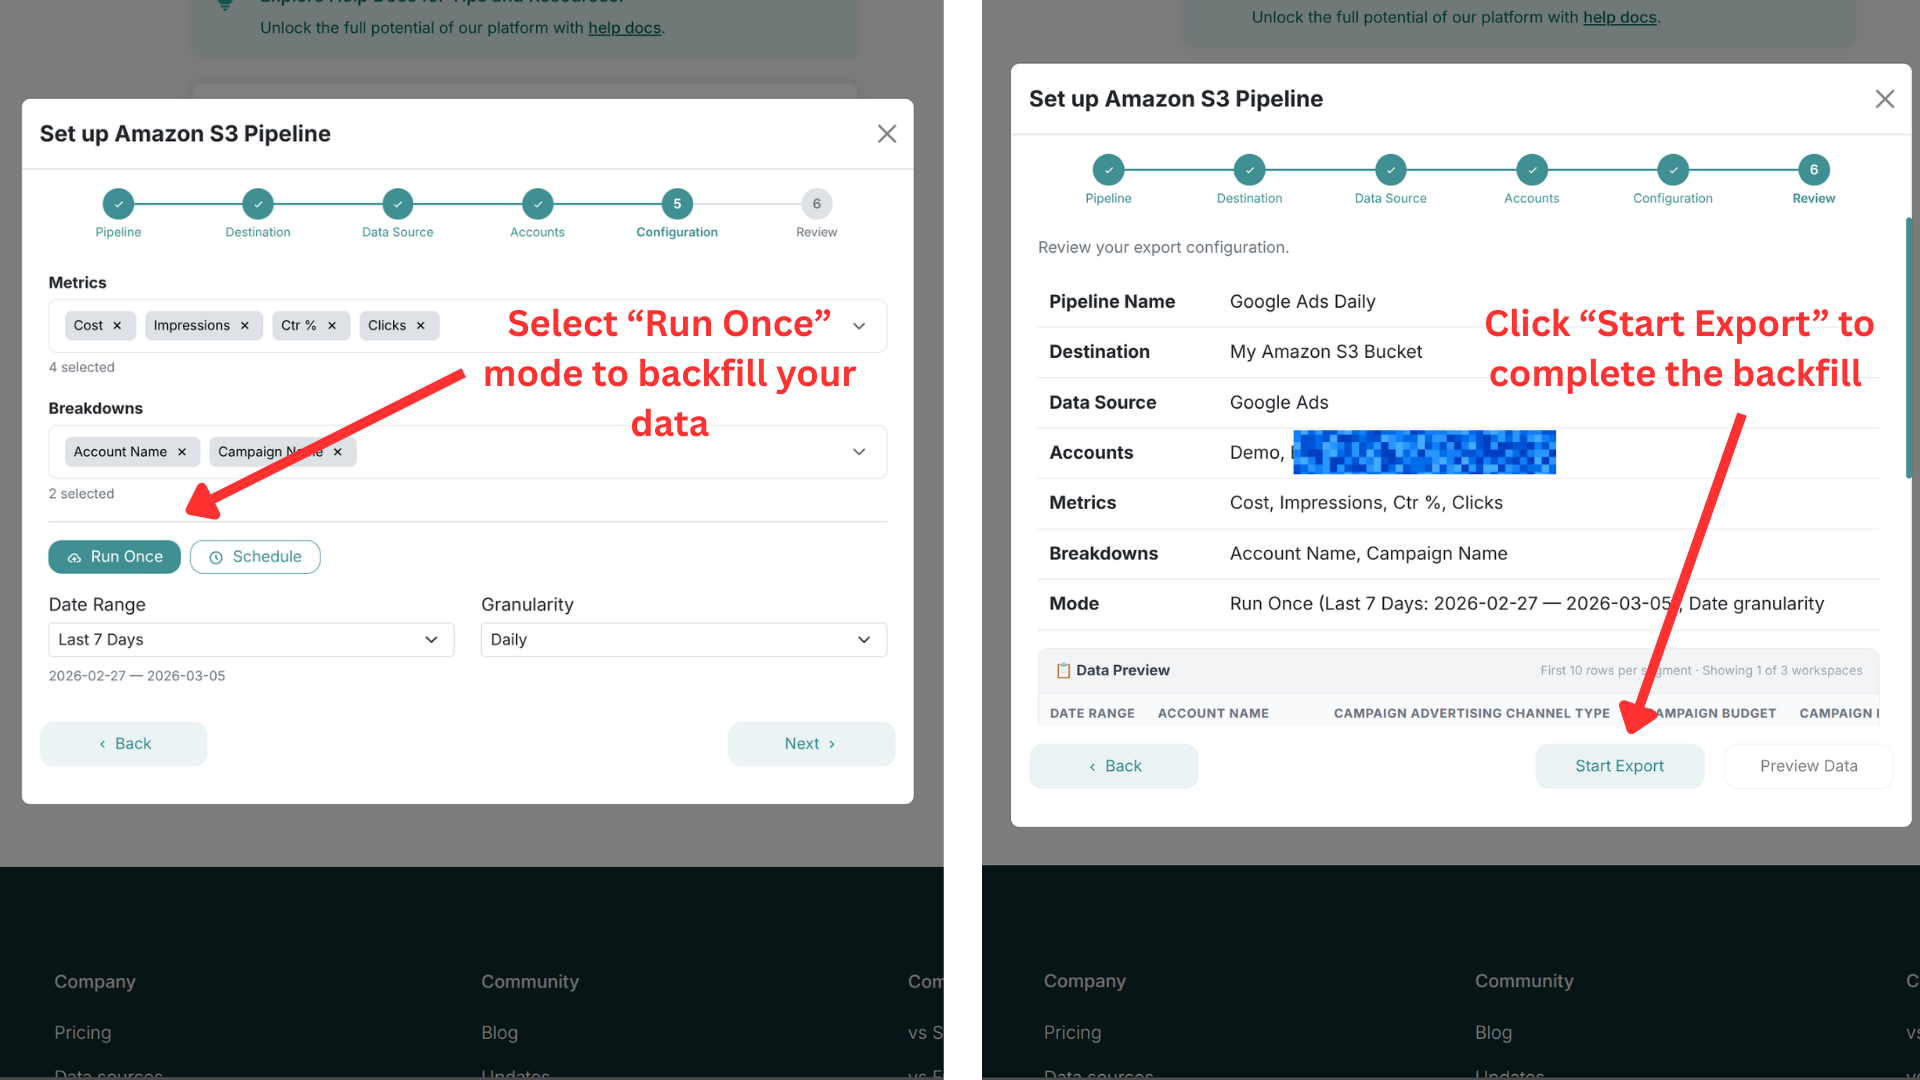
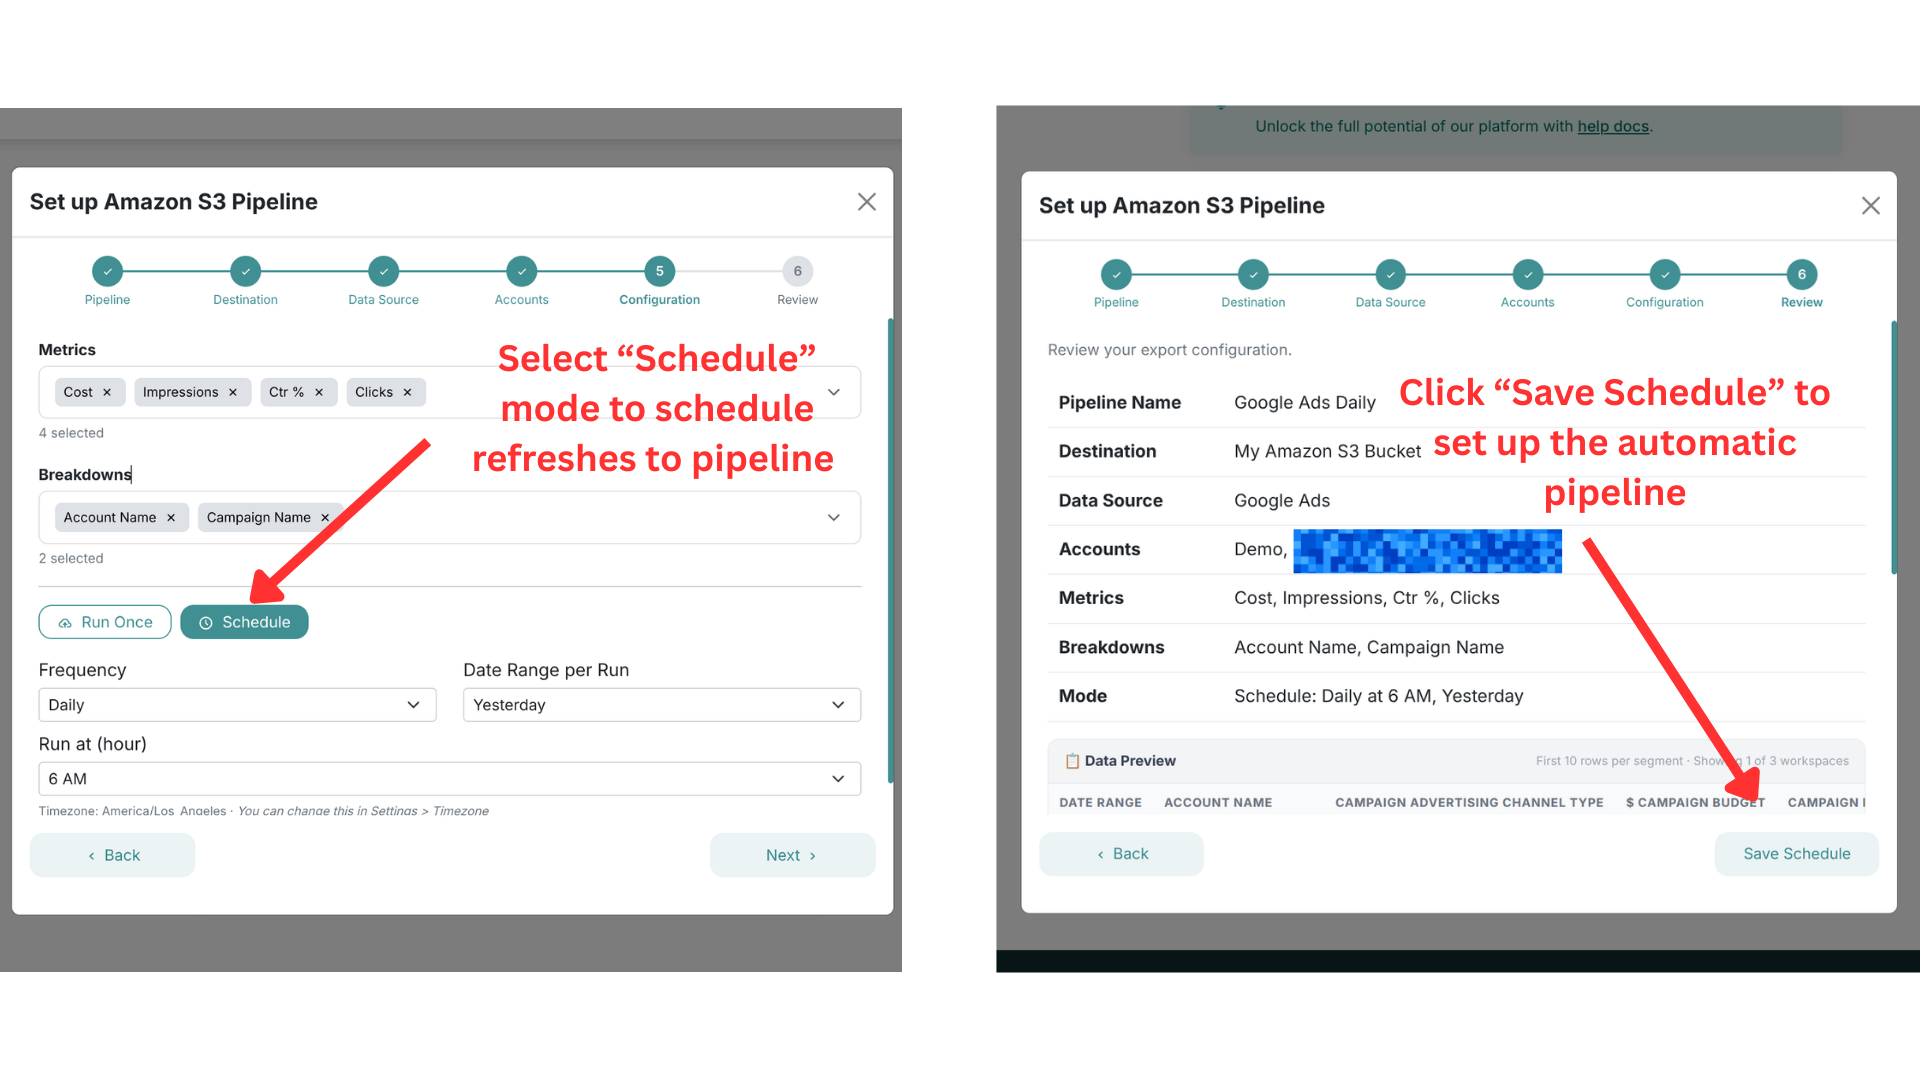
Step 5: Configure Metrics and Export Mode
Select the metrics and breakdowns you want to export. Then choose your export mode:
Option A: Run Once (Backfill)
Select Run Once to perform a one-time data export. Choose your date range and granularity, then click Next to review your configuration. Click Start Export to begin the backfill.
Option B: Scheduled Export
Select Schedule to set up automatic, recurring exports. Configure the frequency (e.g., Daily), date range per run (e.g., Yesterday), and the time of day to run. Click Next to review, then click Save Schedule to activate.
You can create multiple pipelines for different data sources or accounts. Each pipeline runs independently with its own schedule.
Next Steps
Once your pipeline is running:
- Monitor exports — check the Export History tab to see past runs and their status
- Add more pipelines — create additional pipelines for other data sources or accounts
- Connect downstream tools — use your S3 data with Athena, Redshift, Snowflake, or any analytics platform
Need help? Contact us at https://adzviser.com/contact-us.