OpenClaw + Adzviser MCP Tutorial: Query Marketing Data from Your Terminal
This guide walks you through connecting Adzviser to OpenClaw so you can query your marketing and sales data directly from the command line.
Watch this guide to using Adzviser MCP server on OpenClaw
Prerequisites
Before you begin, make sure you have:
- An Adzviser account with at least one connected data source (Sign up here)
- OpenClaw installed and onboarded, with a running Gateway and a working agent (Getting started)
- A model configured in OpenClaw — for the cloud-provider setup shown here, use an API key from OpenAI, Anthropic, or Google AI. OpenClaw also supports locally hosted models.
These steps use OpenClaw's built-in MCP commands, available in version 2026.9.6. Check your installation first:
openclaw --version
openclaw mcp --help
The MCP help should list add, login, status, and probe. If it only shows general OpenClaw help or reports an unknown command, follow OpenClaw's update instructions before continuing. Run the commands on the same machine and OpenClaw profile as your agent; for a remote Gateway, configure the Gateway host.
OpenClaw runs on your chosen computer or server. Data requests use Adzviser's hosted MCP service and your connected platforms; with a cloud model, prompts and included results are also sent to that model provider. Messaging apps receive anything you send through them. See where your data is processed.
Step 1: Save the Adzviser MCP Connection
Add Adzviser with Streamable HTTP transport and OAuth authentication:
openclaw mcp add adzviser \
  --url https://mcp.adzviser.com/http \
  --transport streamable-http \
  --auth oauth
openclaw mcp show adzviser
Check that the saved entry has url: https://mcp.adzviser.com/http, transport: streamable-http, and auth: oauth. If an entry named adzviser already exists, inspect it with show before changing it. See OpenClaw's MCP configuration reference.
Conversational setup shown in the video
The recording asks the agent to perform the setup with this prompt:
Let's connect Adzviser mcp at https://mcp.adzviser.com/httpThis depends on the agent's available tools and permissions. Use the commands above if it does not save a connection, then complete the login and verification steps below.
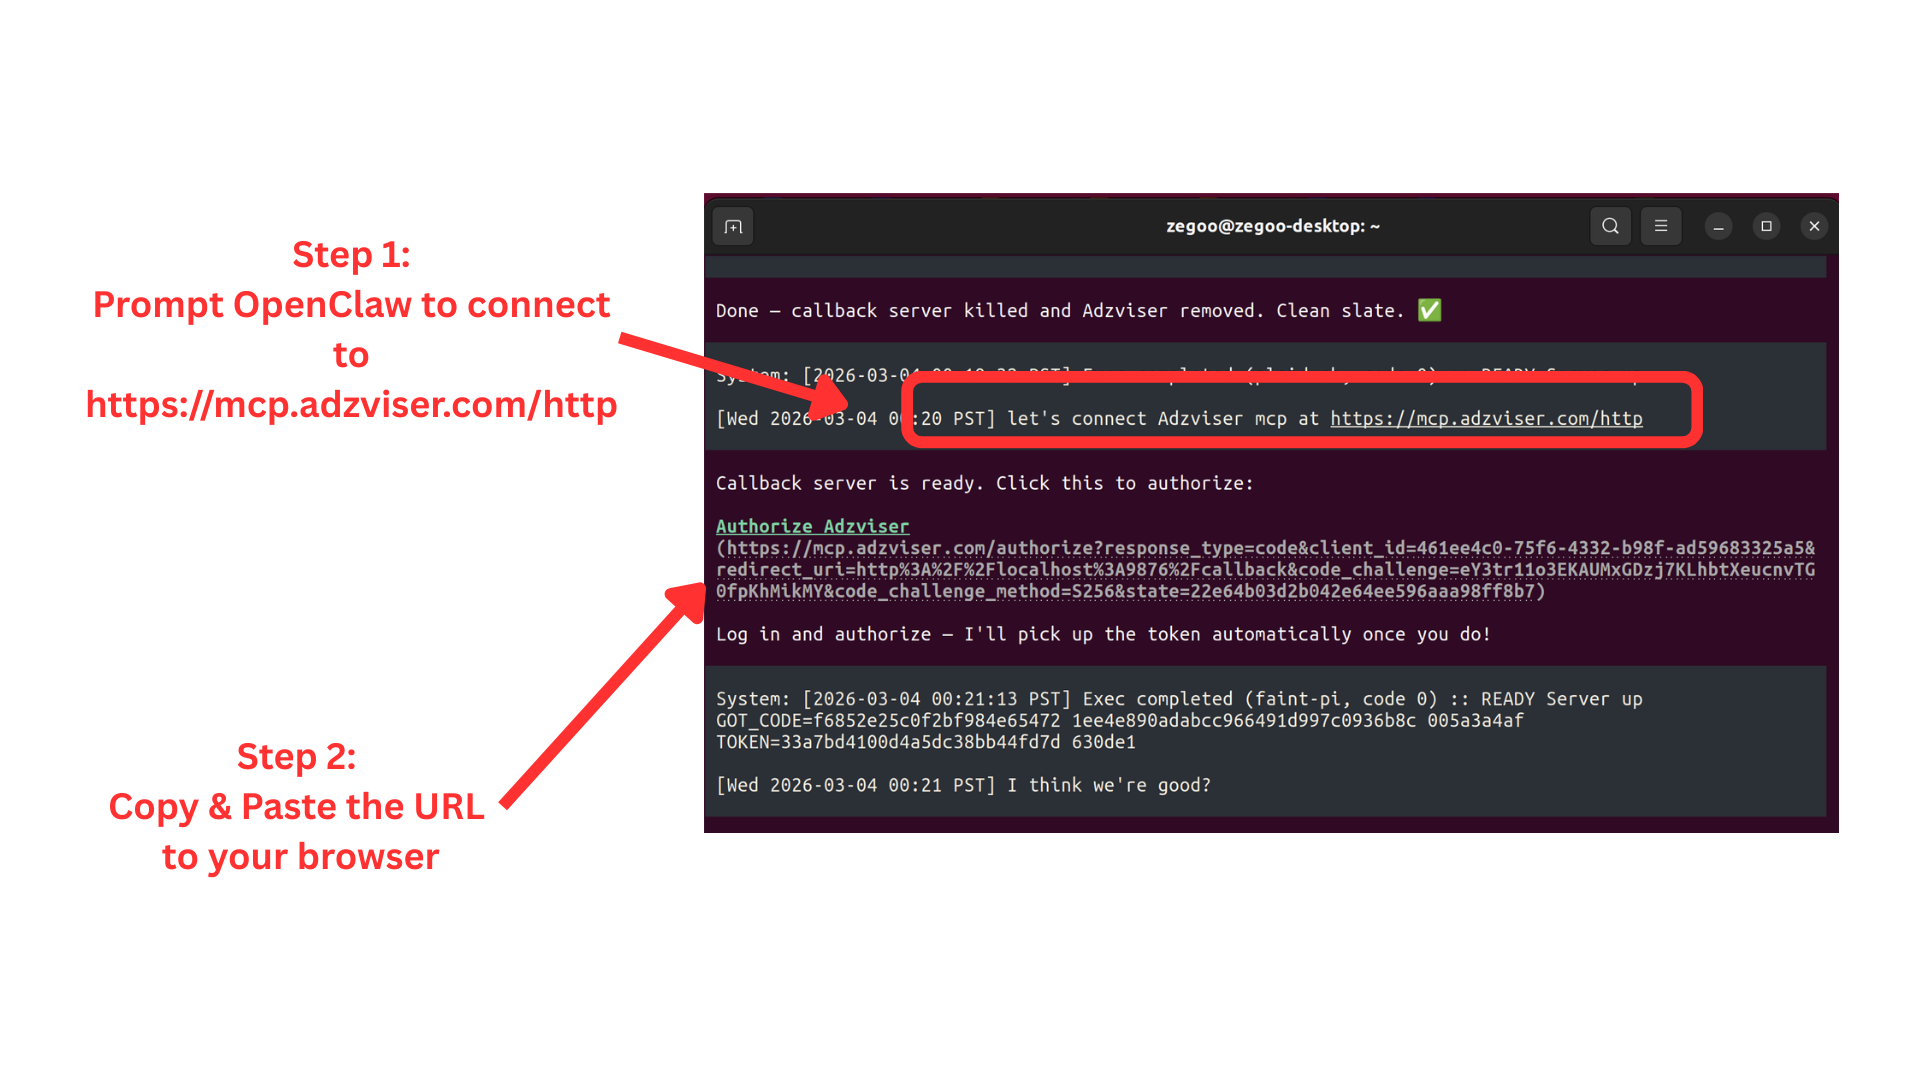
Step 2: Authorize & Complete Authentication
Start the OAuth login:
openclaw mcp login adzviserOpen the authorization URL printed in the terminal. In your browser, sign in to Adzviser and click Complete Authorization via MCP. Keep the login command running while the browser returns to OpenClaw, then check the terminal for confirmation that credentials were saved.
If the browser is on another machine and cannot reach the callback, follow OpenClaw's printed --code fallback using the authorization code from the redirect. See OpenClaw's OAuth instructions.
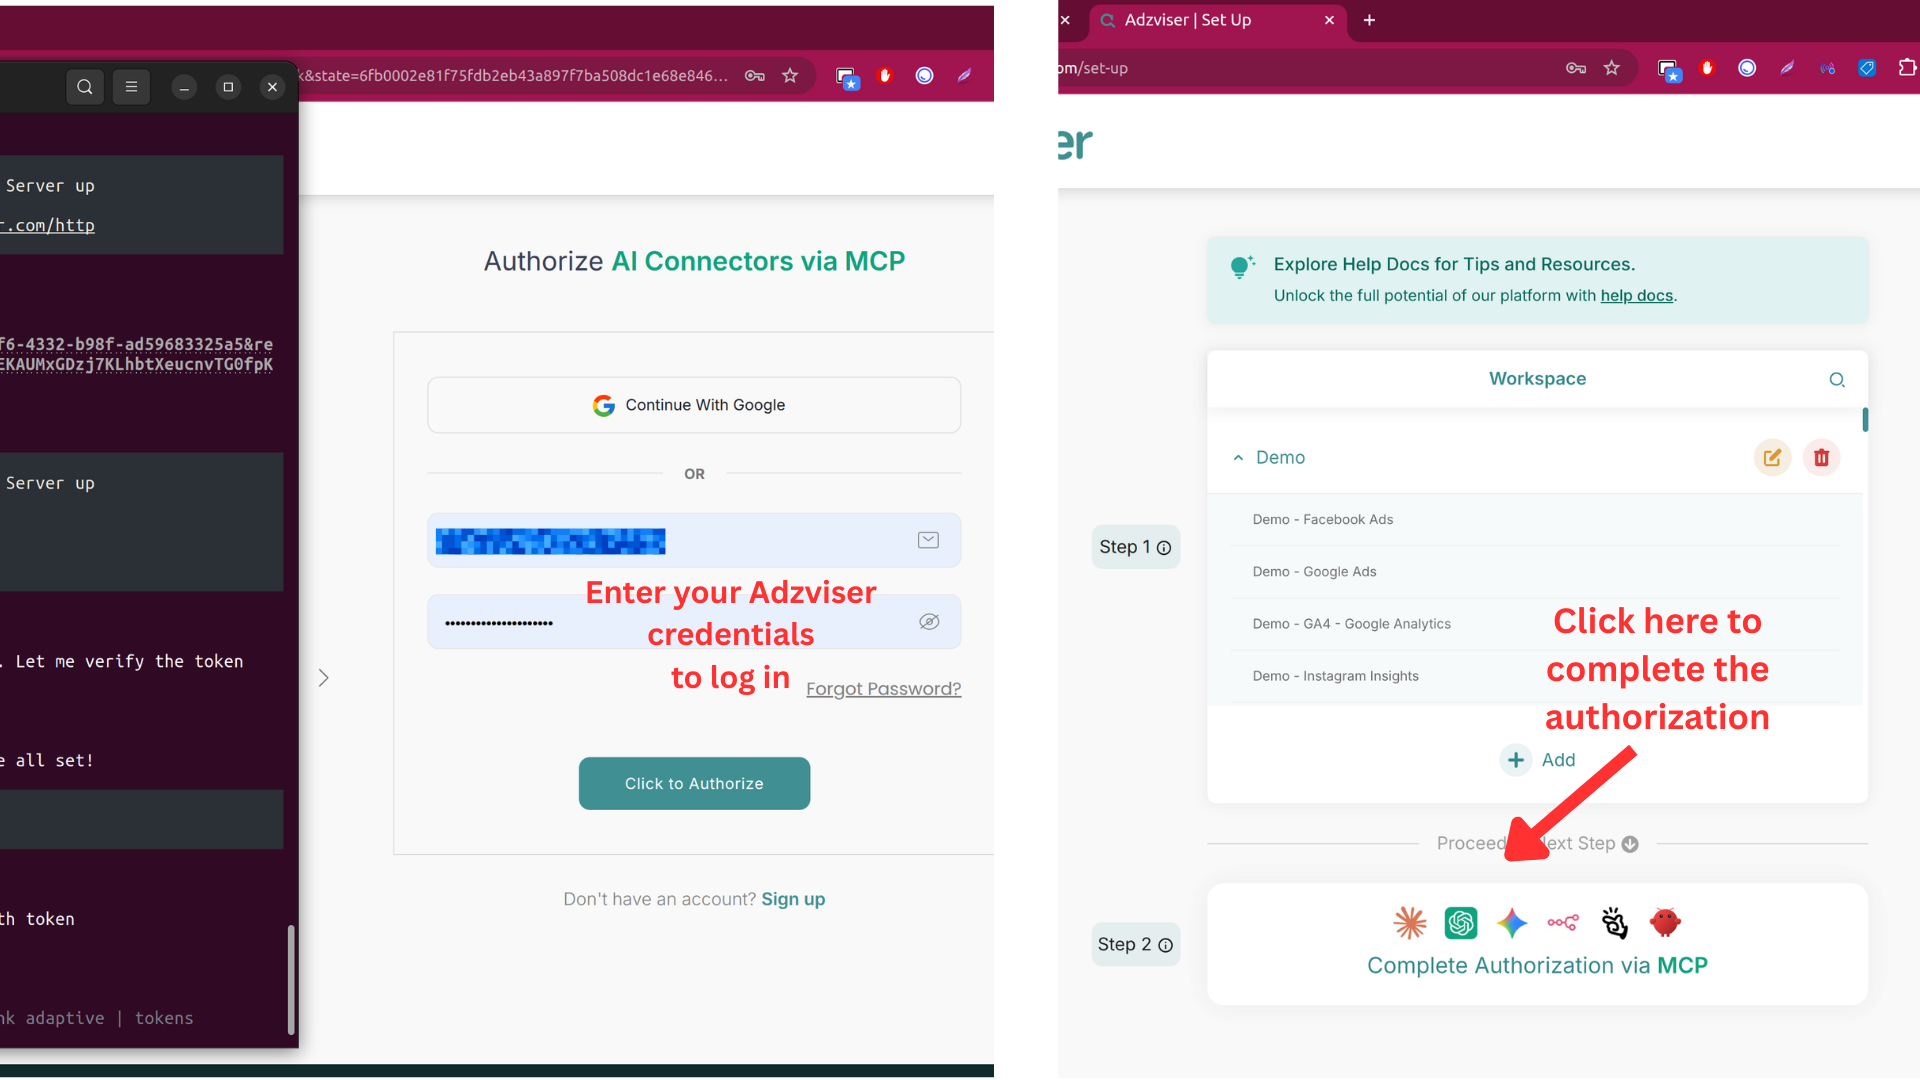
Verify authentication and tool discovery
openclaw mcp status --verbose
openclaw mcp probe adzviser --json
status checks saved configuration and authorization state; probe connects to Adzviser and discovers its tools. Confirm a successful probe with available tools. If authorization is still required, repeat login. For configuration or connection errors, run openclaw mcp doctor adzviser --probe and follow its diagnostics.
If the probe succeeds but your agent cannot see Adzviser, check that it uses the same profile and allows MCP tools. The minimal tool profile hides them, and tool-deny rules or server filters can also block them. See OpenClaw's MCP troubleshooting.
Step 3: Start Querying Your Data
Start a new conversation with your configured OpenClaw agent and verify account access:
Use Adzviser to list my workspaces and the data
sources connected to each one. Ask me which
workspace to use before retrieving data.
Then request a small report from a connected source. For example, after selecting a workspace with Google Ads:
For the workspace I selected, retrieve yesterday's
Google Ads spend and clicks. Show the reporting
dates and currency returned with the data.
Check the workspace, source account, dates, and returned values. Tool discovery alone does not confirm access to a particular advertising account or a successful report. Results reflect the data available from the source.
You can also send results to Telegram after completing the separate messaging setup.
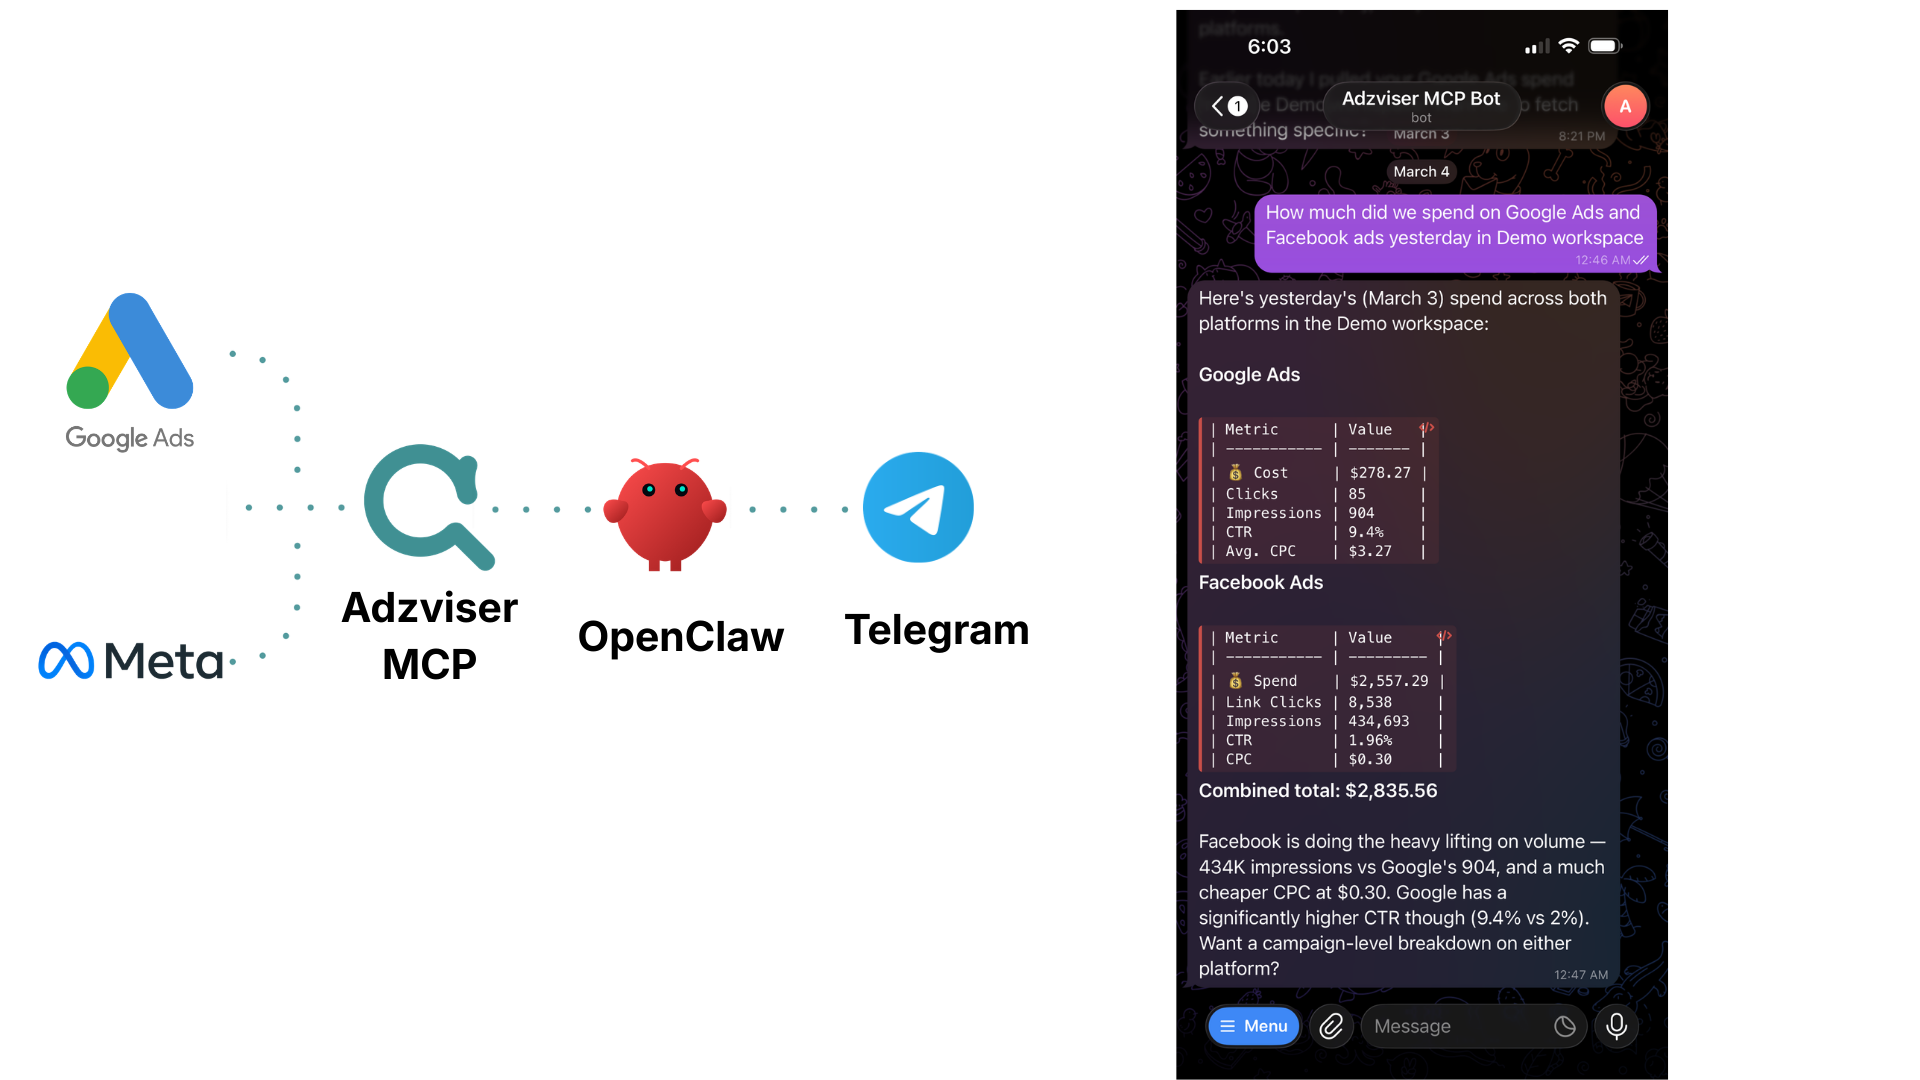
Example Prompts
Quick Performance Check:
How much did we spend on Google Ads and Facebook ads yesterday?Campaign Analysis:
Show me the top 5 campaigns by ROAS from Meta Ads this monthCross-Platform Summary:
Give me a summary of ad performance across all platforms for the last 7 daysOne-time Telegram Report:
Pull yesterday's Google Ads metrics and send a summary to my Telegram botTelegram Delivery (Optional)
Follow OpenClaw's Telegram setup to connect your bot, approve your chat's pairing request, and verify the channel. Test delivery to the intended chat before using it for reports. The Telegram prompt above requests one report; it does not create a recurring schedule.
Recurring Reports (Optional)
Use OpenClaw's automations setup to create a saved recurring job. Specify the frequency, timezone, agent, workspace, reporting period, and delivery destination. For example: daily at 9 AM in America/Los_Angeles, report yesterday's Google Ads performance for your chosen workspace, and deliver it to your configured Telegram chat.
Confirm that the job is saved and enabled, check its next run time, and inspect the first automatic run and delivery. Keep the Gateway running and make sure the scheduled agent has access to the same Adzviser connection.
Tips for Best Results
- Specify your workspace — mention the workspace name when querying to avoid ambiguity
- Mention platforms explicitly — tell OpenClaw which data sources to query (Google Ads, Meta Ads, etc.)
- Include date ranges — specify time periods like "yesterday", "last 7 days", or "this month vs last month"
- Verify delivery and scheduling separately — test your Telegram connection, then create and check a recurring job if you want automatic reports
Need help? Contact us at https://adzviser.com/contact-us.