Set Up Power BI Scheduled Refresh
Adzviser supports a Query URL approach for scheduled refreshes in Power BI. This lets you generate a URL that Power BI can query on a schedule to automatically keep your reports up to date — no manual refresh needed.
The Query URL and Scheduled Refresh feature requires activation on your account. Contact us to unlock this feature.
Step 1: Generate Your Query URL
- Log in to Adzviser
- Go to the query builder and configure your query — select your data source, account, metrics, breakdowns, date range, etc.
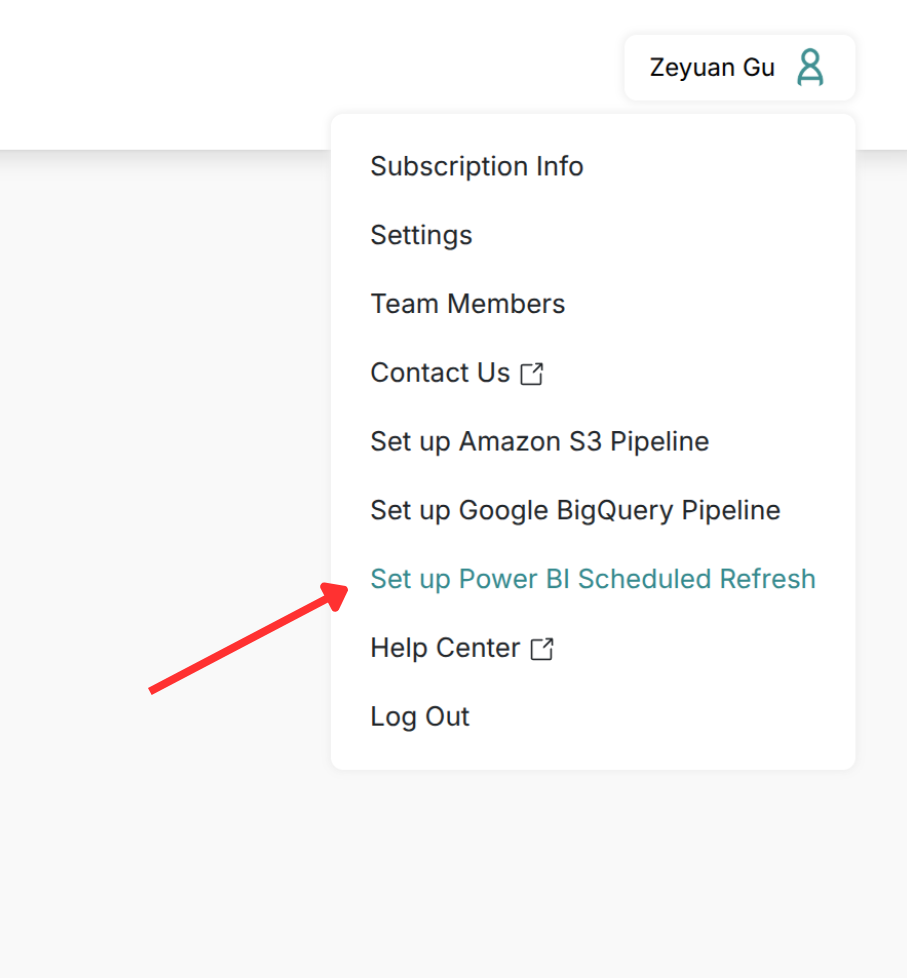
- Click "Set up Power BI Scheduled Refresh"
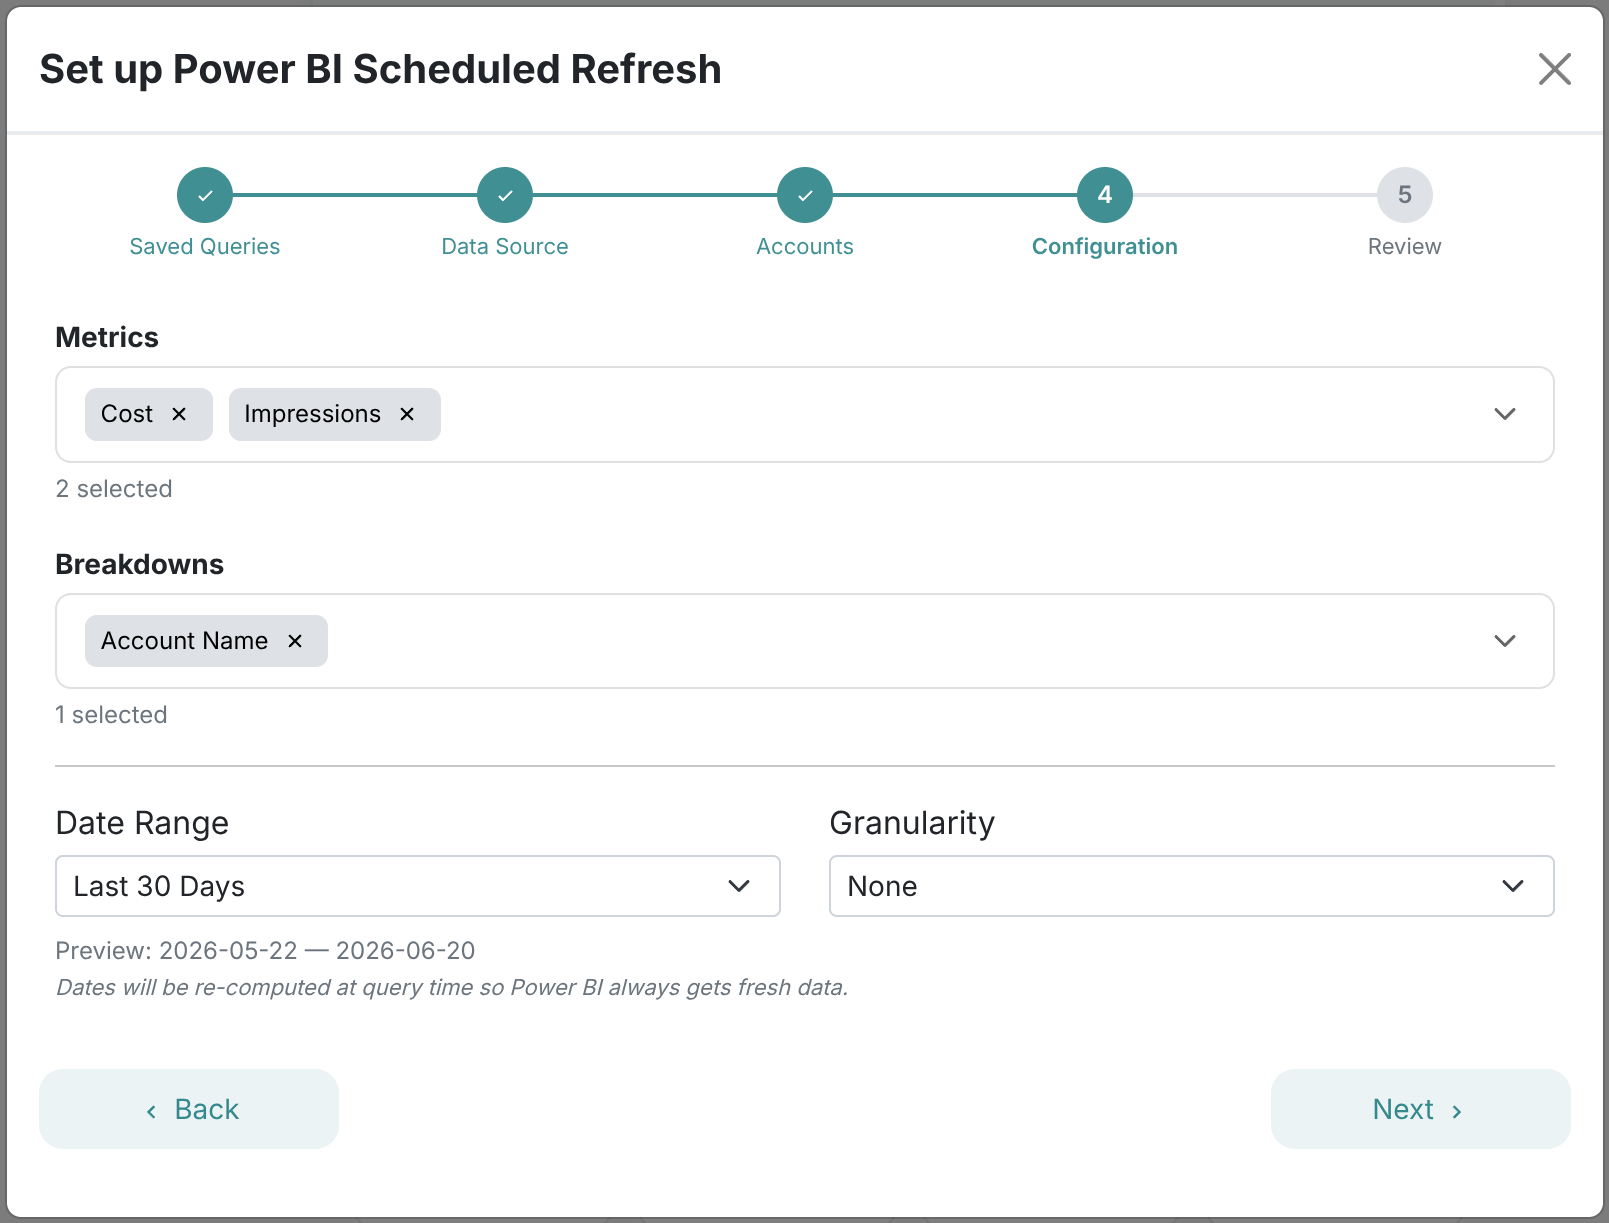
- Walk through the wizard:
- Name your query (e.g., "Google Ads Weekly Report")
- Select your data source (Google Ads, Facebook Ads, etc.)
- Pick your accounts
- Choose your metrics, breakdowns, date range, and granularity
- You'll get a URL and an M code snippet — copy the M code.
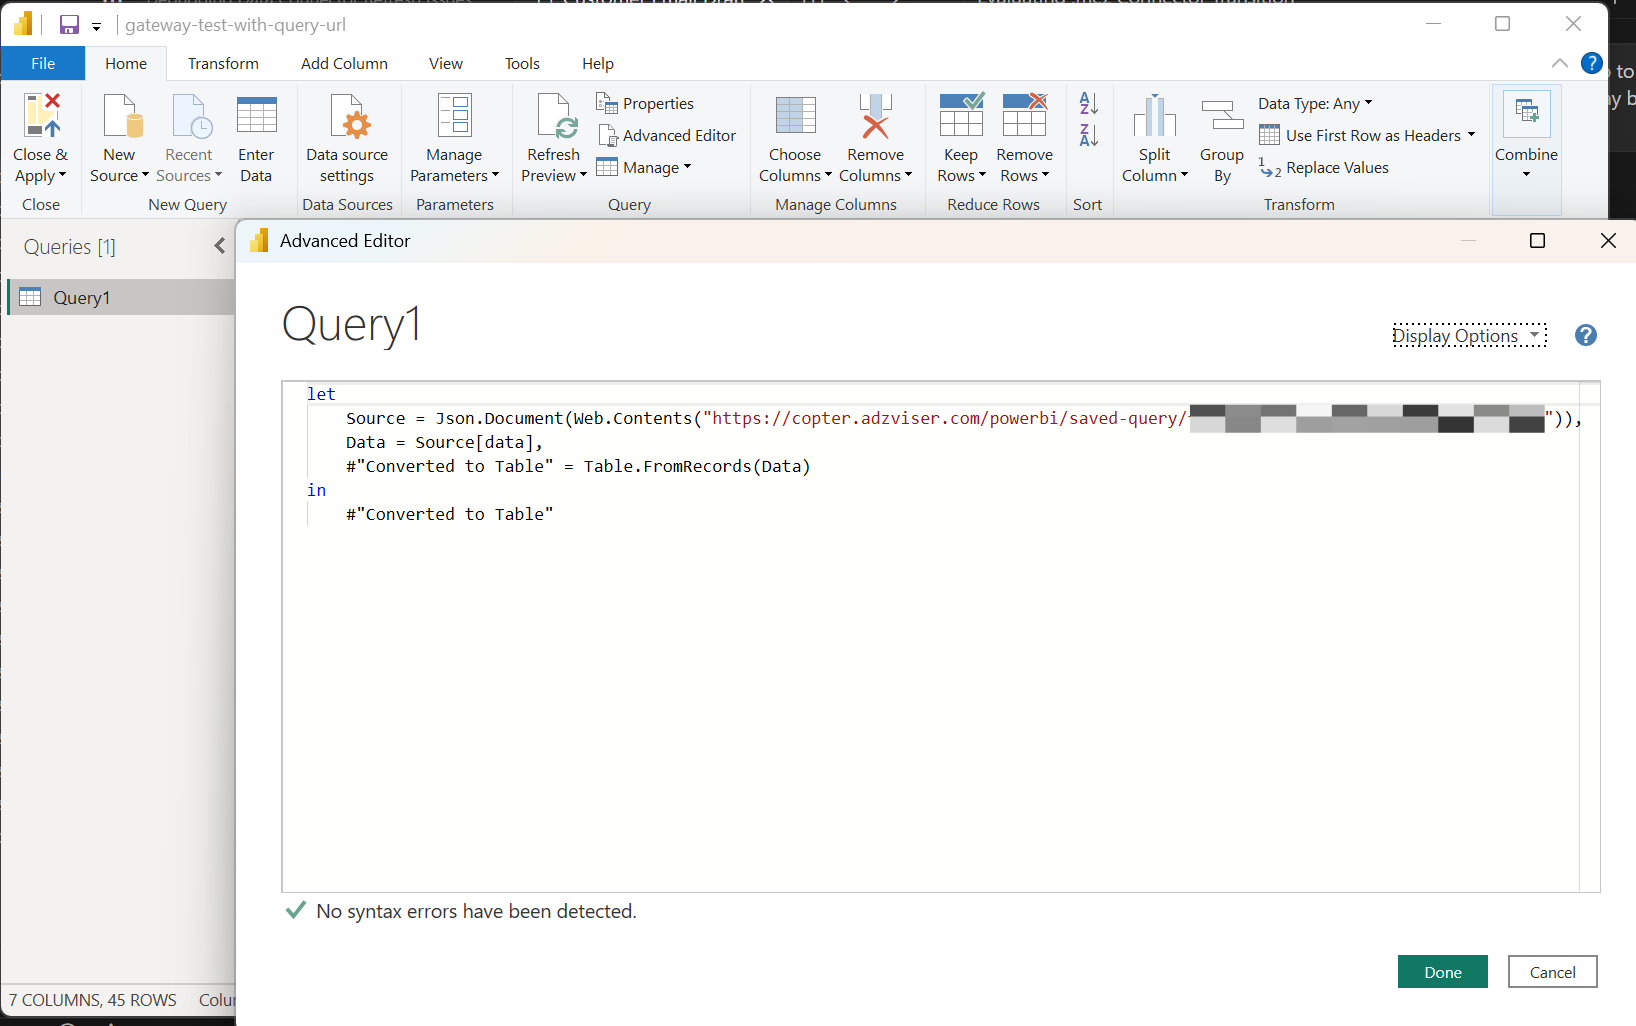
The M code will look something like this:
let
    Source = Json.Document(Web.Contents("https://copter.adzviser.com/powerbi/saved-query/your-unique-id")),
    Data = Source[data],
    #"Converted to Table" = Table.FromRecords(Data)
in
    #"Converted to Table"
Step 2: Create a New Report in Power BI Desktop
- Open Power BI Desktop
- Click Get Data → Blank Query
- In the Power Query Editor, click Advanced Editor (in the Home tab)
- Delete everything in the editor
- Paste the M code you copied from Adzviser
- Click Done
- If prompted for credentials, select Anonymous and click Connect
- If asked about privacy levels, set
copter.adzviser.comto Organizational - You should see your data load as a table — verify it looks correct
- Click Home → Close & Apply
- Save the file
Want multiple queries? Repeat steps 2–11 for each query. You can generate a different Query URL for each data source, account, or metric combination you need.
Step 3: Publish to Power BI Service
- In Power BI Desktop, click Home → Publish
- Select your workspace and click OK
- Wait for the "Success" message
Step 4: Configure Scheduled Refresh
- Go to app.powerbi.com
- Navigate to your workspace and find your dataset (semantic model)
- Click the ⚙ Settings icon (or ... → Settings)
- Under Gateway and cloud connections:
- Make sure the gateway toggle is Off
- Under Cloud connections, verify your data source shows a ✅ green checkmark and maps to "Personal Cloud Connection"

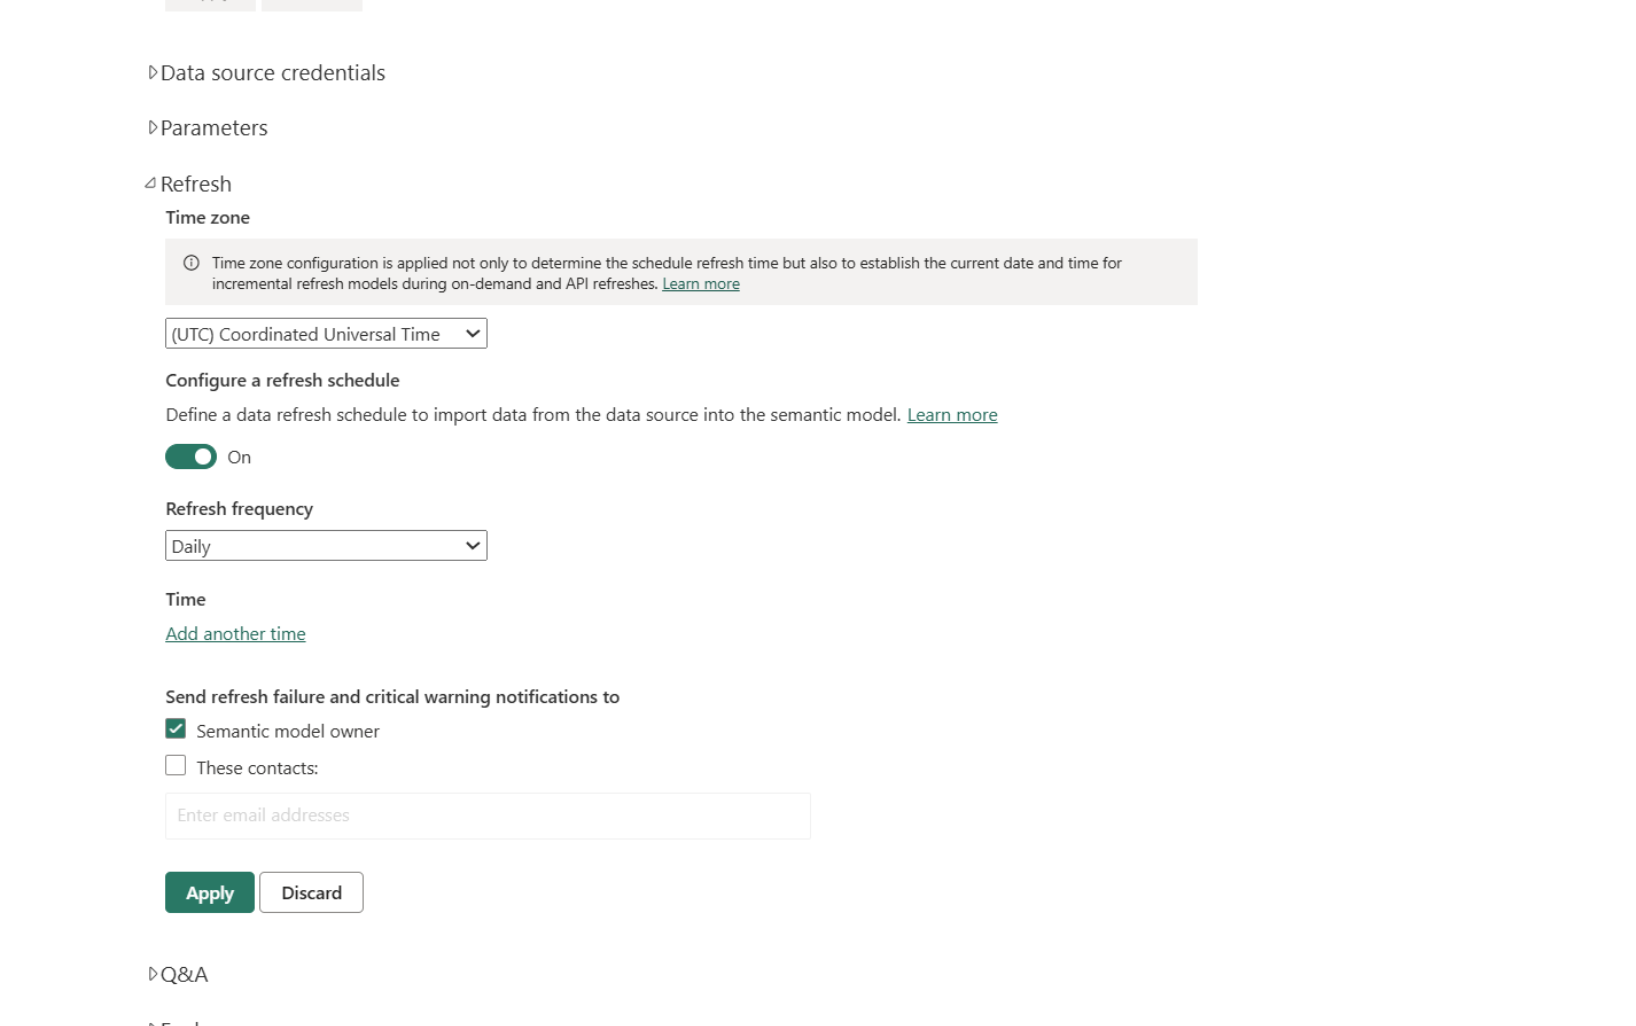
- Scroll down to Scheduled refresh:
- Toggle it On
- Set your desired refresh frequency (e.g., Daily)
- Choose the time(s) you'd like it to refresh
- Click Apply
Once configured, Power BI will automatically refresh your data at the scheduled times. You can monitor refresh history and status from the dataset settings page on app.powerbi.com.