Connect Adzviser MCP to Perplexity
This guide walks you through adding Adzviser as a custom connector in Perplexity, authorizing your account, and querying your marketing and sales data.
Video Tutorial
Watch the complete setup process:
Prerequisites
Before you begin, make sure you have:
- An Adzviser account with at least one connected data source (sign up here)
- A Perplexity Pro, Max, or Enterprise subscription — these plans support custom remote connectors according to Perplexity’s announcement
- Permission to add custom connectors — organization members may need an administrator to enable this option
Perplexity documents its subscription availability, organization permissions, and security considerations in its custom remote connector guide.
Step 1: Add a Custom Connector
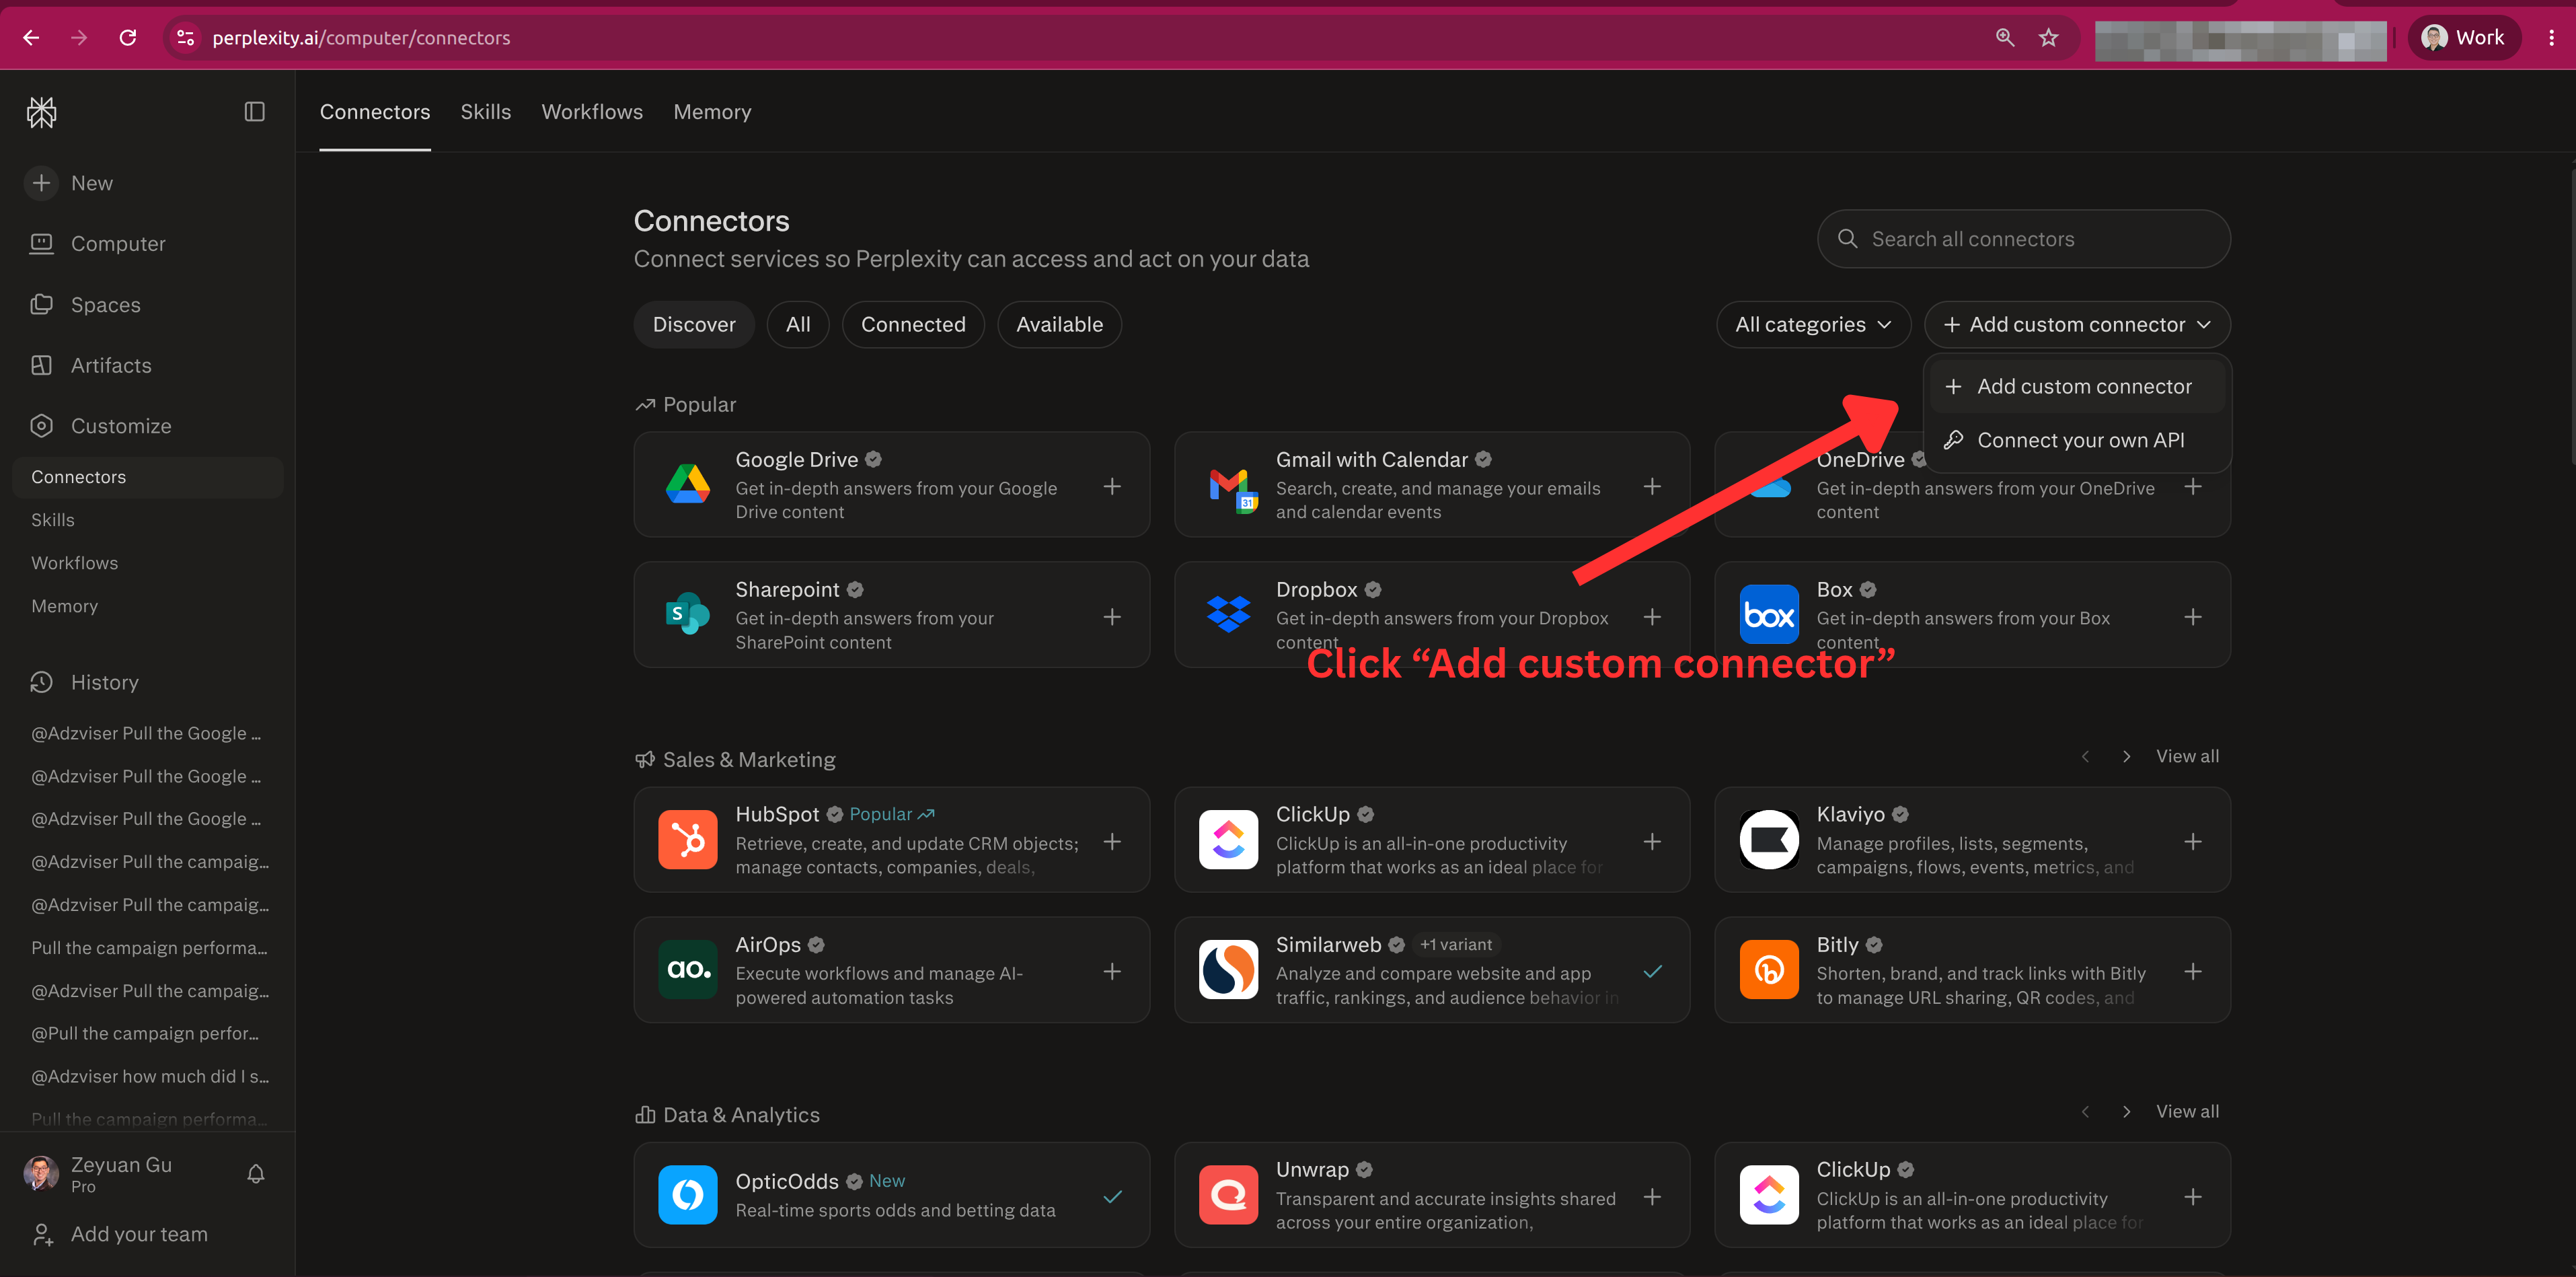
These screenshots show Perplexity Computer: open Customize → Connectors, or go directly to Computer’s connectors. If you are using account settings instead, Perplexity’s remote-connector guide describes Account settings → Connectors; organization administrators have a separate Enterprise settings path.
Click Add custom connector in the top-right corner, then select Add custom connector from the menu.
Step 2: Enter the Adzviser MCP Details
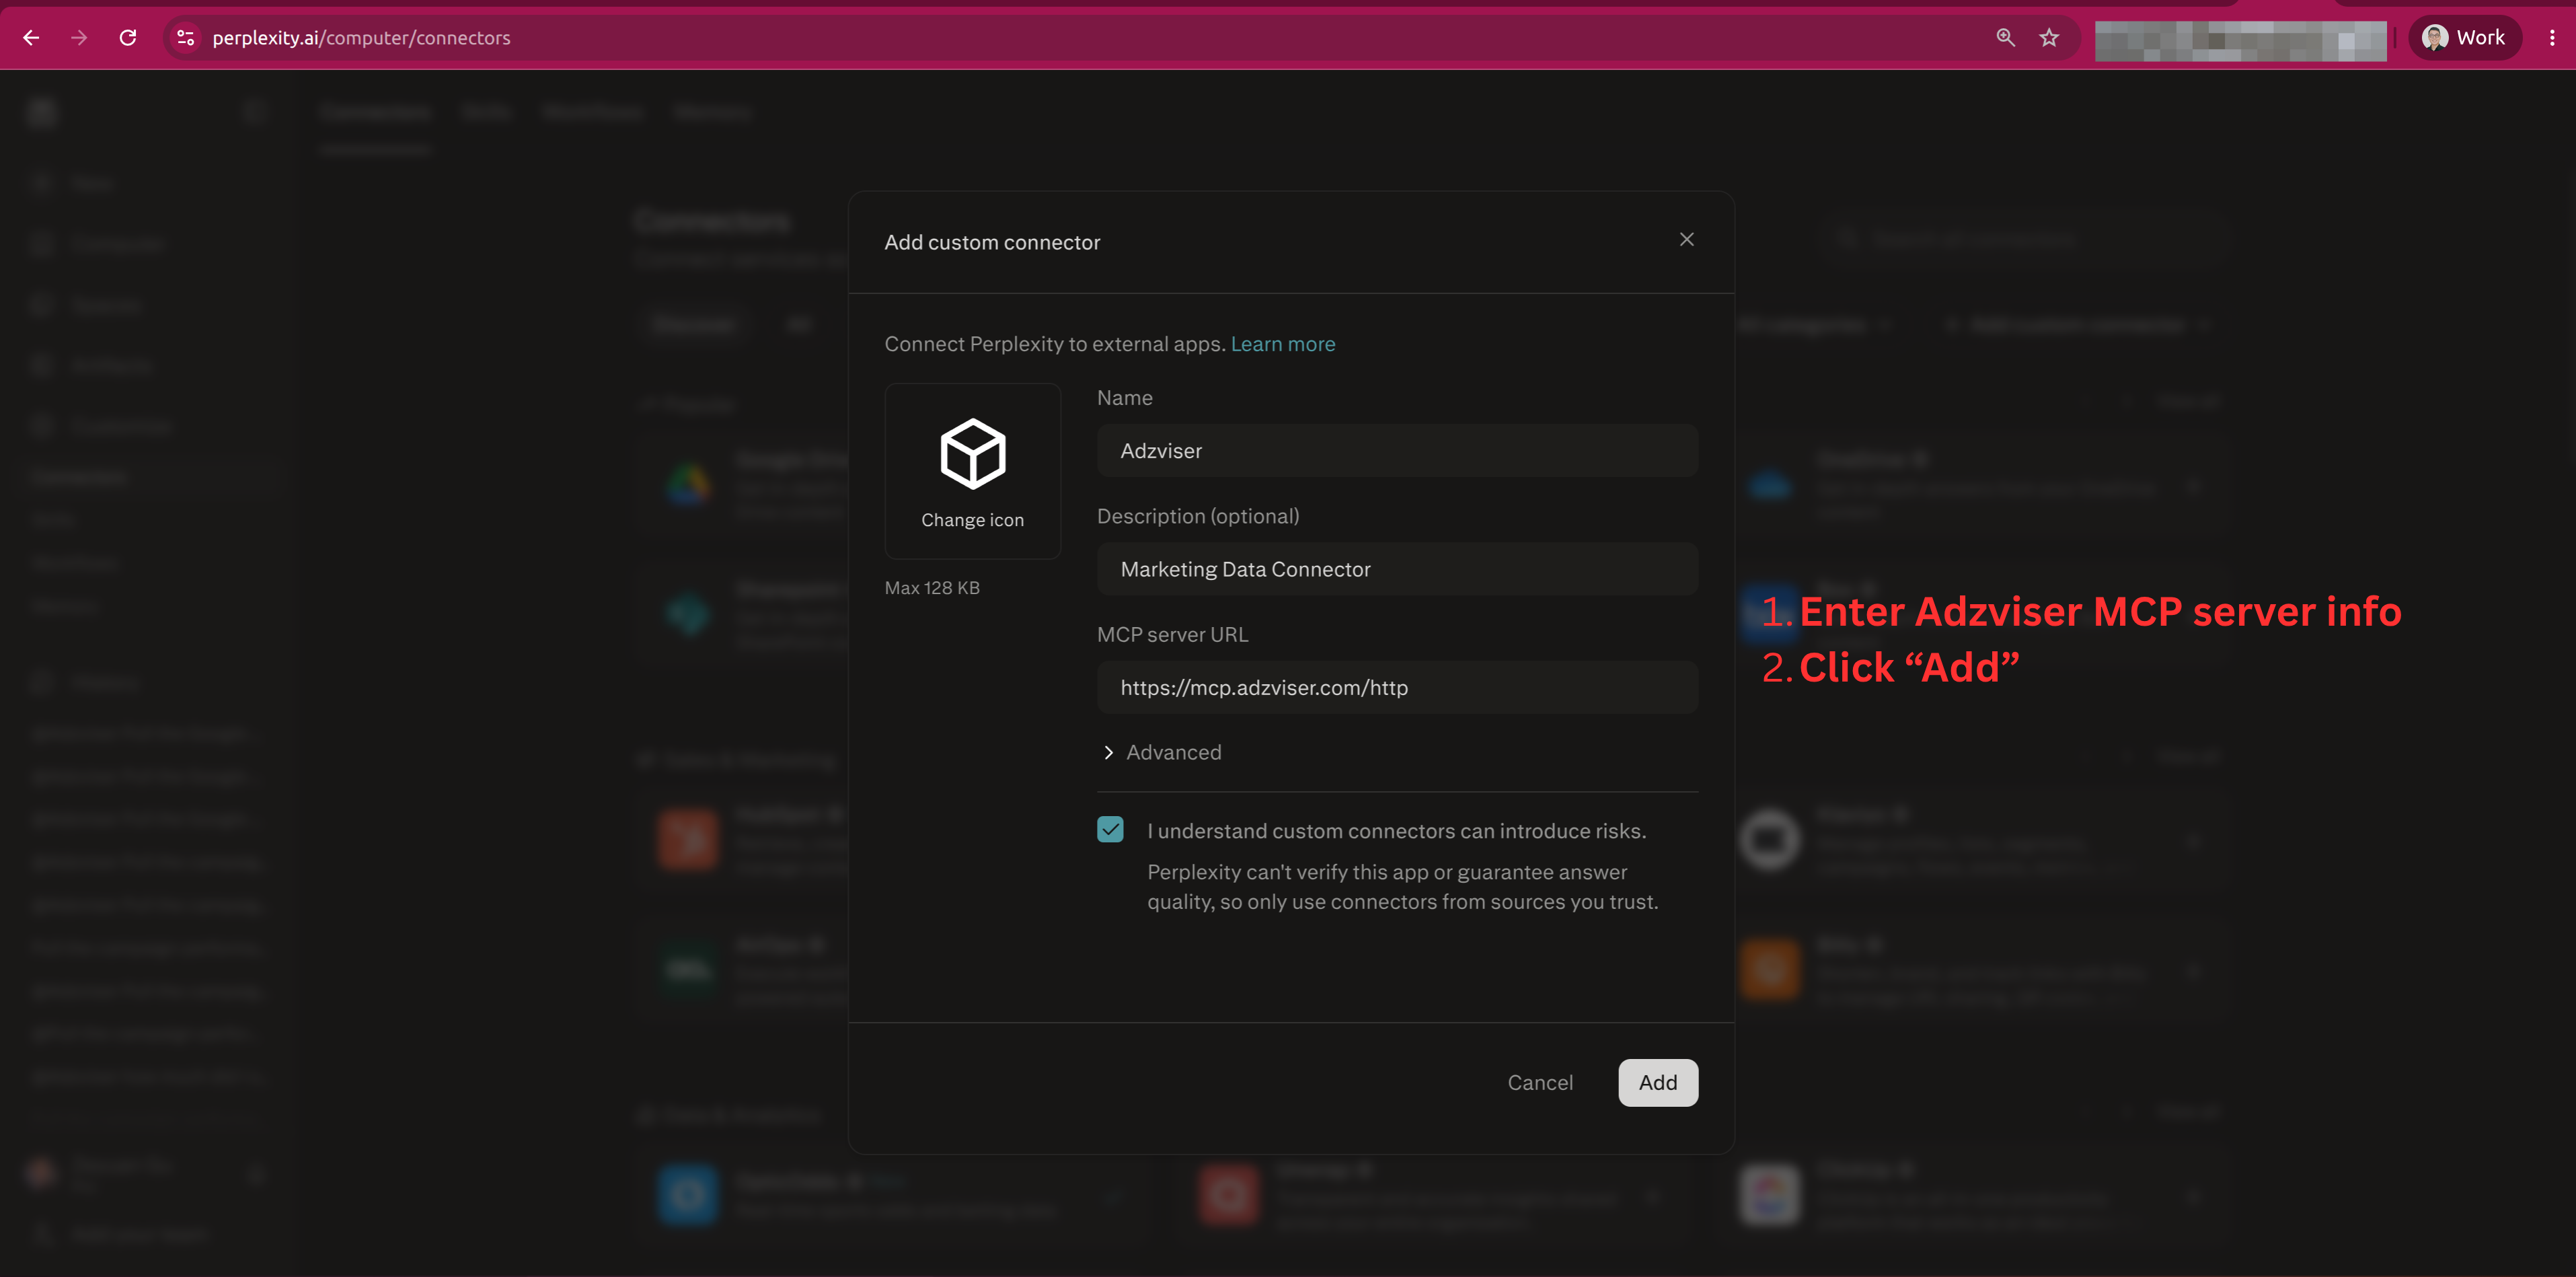
Complete the custom connector form with these values:
- Name:
Adzviser - Description:
Marketing Data Connector - MCP server URL:
https://mcp.adzviser.com/http
Check the acknowledgement box for custom connectors, then click Add.
Use the secure /http endpoint shown above. The previous https://mcp.adzviser.com/sse endpoint is legacy.
Step 3: Start OAuth
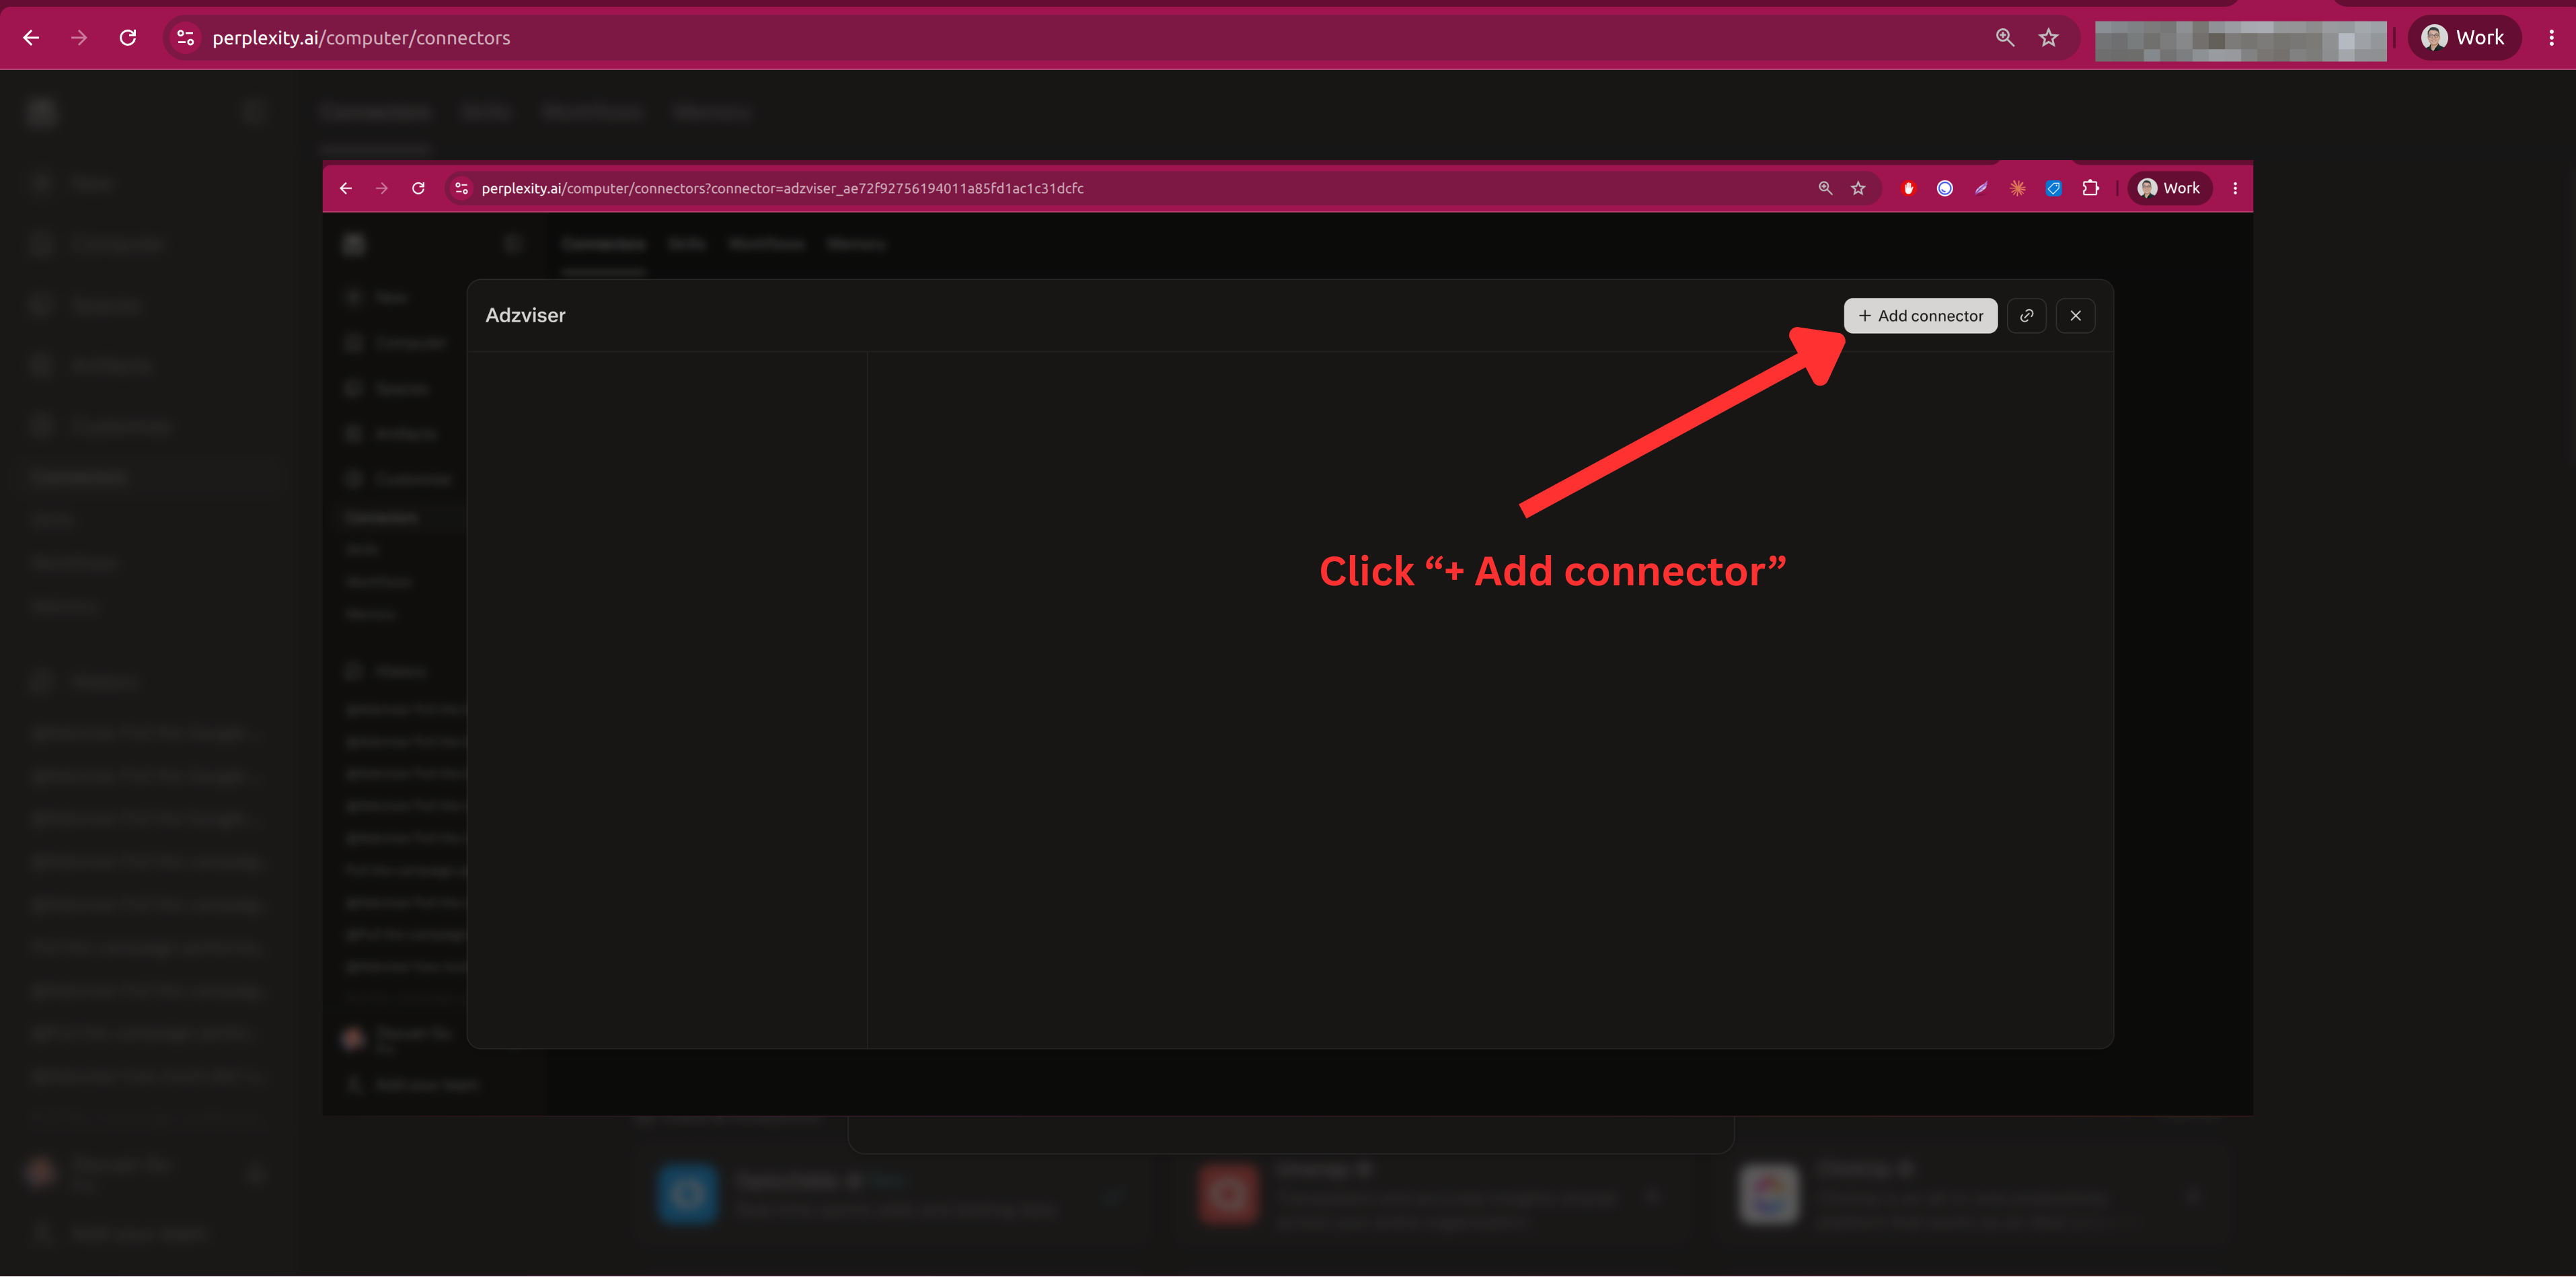
Open the newly created Adzviser connector and click + Add connector. Perplexity will open Adzviser's OAuth authorization flow.
Step 4: Complete Authorization in Adzviser
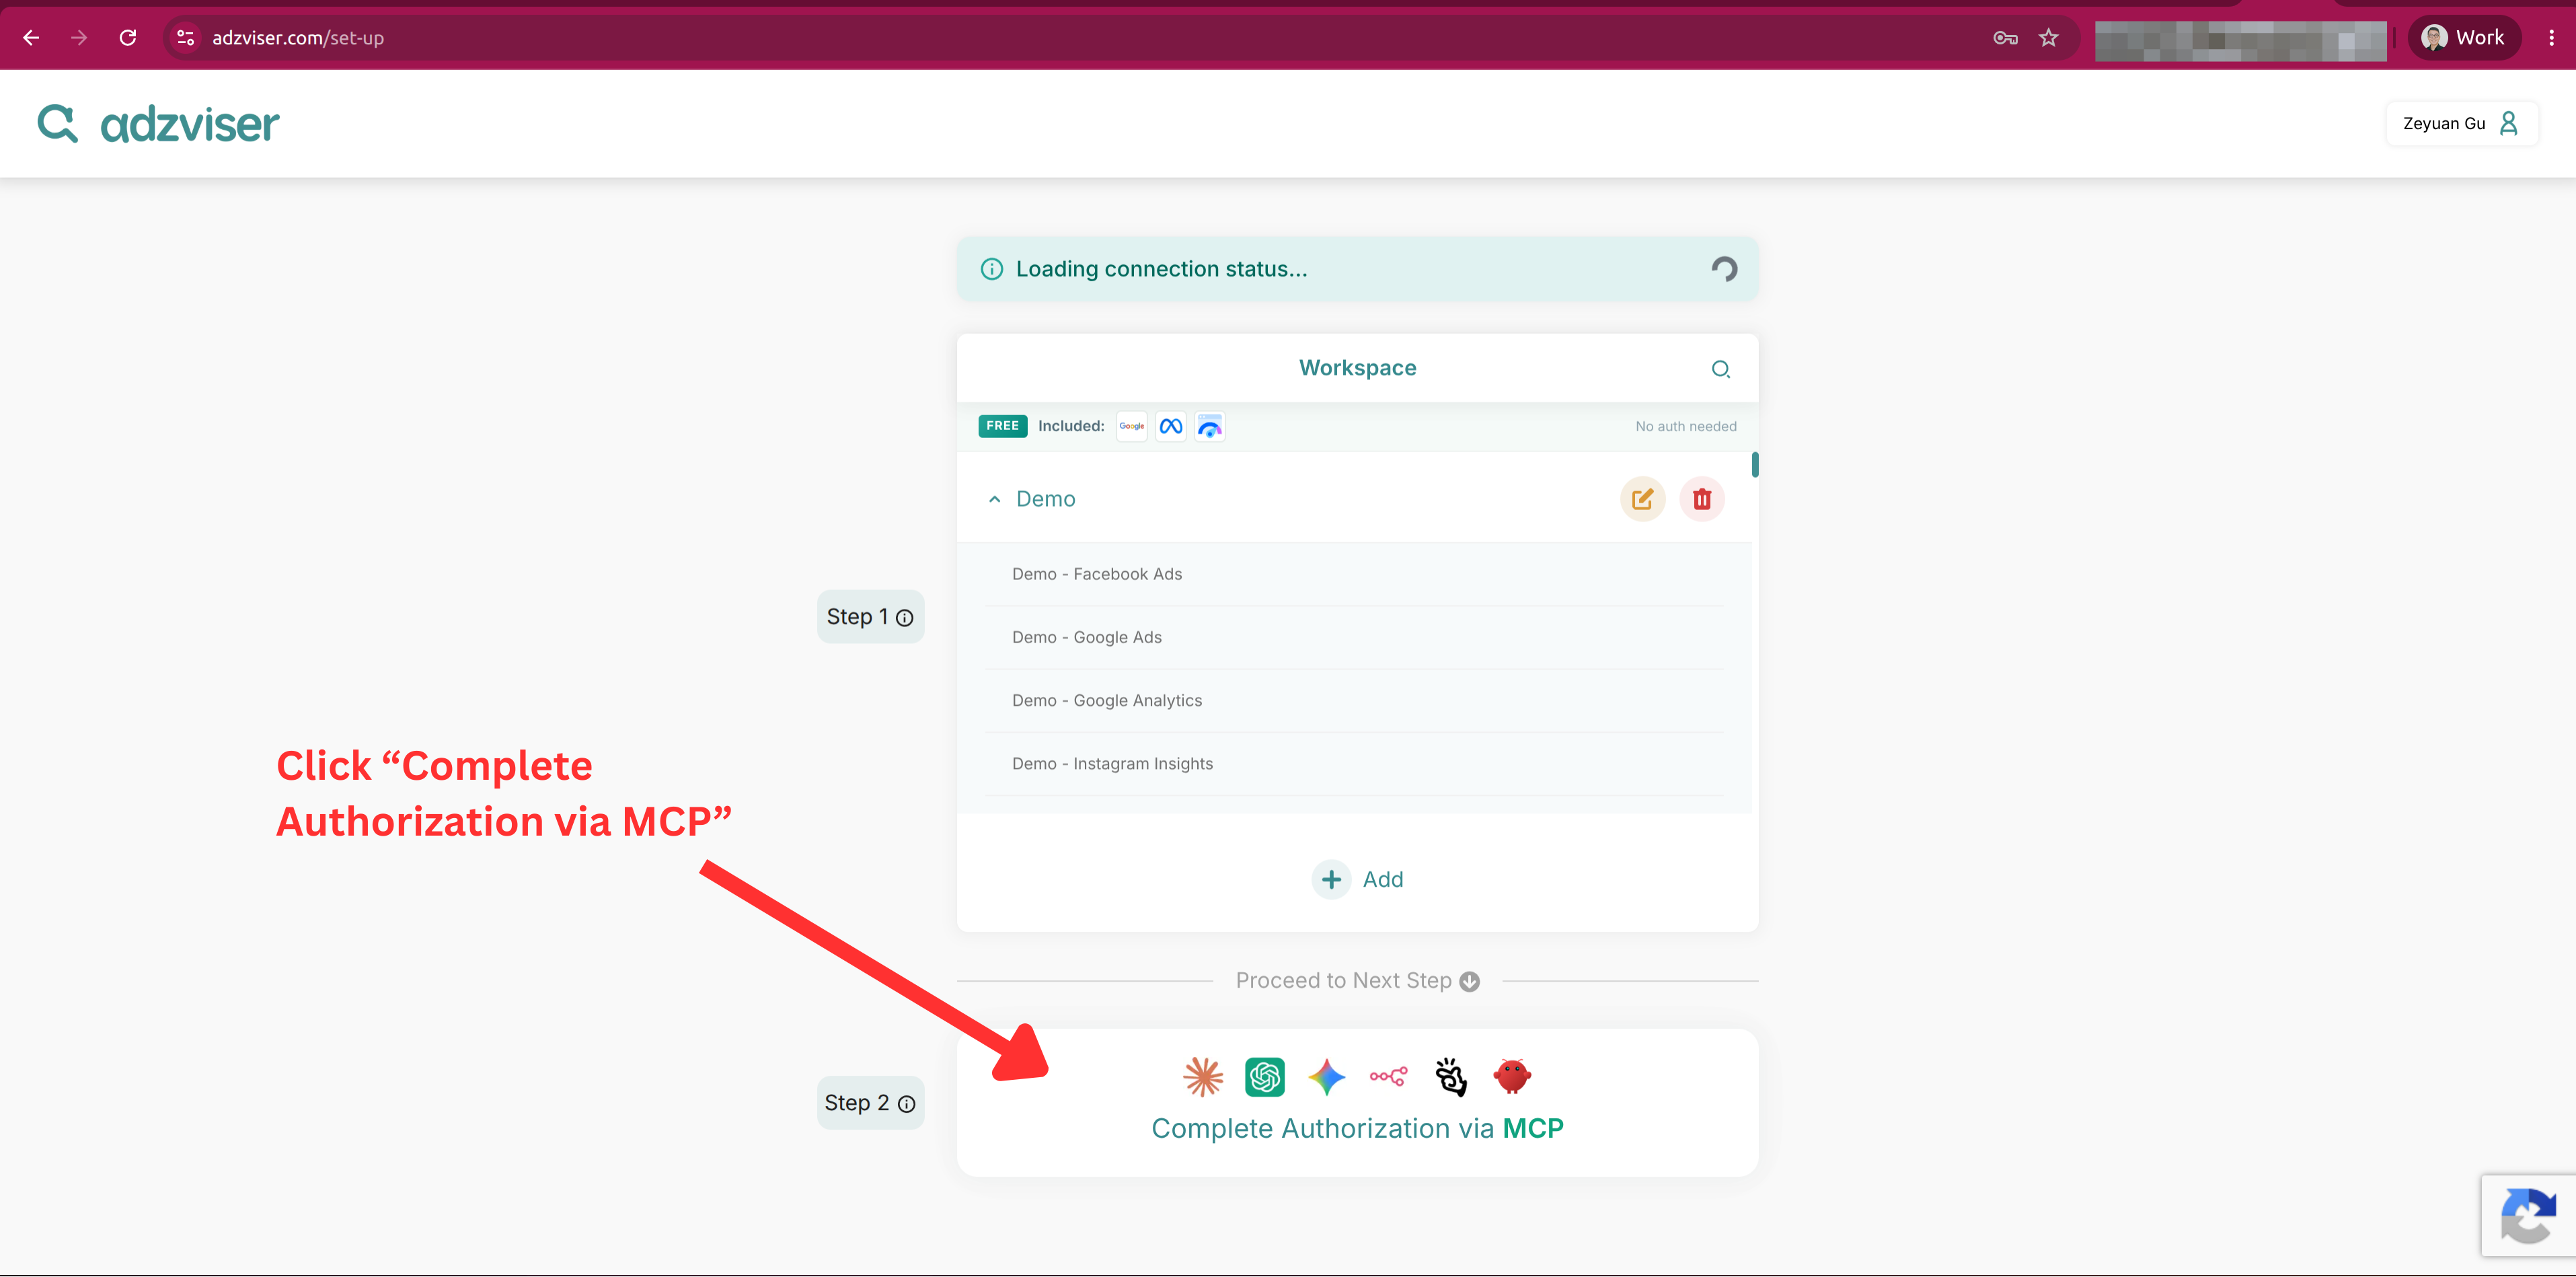
Sign in to your Adzviser account if prompted. Confirm that your workspace contains the data sources you want to use, then click Complete Authorization via MCP.
If you have not connected a data source yet, select Add in your workspace first and complete that platform's connection process.
Step 5: Confirm the Connection
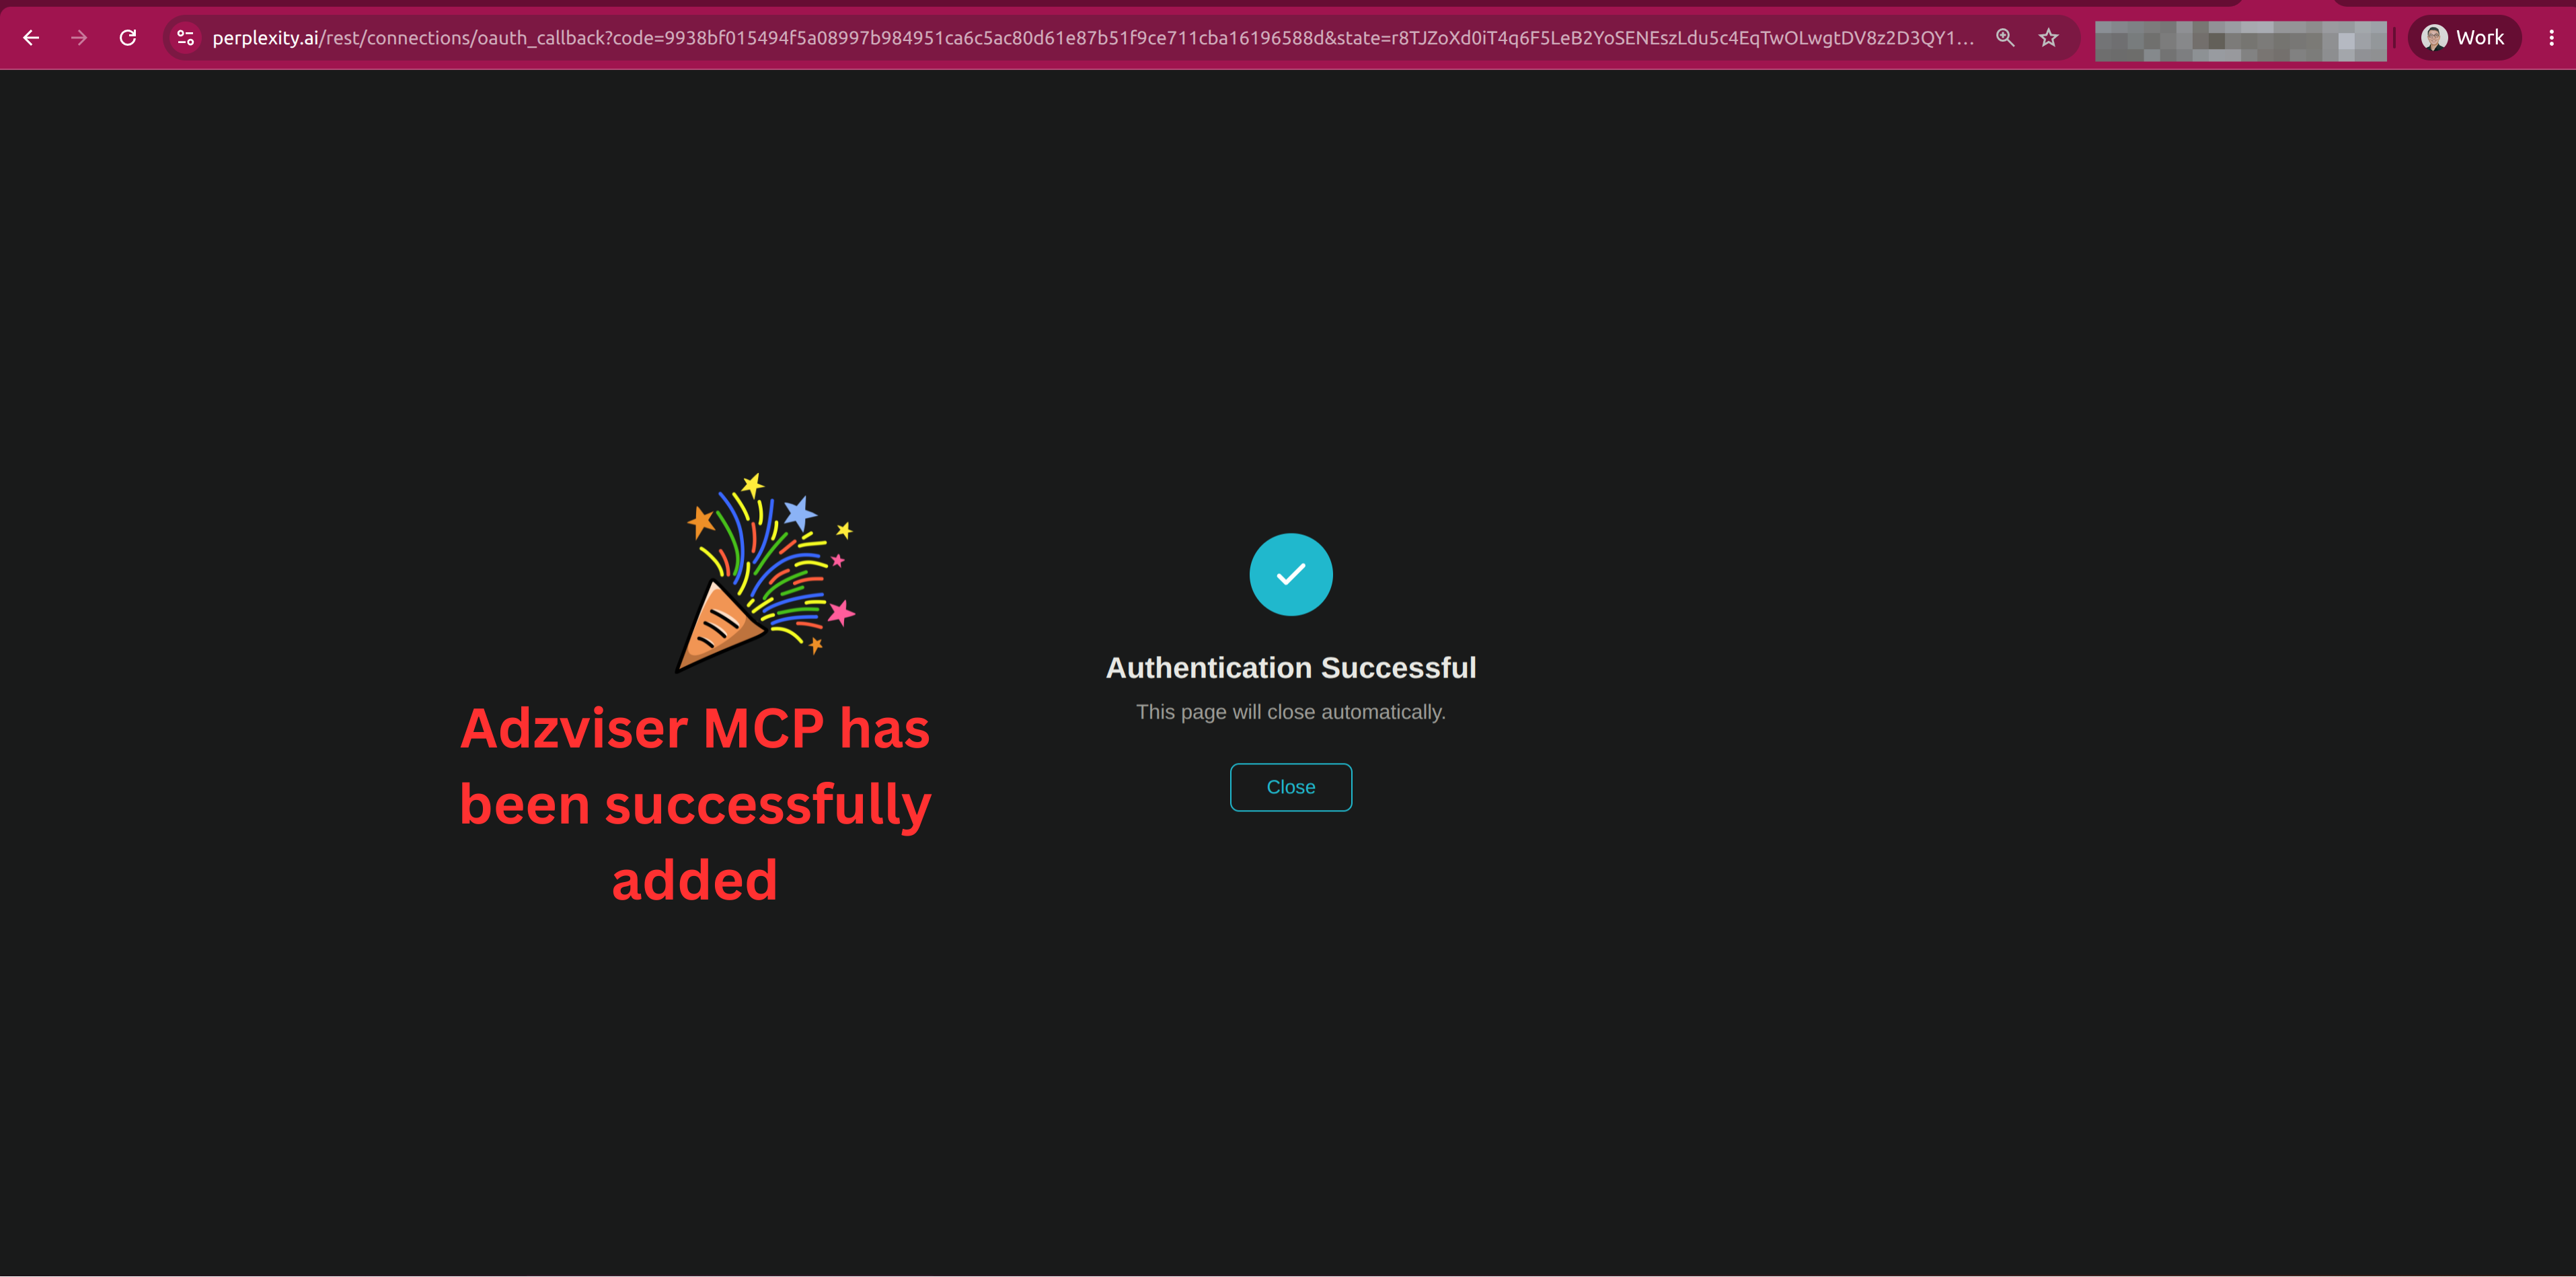
Perplexity will display Authentication Successful and close the authorization window automatically. You can also select Close to return to Perplexity.
Step 6: Use Adzviser in a Perplexity Prompt
Start a new Perplexity conversation and type @Adzviser in the prompt. Select the connector when it appears, then ask a question about your data.
For example:
@Adzviser How much did we spend on Google Ads last month?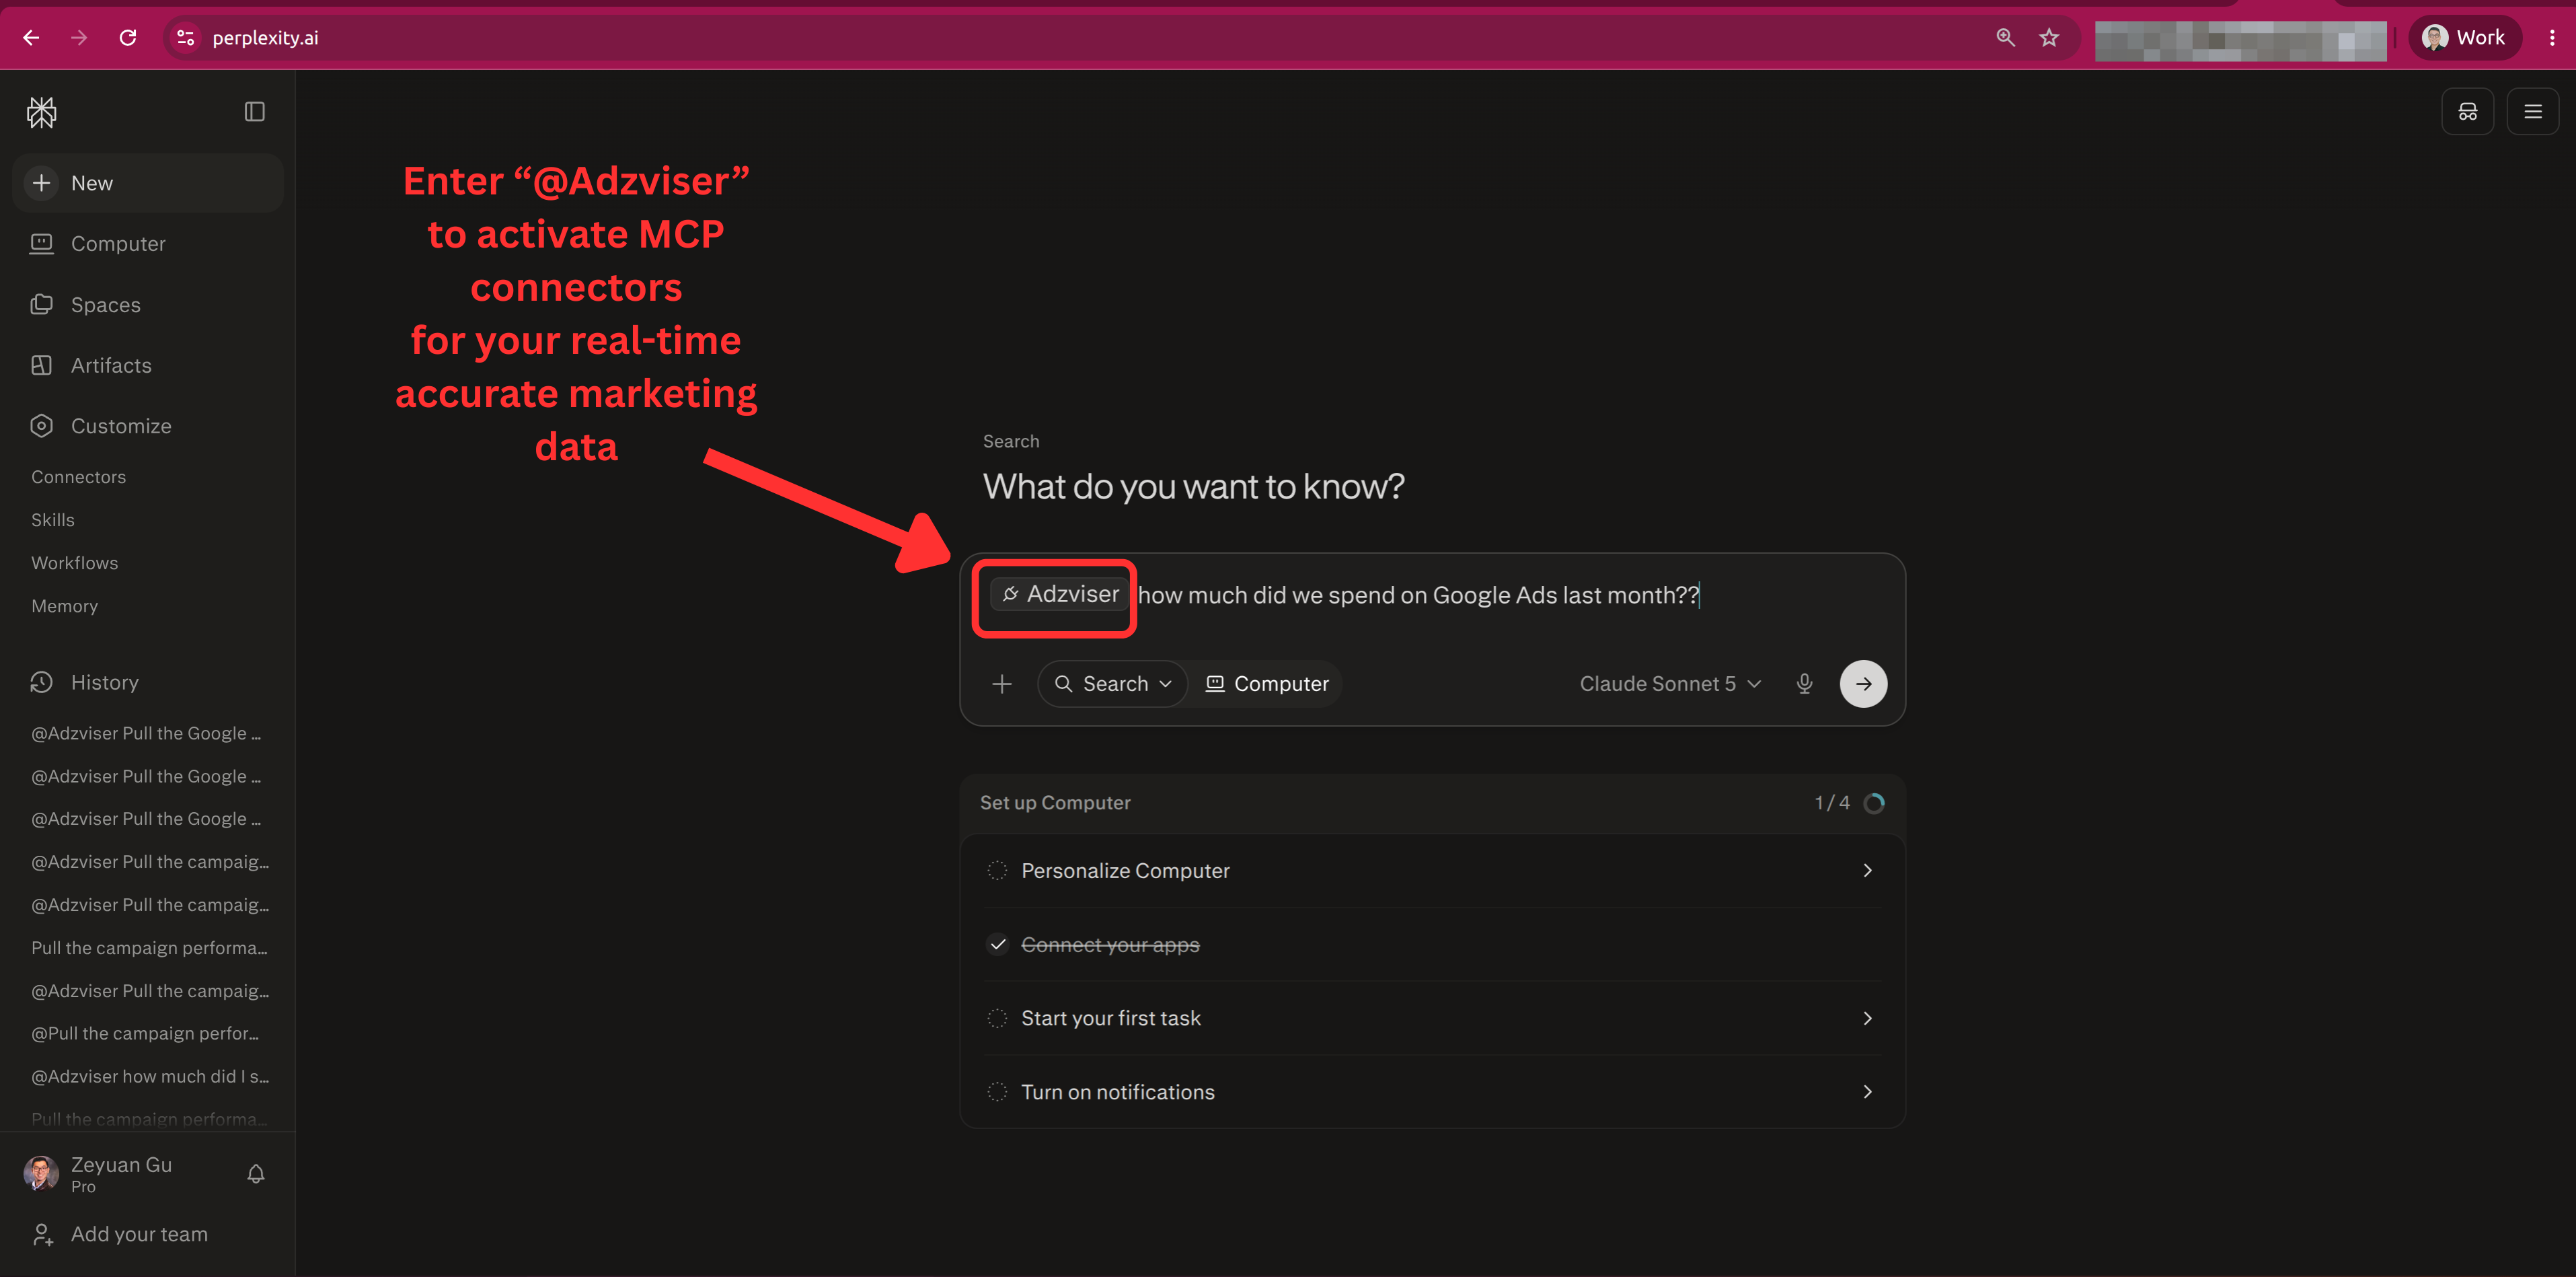
Example Prompts
Looking for more ideas? Browse the Adzviser Prompt Library for additional marketing and sales data prompts.
Check your connection:
@Adzviser What workspaces have I created in Adzviser?Review campaign performance:
@Adzviser Show Google Ads spend, conversions, cost per conversion, and ROAS
by campaign for the last 30 days.
Compare channels:
@Adzviser Compare Google Ads and Meta Ads performance this month.
Highlight the campaigns with the largest changes in spend and conversions.
Create an executive summary:
@Adzviser Create a weekly marketing performance summary for the last 7 days.
Include key metrics, major changes, and three recommended follow-up questions.
Troubleshooting
I cannot see "Add custom connector"
Confirm that your Perplexity subscription supports custom connectors. If you belong to an organization, ask an administrator to enable Allow members to add custom connectors.
Perplexity cannot validate the MCP server
Make sure the server URL is entered exactly as:
https://mcp.adzviser.com/httpThe URL must use HTTPS. Remove any extra spaces and try adding the connector again.
OAuth does not finish
Allow pop-ups for Perplexity, sign in to the intended Adzviser account, and select Complete Authorization via MCP again. If the connector still does not authenticate, remove it from Perplexity and repeat the setup.
Adzviser does not appear in my prompt
Return to Customize → Connectors and confirm that Adzviser is connected. Then start a new conversation, type @Adzviser, and select it from the suggestions before entering your question.
Need help? Contact Adzviser.